by Guest Contributor Michelle Johnson from Love that Shot
So now that you’ve learned some great compositional tips from Misti, let’s take the photos you love and add the “Wow!” factor! There are a few simple Photoshop techniques you can do to make your images really shine. They work on nearly every image, with a bit of tweaking here and there. Just experiment and see what you like best on your photo!
Let’s get started!
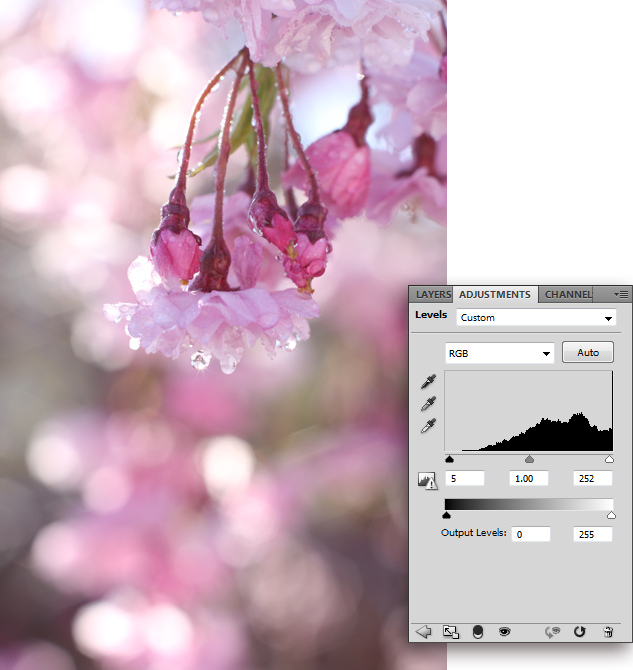
[1] The first thing I like to do to nearly all of my images is give them a boost using either the Levels adjustment or the Curves adjustment. Sometimes I use both!
Bring in the outside sliders just a bit. This will brighten the highlights and darken the blacks and shadows. Depending on the particular image you’re working with, you can bring the sliders in until they reach the beginning of the slopes of the “hill.”
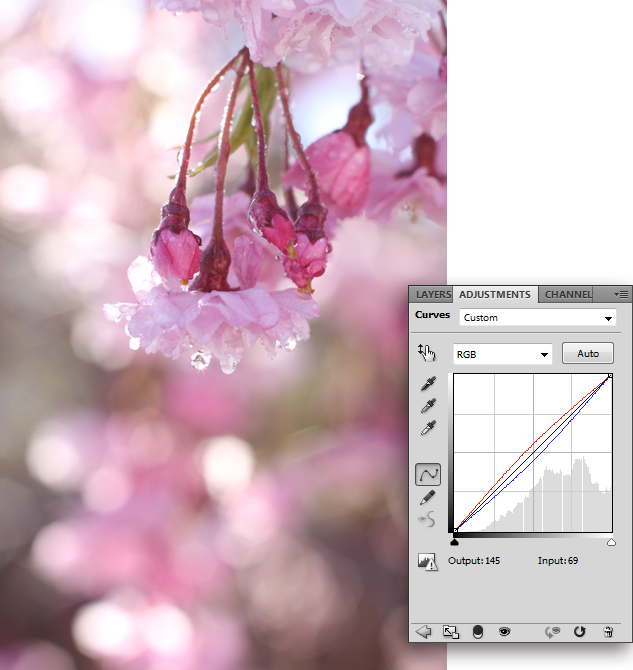
[2] If you find your image needs a little warming up, you can add a Curves adjustment layer. Click on the Red channel in the RGB drop-down menu and create a slight upward curve. Select the Blue channel and create a slight downward curve.
If you’d like to add a cooling effect instead of a warming effect, simply reverse the red and blue curves!
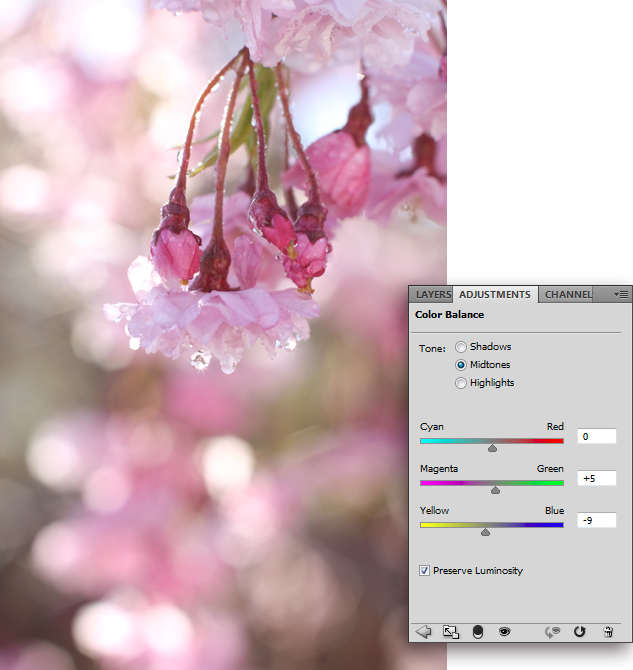
[3] Sometimes your photo might need a little color adjustment. Or it might not, but you can add a fun color effect here! In the Color Balance adjustment window, you can balance out different tones or adjust the sliders to where you have a neat color shift.
Here I added a sunshine glow by moving the bottom slider to the left towards Yellow. I moved the middle slider slightly towards Green. You can add a cool vintage tone by taking the top slider over to the right towards Red, the middle slider slightly towards Magenta, and the bottom to the left quite a bit towards Yellow.
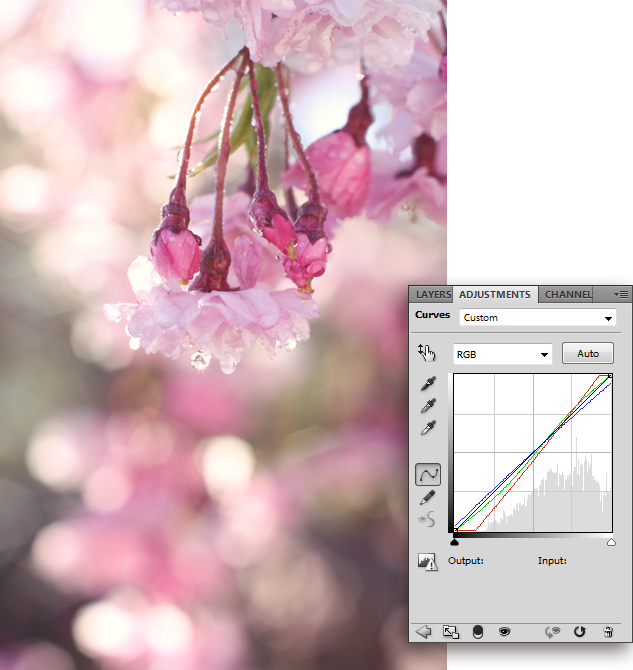
[4] This next technique is one of my favorites…cross-process! You can go really subtle with this or pretty strong! For this image, I went subtle, creating a nice glow with blueish shadows. Create a Curves adjustment layer and go into each color channel in the RGB drop-down menu. Play around with the graph, creating different curves and lines.
Here I added a sharp S-curve to the Red channel and a slight S-curve to the Green channel. In the Blue channel, I grabbed the very outside corners and dragged the top one down and the bottom one up.
You can exaggerate these settings to get a more cross-processed look. And when you’re done with your adjustments, you can customize the effect further by adjusting the Opacity of the layer to fit your image perfectly!
[5] I often like to throw on a Photo Veil or two at the end of my processing! They are so quick and easy to apply and they can transform an image drastically or subtly. Misti and I have included the Photo Veil I’m using in this demonstration as a free download for you so you can try them out! Just scroll down to the end of this article to download.
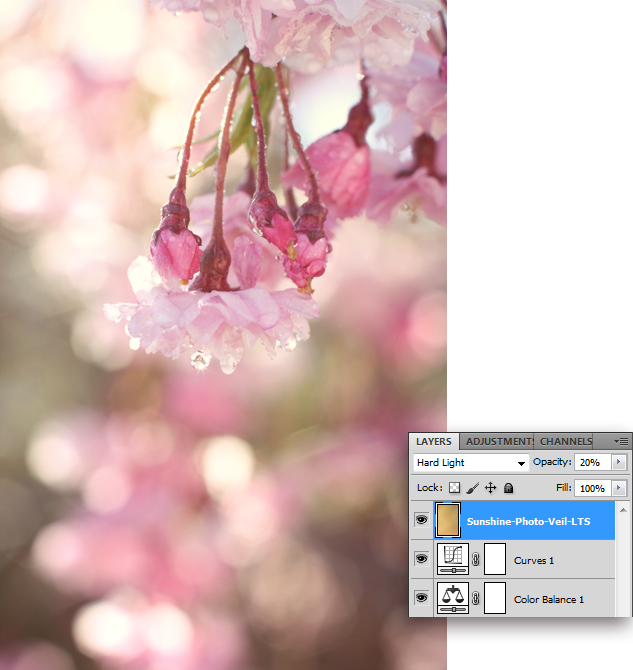
This Photo Veil is called “Sunshine” and I love to use it to add a sunshiny glow to my images! I set the blending mode to Hard Light and adjusted the Opacity down to 20%. You can also use the Overlay and Soft Light blending modes with the Photo Veils. Each of these three blending modes work really well with Photo Veils.
[6] The last thing I like to do when editing my images is sharpen them. There are many different ways you can do this and I’ll share one of my favorites.
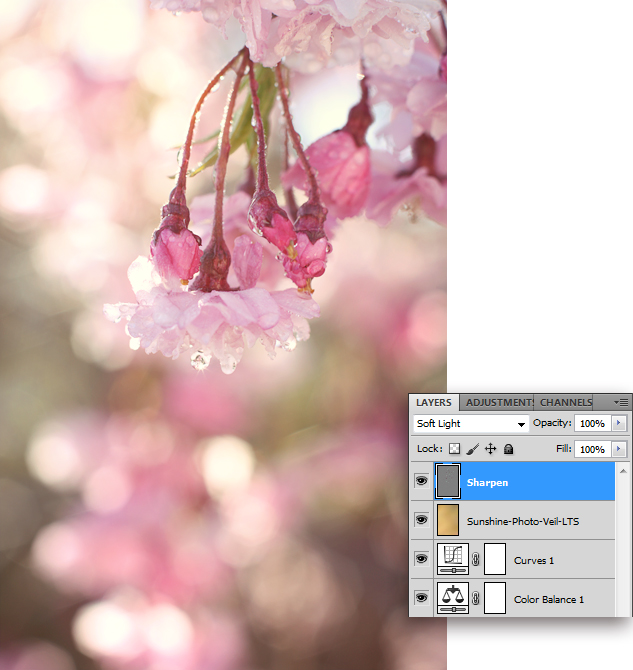
Create a duplicate layer of all the layers you have so far by pressing Control + Alt + Shift + E (Command + Option + Shift + E on a MAC). Go up to Filter in the top navigation menu and select Other > High Pass. Set the Radius to 5.5 pixels. You can go higher or lower depending on how much sharpening you want. I find that 5.5 is a good median setting that works on most of my photos.
Now set the blending mode to Soft Light and adjust the Opacity if you need to. You can also set the blending mode to Overlay if you want more sharpening.
And that’s it! Have fun adding the “Wow!” factor to your photos!
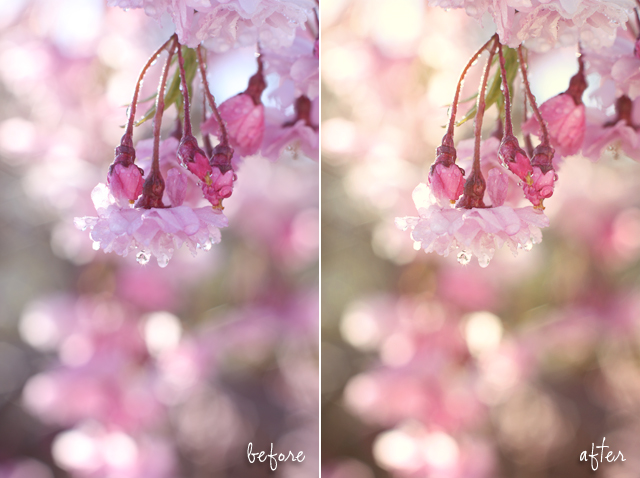
Click here to download your FREE “Sunshine” Photo Veil!
![]()
 About the Author: We are Misti and Michelle, sisters and co-founders of Love that Shot. Love that Shot is for the beginner and amateur photographer. We teach you how to use your camera, and edit your photos, so you can improve your photography skills. We’re your first stop along your path to professional photography, if that’s your goal, or we’ll help you make your hobby more enjoyable!
Find us here: Love that Shot | Blog | Facebook | Twitter
And… if you missed Part 1 of this article, you can find it here: Get Your Photos Noticed [Part 1]: 10 Tips for Mastering Composition



Beautiful and great tips.
An fyi…I can’t get the d/l link to work. Just comes up to a brown page.:( But love it!~
Link doesnt work for me either, but great tips 🙂
That brown-ish image you see IS the download. You save the image to your desktop, and bring it into your Photoshop document as a layer. Then follow their tips.
Great post. I have so much to learn and am loving every minute! Thanks for the helpful tips!
Okay..I feel stupid. I read and looked at that…but am so programmed to have a LINK to click and d/l that it didn’t compute! Thanks!!!
You gals are amazing!! I am excited to play around with your veil. Thanks so much!! =)
Thank you so much for sharing your amazing talent! I am pretty new at photography and photoshop, but I love it! Your blog has been so inspirational and informative. I love the free download, I can’t wait to use it! Thank you!
Better when you have CS5! the tools placement is better.
I prefer CS3 as CS5 slows my pc down way too much.
Still… Cs3 does the same job sorta lol
AWESOME! I am so happy I found this blog, it is amazing! Thank you for sharing your talent and insight with us!
Thank you so much for these tips! Priceless info!
Love, love, love!
I love the High pass sharpening trick. I just tried it worked like a charm! Glad I found your site 🙂