• Pretty Forum
  • Pretty Presets
  • Pretty Actions

Pretty Forum

Online Photography | Forum | Workshops | Tips | Tutorials | Classes | Business | Courses | School

  • Home
  • Blog
  • Enter Forum
  • Workshops
  • About
    • Meet the Team
    • FAQ ABOUT JOINING THE PRETTY FORUM
    • WHY JOIN THE PRETTY FORUM
    • Testimonials
    • Privacy Policy
    • Site Terms and Conditions of Use
  • Advertise
  • Contact
  • Join

Guest Contributor

Newborn Posing Tips

by Guest Contributor Amber Scruggs of Little Moon Photography

Photographing newborns is not as easy as it looks! It takes years of practice and lots of newborns before you get it right. I’ve been photographing newborns for 3 years and specializing in them for 2 and I’m still learning. I shoot about 100 newborns a year in my natural light studio located in Leesburg, Virginia so I’ve learned a lot of tricks along the way!
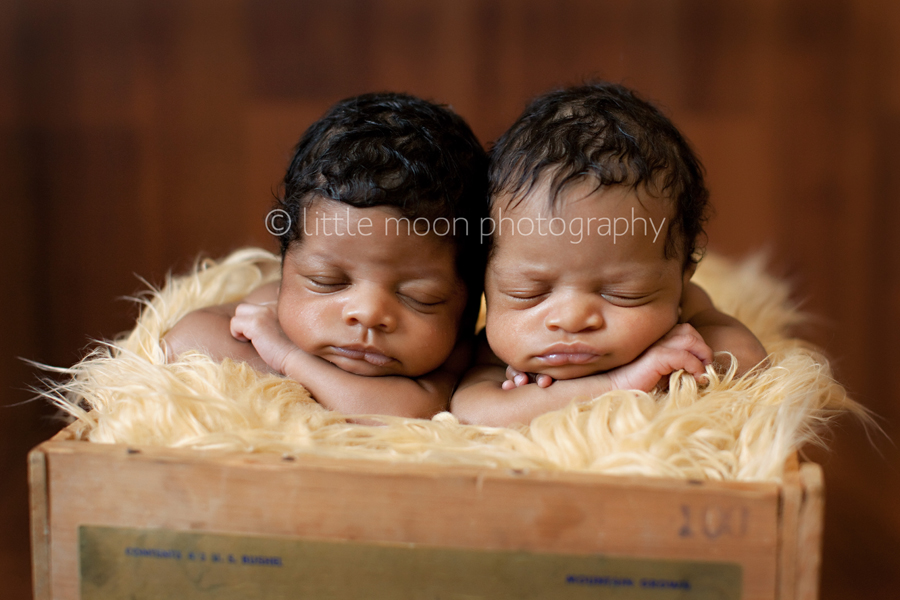
1. Comfortable Baby

Keep the room nice and warm, my studio is usually close to 90 degrees and while it feels hot to us it’s the prefect temperature for a newborn. They spent 9 months in their Mom’s warm womb you want to mimic that environment once out.

Have the baby fed really, really well. I have Mom undress and top off the baby once they arrive so that their bellies are nice and full.

White noise is also very important, I usually have two different ones going at the same time and any time the baby startles or looks like it’s waking up a little bit I pat and SHHHHH really loud in their ears, puts them right back to sleep!
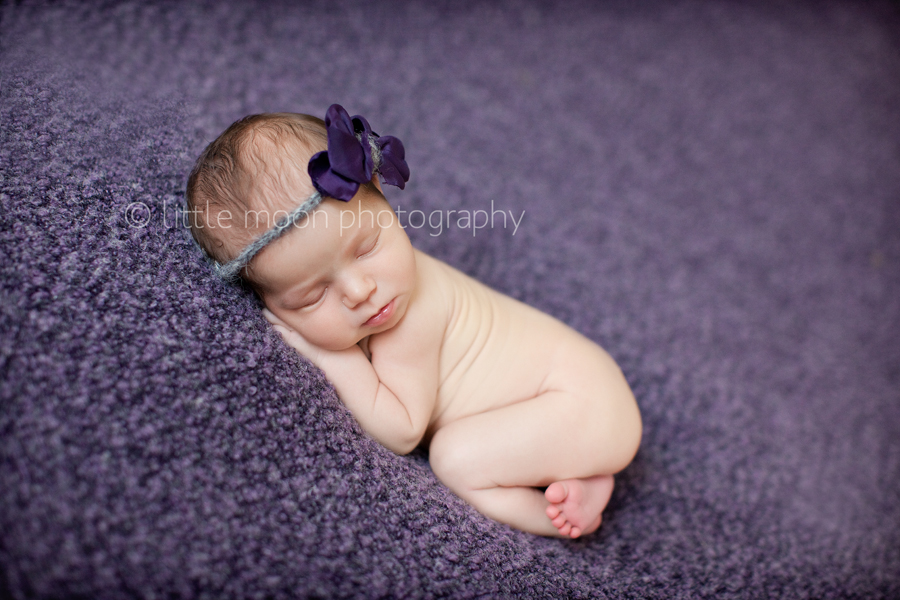
2. Tummy Poses

Babies love being on their tummies so if the baby is asleep I usually start off in a pose where they are on their tummy, I lay them on the beanbag with all of my blankets and fabrics layered on it and lay a small blanket on top of them. I then pat and get them nice and sleepy and pose them while they are under the blanket. If they are already asleep, I pose them in my arms and then lay them on the blanket. The tushie in the air is a great starter pose!

3. Switch it up!

While in the same pose I tweak it a little and shoot at all different angles to get totally different photos. You can take one pose and get 10 different images out of it if you just switch up the pose a little bit, move a hand, add a headband, etc. Stand up and shoot that angle, get on your knees and shoot that angle, get creative!

4. Changing up the pose

When changing a pose or blanket, I lift the baby myself keeping them in the same position they are in on the blanket in my hands. I then have the mom or dad throw  back the blanket to reveal the next layer. I then switch up the pose while baby is in my arms and then lay them back down on the blanket.

5. Props and planning

I have an area in my studio that I do all of my prop and parent shots, I plan which pose I will do with each prop and how I will do it beforehand so once they are in the pose on the blanket I can keep them in that same pose and just move them over into the prop. I also plan ahead which blankets and poses I want to do. This helps me keep organized and keeps the session flowing well. I aim to get the session done in 2 hours but it depends on the baby, 3 hours is my average.
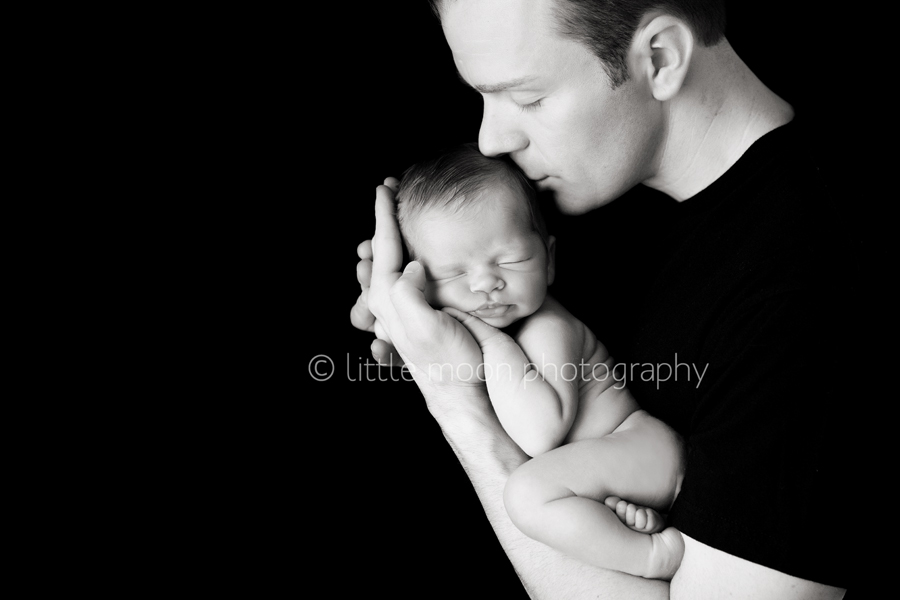
6. PATIENCE AND PERFECTION

This is the most important tip, you have to be very, very patient and take your time with every pose so that everything is perfect. Take the time to get the blanket smooth, the babies fingers nice and flat and make sure you are not shooting up the nose, always shoot square, straight on, with their faces.

Always have someone nearby to spot on any prop shots or hard poses, the babies comfort and safety is always your number one goal.

Enjoy them! Newborns are so beautiful and sweet, it’s really the best job in the world.

blog_separator

Amber Scruggs owns Little Moon Photography Studio located in Historic  Leesburg, Virginia. She specializes in modern, artistic natural light  newborn photography. Amber also offers her Little Posers Newborn  Posing and Business Workshop a few times a year, email her for more  information: amber@littlemoonphotography.com


Tweet


22 Comments

Guest Contributor

Take Fantastic Pictures of Your Toddler

by Guest Contributor Gayle Vehar of Mom and Camera

Does the title of this blog post shock you? Maybe intrigue you a little? Are you sure that getting good shots of your toddler is next to impossible? With a 3 year-old who rules my house, photographing little kids who are constantly on the move is a challenge I am all too familiar with! I love being a mom to a busy little boy. I love photographing him, too.

I know it is a challenge to get good photographs of kids who are always moving, so I thought I would share a few of my tips with you with the hope that it will give you the courage to photograph your toddler! These days vanish all too quickly and photography is the perfect way to preserve them!

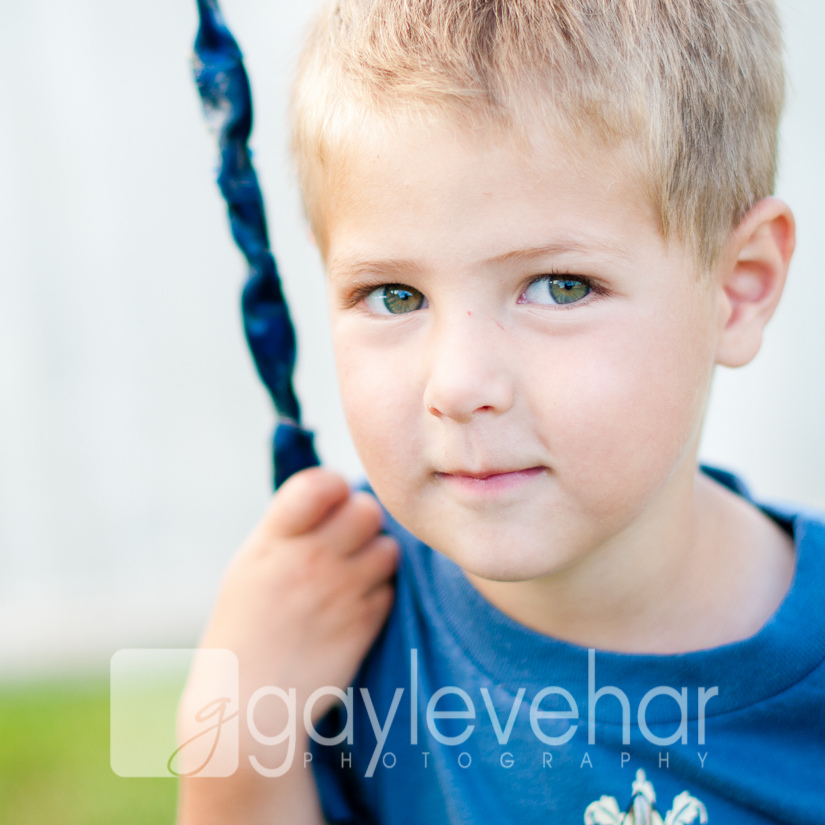
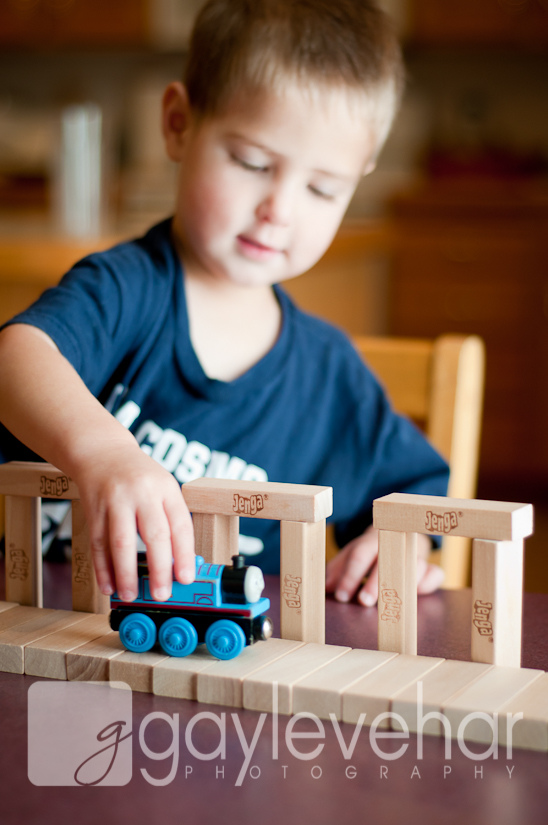
(Lens: Nikon 50mm f/1.4, ISO 200, aperture: f/2.0, shutter speed: 1/400, taken at 6:10 p.m.)

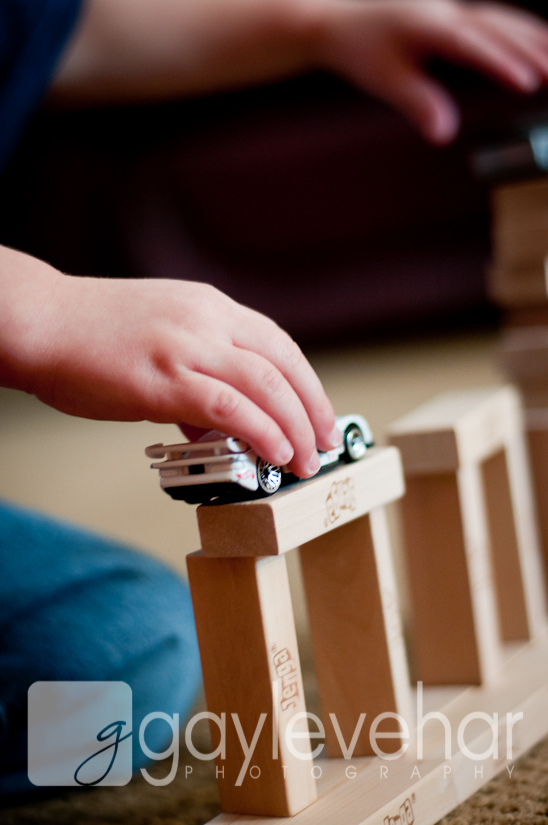
  • First, I plan. I plan for light and I plan what I want to capture. If I will be photographing indoors, then I find a room with lots of light and open the blinds to let in as much light as possible (since I dislike flash.) Good light is crucial because of point #2. If I am photographing outdoors, I try to avoid the bright mid-day sun in the summer and dress for the cold in the winter. If we will be photographing inside, I plan what we will be doing based on my toddler’s interests. Maybe we will be playing Lego’s or cars. If we are outside, I also try to have an activity to do–playing baseball, running through the sprinklers, or drawing with sidewalk chalk. An activity helps to keep a toddler’s attention (and also keeps them a bit still), even if just for a short while!

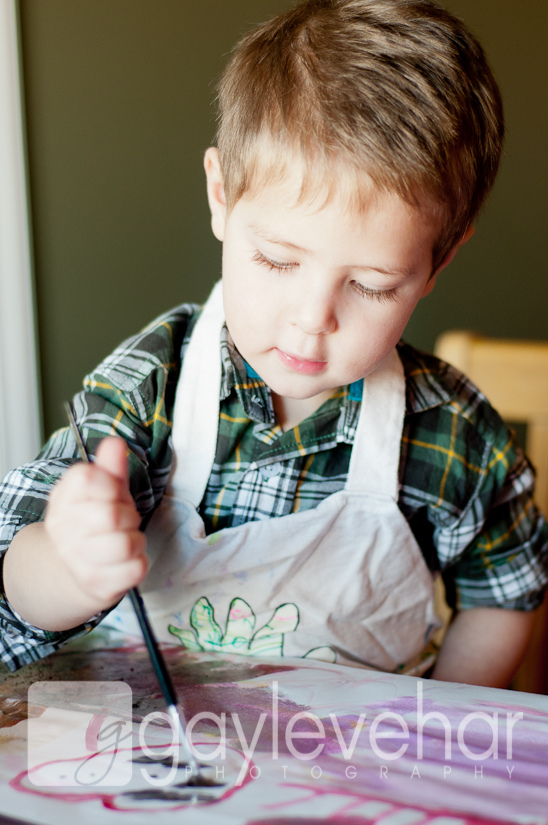
(Lens: Nikon 50mm f/1.8, ISO 400, aperture: f/2.2, shutter speed: 1/100, taken at 11:28 a.m.)

  • When photographing 2 year old’s and all small children, it is important that you have a fast shutter speed. Generally this is the #1 reason for blurry pictures when trying to photograph small children. They move quickly and in order to freeze the motion, your shutter speed needs to be 1/100 of a second or faster (under ideal conditions I try to keep mine at 1/200 or faster.) In order to have a fast shutter speed, you’ll need good light. You may have to raise your ISO quite a bit if you are photographing indoors. If you aren’t sure how to shoot in manual or how aperture, shutter-speed, and ISO work together, check out my posts on The Big Three of Photography.

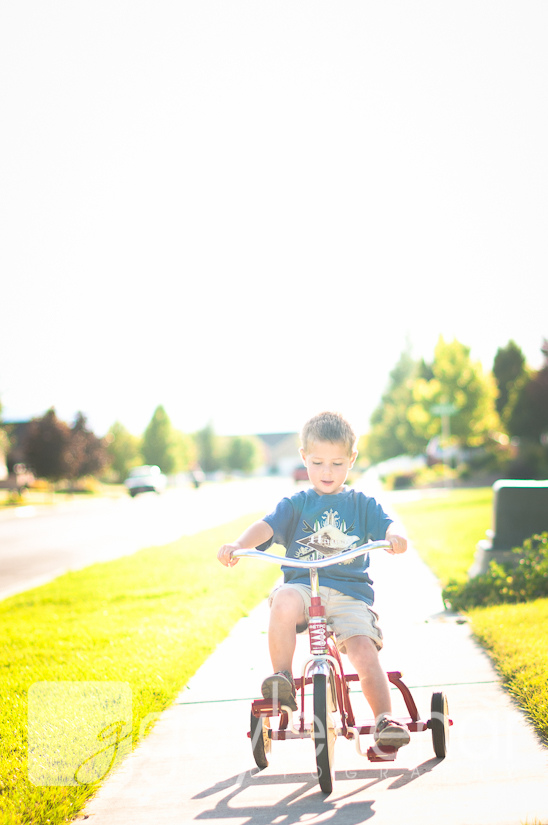
(Lens: Nikon 50mm f/1.4, ISO 200, aperture f/2.0, shutter speed: 1/1600, taken at 6:25 p.m.)

  • Whatever you do, DON’T EXPECT A TODDLER TO POSE FOR YOU! They won’t. And you’ll be disappointed! However, you may be able to give them something to do that will keep their attention and allow you to capture them somewhat posed! Whatever you do, TALK TO THEM to engage them and get their attention. My favorite way to capture my son is to get out some of his toys where I know there will be good light and then play with him and talk to him and occasionally pick up the camera and photograph. Then put down the camera and repeat!

(Lens: Nikon 50mm f/1.8, ISO 320, aperture: f/2.2, shutter speed: 1/80, taken at 11:55 a.m.)

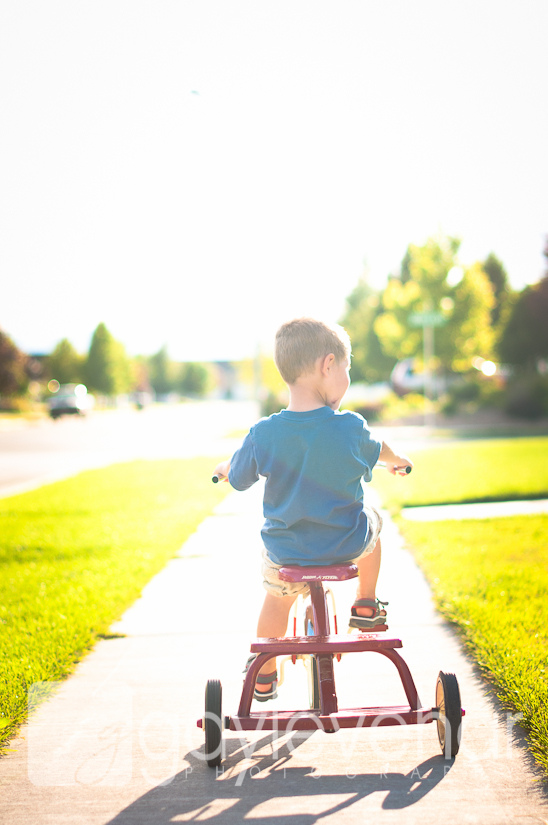
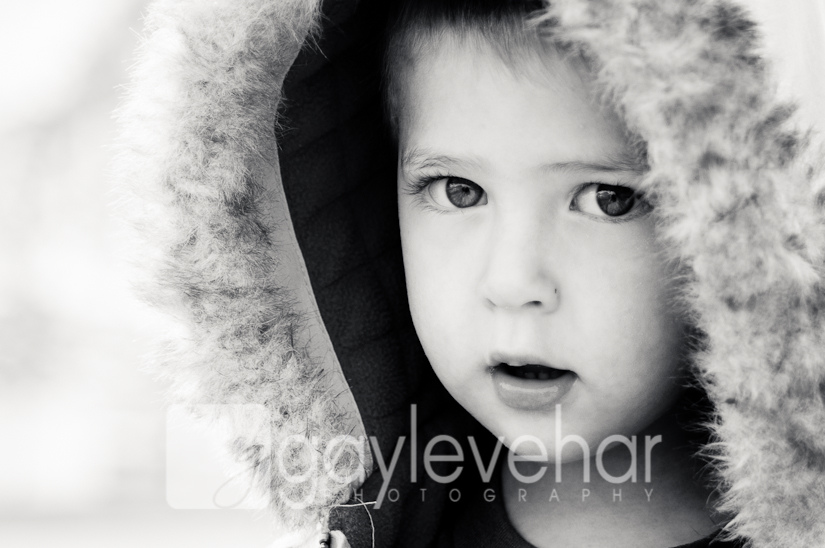
  • Get on their level! If they are sitting, sit or lay near them. If they are standing, kneel or sit when possible.  To capture them running, sit and capture them running away or towards you. Occasionally, you will need to get to your feet to chase them, but I definitely prefer photos when I can stay at my toddler’s level.

(Lens: Nikon 28-105mm, ISO 200, aperture: f/4.5, shutter speed: 1/400, taken at 10:17 a.m.)

  • Be Patient and Go With the Flow! They won’t always look at you when you want or do exactly what you have planned. This shouldn’t surprise you if you live with a toddler! Just be patient. If their interests change, you’ll change along with them. Play with them, interact with them and you’ll be rewarded with a few opportunities to capture what they are doing.

(Lens: Nikon 50mm f/1.8, ISO 1000, aperture: f/2.0, shutter speed: 1/60, taken at 11:37 a.m.)

  • Keep trying. If it doesn’t work the first time, try again another day. Whatever you do–DON’T FORCE IT! They will quickly begin hating the camera if you do! Knowing when to cut your losses is an art :)!

Happy Photographing!

blog_separator

Hi!! I am Gayle. I am a wife to my handsome husband and mom to 4 beautiful kids. In my spare time, I am a photographer and blogger at Mom and Camera. I have a passion for sharing my love of photography with others. I teach local photography classes and regularly share photography tips and tricks on my blog. I hang out there a lot—I’d love you to stop by and visit!


Tweet


4 Comments

Business & Marketing Guest Contributor

Capturing Love with Love

by Guest Contributor Jennifer Storer of Darling Photography

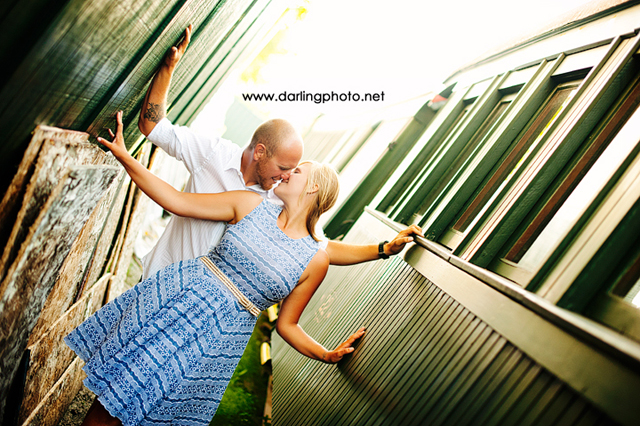
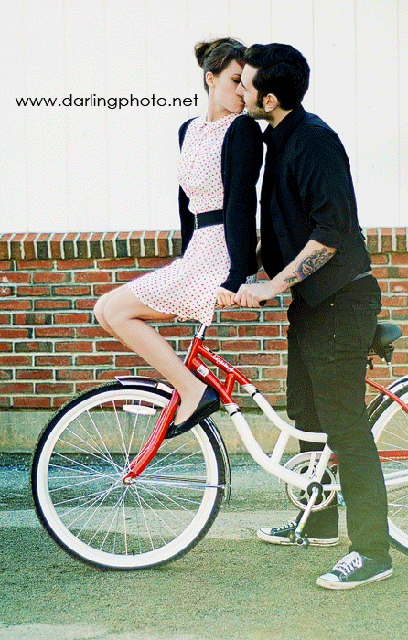
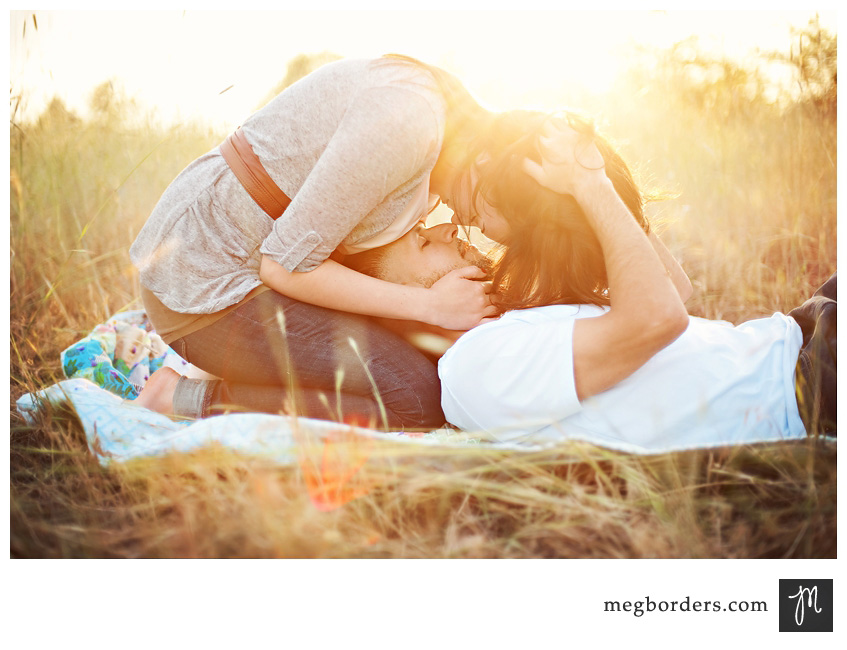
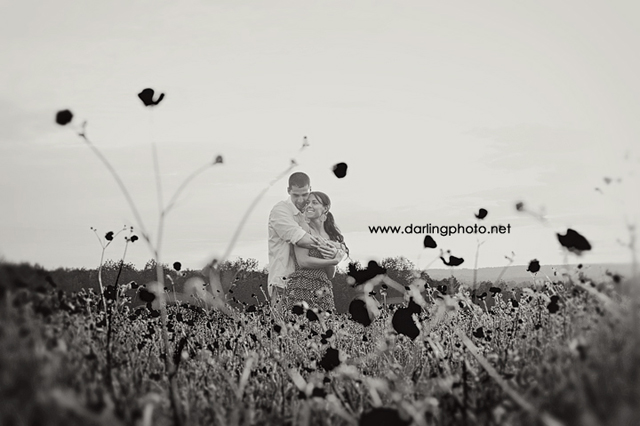
I am a romantic. I am the girl who is in love with love… stories, movies, songs, music videos, books. I swoon over it all! So it’s no surprise to me how much I adore capturing love on camera. The kisses, the laughs, the sweet nothings.. I live for this stuff! It’s my favorite of all things to photograph.

When shooting couples (sounds terrible, I know) I always follow a few key rules.. and because I am also loving and sweet … 😉 … I’ve decided to share some of them with you!

Make them feel like they’re your only client
They know you have other clients, you know you have other clients. None of them matter when you’re shooting the couple you’re with. You focus on them 100%.. ask them about their lives, their relationship, their pets, their love.. Get to know who they are and sincerely care about it. I become friends with SO many of the couples I work with for this very reason. I truly want to know who they are and where they came from. They will thank you for becoming their best friend and won’t be stiff and awkward in photos. Plus – the more you know about them, the easier it will be to make their photo shoot one of a kind. 🙂

Give them time
Start out slow and tell them exactly how the session will go BEFORE the session starts. I give them the run down and explain to my clients that they WILL feel awkward at first but when we’re done they’ll be super excited and won’t want to leave. Well, maybe… but I do promise they will be extremely excited to see their images.

Sneak Peek
I don’t mean you HAVE to show your clients every image on the day of your session.. actually I recommend that you don’t. If you know that there’s something in the image one of them won’t like, don’t show that image. I only show 2 or 3 images from the day on my camera and I do that to loosen them up. I make sure it’s an AMAZINGLY well lit image and shows NO flaws. You don’t want either of them to say “Fix my chin” or “Look at my arms!” Showing your client an amazing SOOC image is your first step to making them trust that they really DO look as good as every other couple you’ve photographed.

Let them know who you are
Sure, they don’t want to know every detail of your life but if you’re asking them to kiss and snuggle in front of you – they’re going to want to know a few things about you. Tell them funny stories to make them laugh. After you tell a story about yourself, bring it back to THEM!

Keep the direction loose
Put them in a pose and explain that when you ask them to kiss, you mean just a peck. (I promise it can get pretty intense if you don’t remind them of that!) You don’t want them to sit and hold a kiss for 30 seconds while you attempt the perfect shot – so tell them to make each other laugh or talk to one another. I aim to capture the moments as they happen and very rarely do I take the first shot right away. I’ll make it look like I’m adjusting something on my camera so they can start talking and being sweet to each other.. that’s the stuff you want. Let them pose themselves sometimes!

Always get the mom shot
Make sure you ALWAYS get a shot of them smiling together and looking at the camera. You may not use it for your portfolio but they will want it and their parents will NEED it.

Hopefully these tips will help you in your journey to capture the love YOU’RE near.  And… please send me an e-mail if you’re interested in learning more or if you have a question!

blog_separator

About the Author: Hi, I’m Jenn Storer, full time photographer & momma to a 5 month old handsome + 3 pups. In my spare time I’m a wife. 😉 Shooting with Nikon D700, 50 1.4G, 24-70 2.8
Visit Jenn at her Website – Darling Photography and on her Facebook page.


Tweet


10 Comments

Guest Contributor

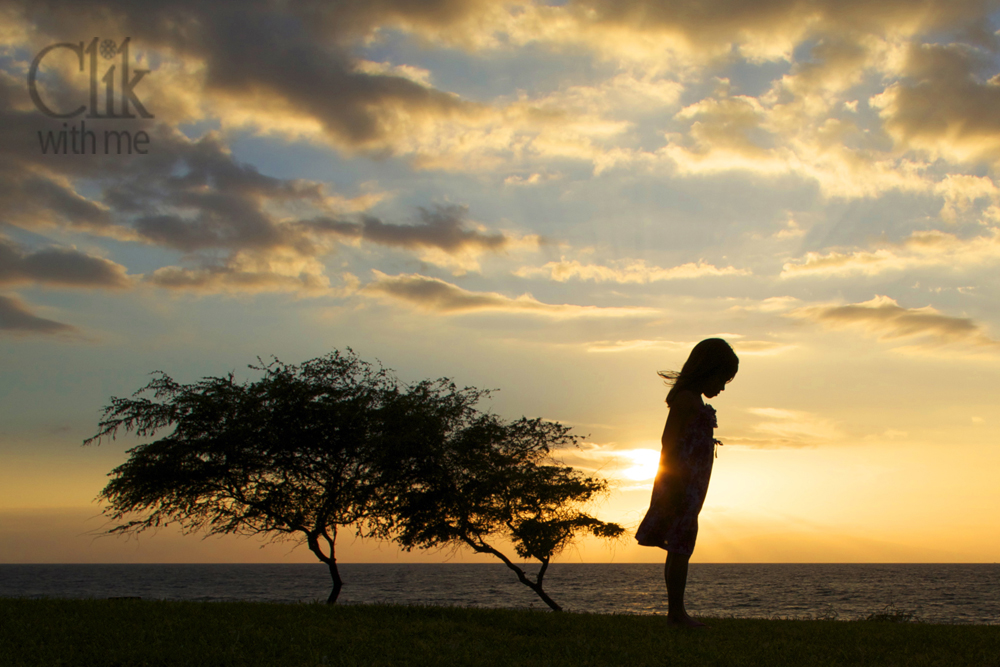
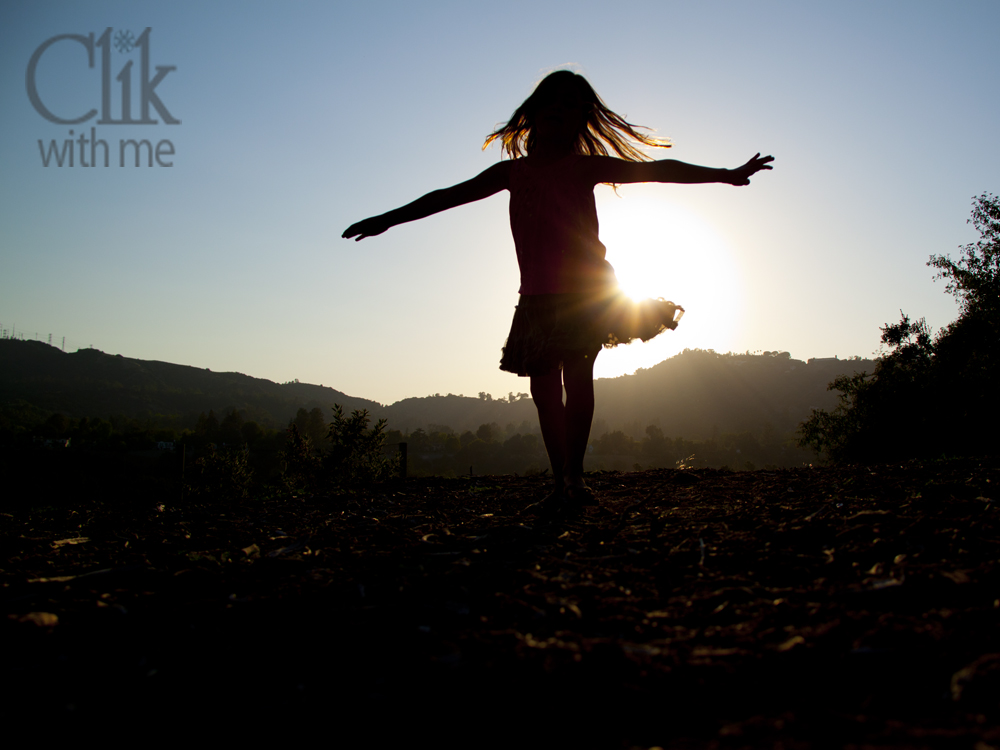
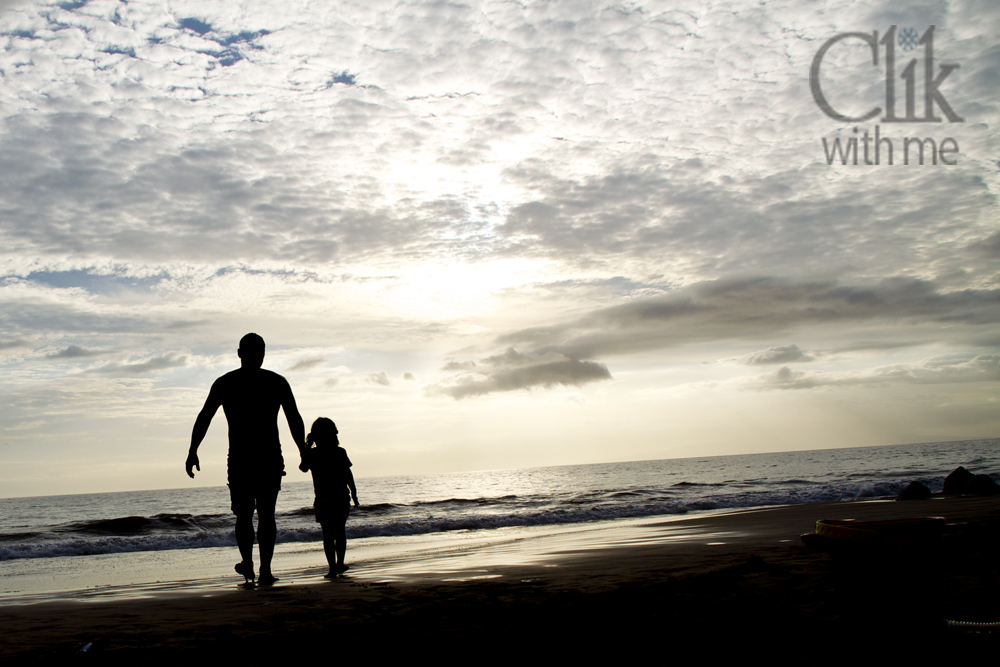
5 Easy Steps to a Summer Silhouette

by Guest Contributor Anna Bilowus

Summer is here! Long walks on the beach, sandcastles, bonfires, family picnics, the fun is endless in the summertime. A great way to capture those fun summer moments is creating a silhouette. I love silhouettes as they leave so much for the imagination. A late summer afternoon is the perfect time to take a silhouette photo.

Here are the 5 easy steps to creating a summer silhouette:

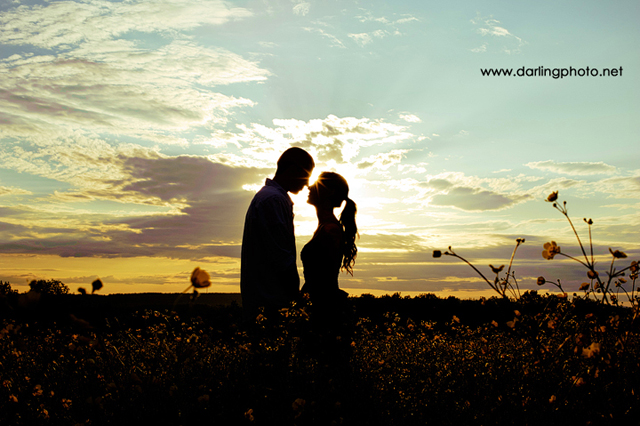
1. LIGHT. First, it is very important to have your FLASH OFF. Second, you want a strong light source in the background – behind your subject. Excellent sources of light are sunsets and sunrises. So, make sure you have little or no light in the foreground(no flash) and strong light in the background.

2. COMPOSITION. Since you are not relying on color or texture, SHAPE is very important when creating a silhouette. There are a few things to help your shape stand out. First, you don’t want anything in the foreground or background that will cut off your subject(s)’s limbs. Sometimes getting down really low (on your belly) helps keep the ankles and feet visible. Placing your subject(s) in front of a big open sky is best. Second, avoid clutter in your photograph. You don’t want too many other things (grass, trees or rocks) surrounding your subject. Too many shapes will distract the eye. Third, consider their positions. Placement and movement can really help create a great shape. Holding hands is a great way to bring your subjects together.

3. THE CAPTURE (Exposure). Before you take the picture you want to be sure to meter off the brightest part of the sky. Then bring your focus back to your subject(s), compose and snap. You can do this with Priority and Aperture settings but Manual is the definitely the best way. Also, I have great success with the default setting, Evaluative metering but you can also change your metering mode to Spot or Centered-weighted. This will help you meter off the brightest part of the sky. I wanted to keep this easy but it is good to know all your options. Last, consider zooming out as far as you can to grab the big beautiful sky. If you are still using AUTO place your focus on the bright sky; press the shutter button half way; then bring your focus back to your subjects and snap.

4. POST CAPTURE. When you are all done you may want to touch it up a little bit. If you want more color in your sky consider increasing the saturation. To make your silhouette pop more you can increase the blacks, contrast and/or clarity. Remember, this is subjective trust your eye.

5. HAVE FUN!! Oh, one more tip – try to avoid all white and sheer clothing, they are more difficult to darken.

Now, get out there and capture summer!!

blog_separator

I have always had a desire to be creative but could never sit still long enough to sew, paint, draw or glue. I think photography is the perfect creative outlet for me. I am learning something new everyday by capturing the beauty of life.

Visit Anna at her WEBSITE | FACEBOOK pages today!


Tweet


9 Comments

Guest Contributor

Photographing Children with Special Needs

by Guest Contributor Megan Drane

There are many types of photographers in our over-saturated industry, but there is one area that is still sorely neglected.  While there are countless baby and child photographers out there, very few are working with special needs children.

If you photograph children, it is likely that you have worked with a special needs child at least once.  If not, you will.  With 17% of American families having special needs children, it is only a matter of time before you will be asked to test your skills in this area. If you do not have personal experience with special needs, it is worth the time to determine if you should take such a session, and if you do, to be prepared.  I bring up if you should take such a session, because maybe you shouldn’t.  Photographing special needs children is not for everyone, just like wedding photography isn’t for everyone.  I don’t have the lenses needed, nor the experience to do a good job with a wedding.  I’ve been asked to do weddings, but I always turn them down because I know my limitations, and I always want to produce superior work.  If you aren’t extremely patient and flexible in your approach with sessions, then don’t bother with special needs photography.  Parents have enough experiences with people who judge or just show their displeasure with their children, photography doesn’t need to be another one.  All parents should be able to get beautiful portraits of their children.

Breaking Down Special Needs

I am not a medical professional, so everything I am about to say comes from a mother of a special needs child, and a professional who works with many areas of special needs.  Disabilities/special needs can be broken down into three categories (in terms of how we see them):  cognitive, physical, and behavioral.  Many diagnoses fall into more than one category, but it helps to think in these terms when approaching a session.

Physical issues are by far the easiest to deal with as a photographer.  They may take some creativity on your part in terms of posing or positioning children in flattering ways, but these require little “work” on your part.  For example, when a five year old child has severe hypotonia and cannot sit on their own or struggles to hold up their head, then you work with chairs and sofas or on the floor.  Again, these situations require just a bit of creativity.

Cognitive issues can be more difficult, but I find the best way to approach the subject is by their cognitive age – not biological.  Speak to children at the level that is appropriate for them.  This also helps in terms of how you come across to the parents.  If you know and understand that the 10 year old you are about to photograph has the mental acuity of a five year old, you will be far less frustrated when that child isn’t as responsive or attentive as a typical 10 year old.  Setting your expectations can make all the difference, as parents know if a photographer is frustrated with their child.

The hardest to work with are behavioral issues (which stem from a multitude of reasons).  Understanding sensory processing disorders is probably the key point for an outsider, as it is foreign to most people.  To an outsider, sensory issues would present as behavioral issues in response to stimuli that we do not  understand.  If you want to take the time to educate yourself, I highly recommend the book The Out of Sync Child.  Heck, Google “sensory processing disorder” and just read.  There is no quick and easy rule that will make such sessions easy, but educating yourself and being patient are good starters.

Working with Autism
I have photographed children with cerebral palsy, cystic fibrosis, Prader-Willi Syndrome, Downs’ Syndrome, chromosome 18q syndrome, duplication of chromosome 16p11.2, Trisomy 18, sensory processing disorders, and all forms of autism.  I’m known as “the autism photographer”, and I must say that by far, the most difficult subjects are those with autism.  Not all, but in terms of  educating photographers, this is the area where you need to look within yourself to decide if you can provide a great service for such a family.  And if you can’t, refer elsewhere.  Like I said before, we all have our specialties, and no one needs to feel badly about not taking sessions outside their comfort zone.

Many of these children are more difficult to direct than the average child, and if you push  too much, it is easy to hit a wall with them or make them angry.  This means a lot of improvisation on my part. I have to do a lot of moving with them.

Tips for working with subjects with autism:
· Ask about sensory sensitivities (will studio lights be a problem?  Can you touch the subject?)
· Ask about the subject’s interests (those on the spectrum are usually extremely interested in a certain subject – trains, super heroes, doors, etc).  Know these and talk about them during the session to build trust
· Ask what makes the subject calm and happy (those on the spectrum typically do stimming behaviors that are repetitive motions such as spinning, flapping, rocking.  If you see such activity, it is your cue to back off and take a break, as the subject is most likely getting overstimulated)
· Ask what sort of bribe you can offer – if you are the sort to offer bribes, which I am.  For normal sessions, I offer Smarties as bribes, but many children on the spectrum are also on a GF/CF diet.  Asking upfront builds trust with the parent, and they can offer input.
· Ask the parent what will help you be successful.  This opens the dialogue to specific quirks or behaviors that you need to know about.  For example, does this child tend to repetitively poke people?  If so, you need to know this and know that they aren’t being “bad”, but are trying to communicate with you.

Another major and obvious challenge with autistic subjects is eye contact and engagement.  My number one tip to photographers is to know what the child is really interested in.  Have the parents have something handy – if the child is really into Thomas the Train, I place the train on top of my lens.  Eye contact is easier to achieve if you aren’t trying to get the child to look directly at you or the camera.  Place something on the lens (skittles, smarties, lens pet, toy).  If the child is higher functioning, I’ve told them that my camera is a robot and the lens is its eye, and the eye blinks at people it likes.  Then I ask them to see if it blinks at them.  This can get them looking directly into the camera and engaged, though not usually smiling.

Asking a child on the spectrum to smile is most likely not going to result in a natural looking smile.  My son is a great example:

He has the most beautiful smile, and is truly a joyous person, but any time I bring out a camera, he looks like he is in pain or constipated.  Getting him really laughing, on the other hand, results in the expressions that I see in him, and that is what parents want.  In this image, my husband was behind me pretending to be a zombie about to attack me.

How to be Successful
When a client books with me, we have a conversation about their particular child, that child’s specific needs and challenges, so I can walk in the door knowing their child and having the best odds to succeed.  We decide if bringing my studio lights and equipment will be too disruptive, or if lifestyle images would be best.  I am blessed to know my own best skills – and paramount among them is my patience with children.  They do not get under my skin, no matter the behavior.  In fact, in my client contract which I make clients sign, my #1 rule is that there will be NO apologizing for their child’s behavior.

There are really two parts to having success with photographing special needs children. First is making the parents happy.  Parents of special needs children are not quite the same as parents of typical children.  Usually, these parents have had to fight for their children, they have to protect them from stares and mean remarks.  These parents have usually had bad experiences in the past, and this includes bad experiences with photographers who were impatient.  If you show some effort in understanding their child, they will appreciate you SO MUCH.  Get images that show the child that they love and see in the intimate moments at home, and they are yours forever.

The second part of being successful is building a bond with the child.  I always judge a good session by if a child leaves thinking it was fun.  If they had a good time, then I just altered their perception of having their pictures taken.  And in case I haven’t mentioned it in the past few minutes, the single biggest factor to being successful with special needs children is PATIENCE.

blog_separator

About the Author:  Megan Drane of Firefly Nights Photography is based in the western suburbs of Chicago, Illinois.  While being a baby and child photographer, she has focused on photographing children with special needs for the past two years since her son was diagnosed with Asperger’s Syndrome.  She is a wife and has two children, one of whom is turning her grey and making her question her parenting skills, and the other has special needs.  She likes to eat too much good food and reads too many books.  In fact, she is a published writer and holds a Masters of Fine Art in Creative Writing and hopes to someday figure out how to squeeze writing back into her life.
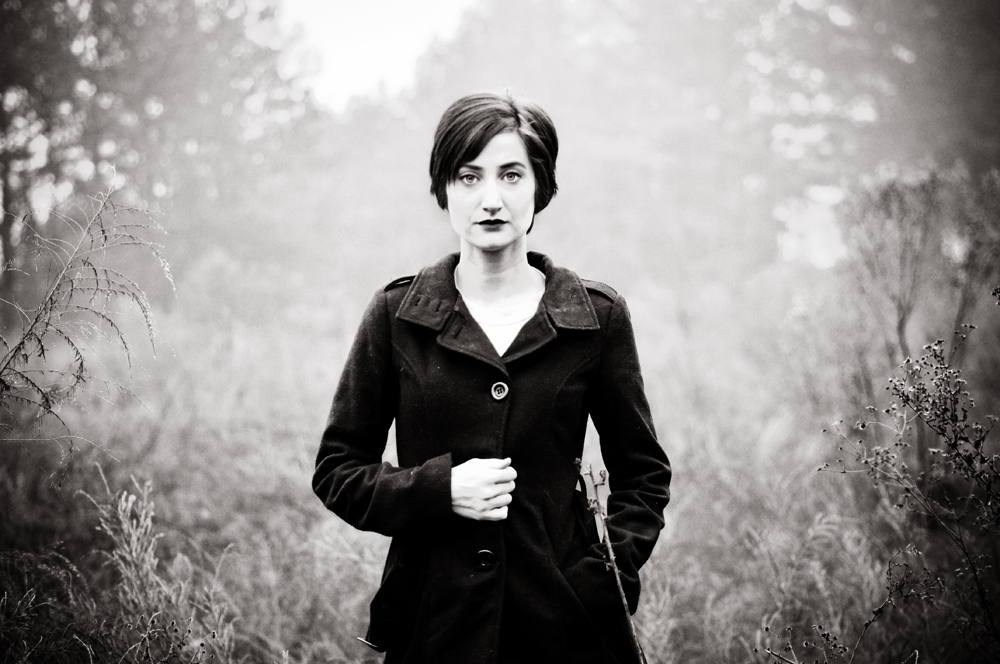
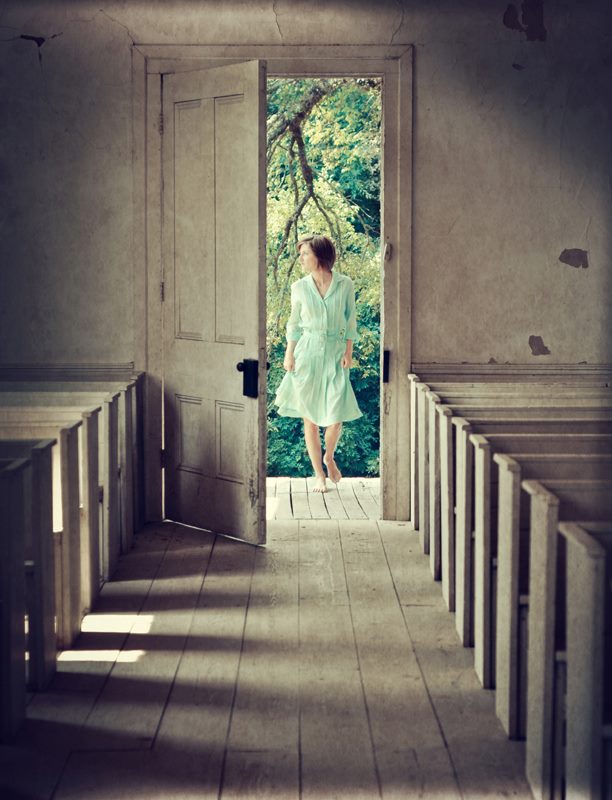
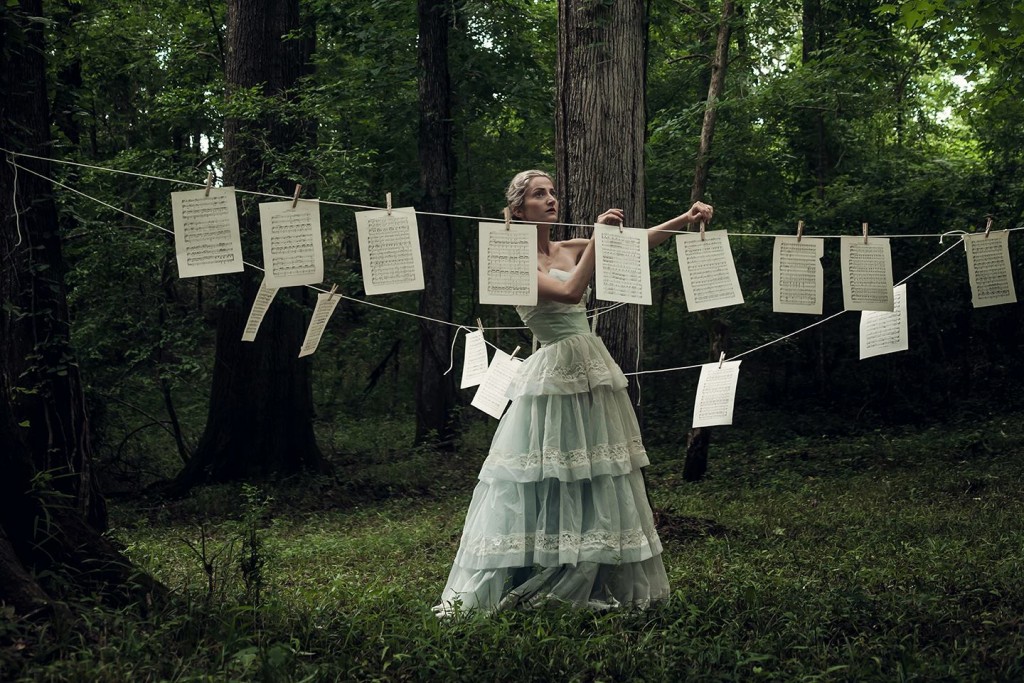
She is an active member of the Professional Photographers of America and is a volunteer photographer for Inspiration Through Art (previously Littlest Heroes Project).  She was named a 2011 Director’s Choice by Stories of Autism, been featured on Chicago’s ABC News as well as autismpodcast.org,  and showcased by Autism Society of Illinois.  Next month, she will be photographing the families of the national support group for Trisomy. Her work has also been featured on the cover of the international magazine Autism File and within special needs calendars.

You can learn more about Megan and follow her work at her Website or stalk her Blog or FaceBook page.


Tweet


26 Comments

Photographer Spotlight

Anna Gay: The Art of Self-Portraiture

What inspired you to become a photographer?

I became a photographer by accident, actually! I studied theatre and dance when I was in college, and continued to dance for a couple of years after I graduated. In 2007, I injured my knee, was no longer able to dance after my surgery, and could do very little physical activity, for that matter. I took up drawing and photography as a hobby, and to take my mind off how much I missed dance. I immediately fell in love with photography, though, and was absolutely obsessed with photographing everything I saw. The way I saw the world completely changed once I picked up a camera, and I started to notice a lot more beauty in the world. From that point forward, things started progressing very quickly from it being just a fun hobby, to something I was very passionate about.

556400_10150620770102314_1424203854_n

What is your photography style?

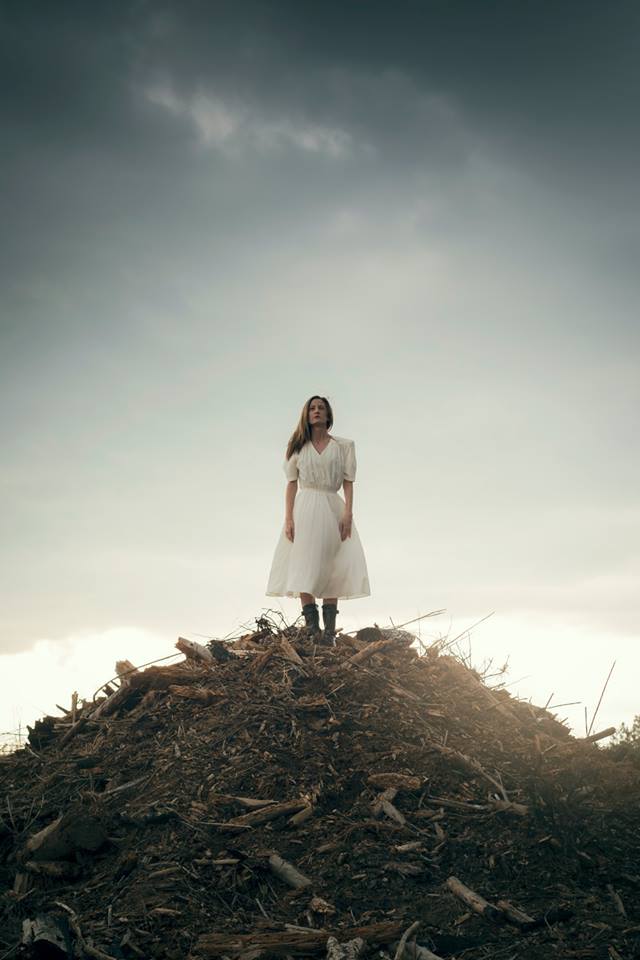
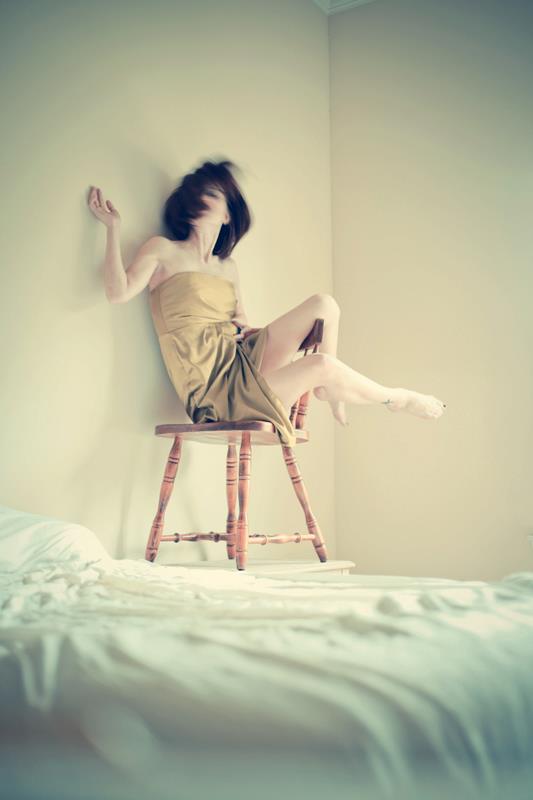
My photography style is constantly changing, so that is tough to answer! The one thing that I feel has remained the same, especially with my portraiture, is that it is somewhat quirky. I have no agenda of making a political statement or even creating what some people might consider a work of art. My goal is to bring out what is real in people (and myself when I am taking self-portraits) and highlight the beauty and joy in the world, that is in all of us. People say that a lot of my photos are humorous, which is true to an extent because I have a pretty easy-going outlook on life and try to keep things light. I also use a lot of props, scenery and color tones in my photos, so that sort of lends itself to a bit more of an upbeat style.

anna2

Your photos are absolutely gorgeous.  Do you have any tips or tricks to creating a unique photo session?

Thank you! Any time I schedule a shoot with someone, whether they’re a friend or a stranger, I try to have a pre-shoot meeting to sit down to talk with them for about an hour in order to discuss what they are looking for in the shoot, but also to get to know them. If the person is someone who I do not know, getting to know them before the shoot helps me find out what aspects of their personality really shine, and also gives them the chance to get comfortable around me. My goal as a photographer is to help them relax, and just be themselves in front of the camera. I also try not to set a time limit for shoots. I know a lot of photographers whose sessions will run an hour or so, but I like to leave at least 3-4 hours open, because I like to get as many shots as possible so the client has a lot of shots to choose from. I also keep in mind that the client’s patience runs out about 5 times as fast as the photographer’s, so I try to keep the shoot moving while having as much fun as possible.

10006602_10152009525127314_760965986_n

You have created an e-book about self-portraiture.  Can you tell us more about that?

One of my favorite styles of photography is self-portraiture, for many reasons, but the main reasons are a) it is a wonderful way to hone your portrait skills and b) it is a great emotional outlet for self-expression. Before I started taking self-portraits, I was absolutely terrified of photographing another person! But, over time, as I practiced with self-portraits, I acquired a set of basic skills that made me more comfortable in my portrait work. I started a self-portrait 365 project, and the things I learned about composition, lighting and post-processing, became invaluable to my portrait photography. Last year, Darren Rowse, the editor at Digital Photography School, interviewed me on dPS, which eventually lead to him asking me to write the e-book. I absolutely jumped at the opportunity, because I knew there was definitely an interest in self-portraiture, but for those who had never tried it, I knew the book would encourage them to give it a try in order to improve their photography.

577828_10150696408122314_1184941308_n

How important is self-portraiture?

If you look at the work of photographers, or any type of artist for that matter, throughout the ages, you will find that many of them explored self-portraits. Not only is it a form of self-expression, it is a valuable learning tool because you have the opportunity to work at your own pace, in a safe environment, and experiment through trial and error. If you do not have a willing model readily available, you can always use yourself as a model to experiment with different techniques of light, post-processing, etc. without the pressure of pleasing another individual. It can be a very freeing learning experience that will help you acquire skills that will not only carry over into your portrait work, but your photography as a whole.

10862500_10152501671107314_3774574621649919391_o

What do you think photographers will learn though self-portraiture?

What you learn through self-portraiture depends entirely on you. Just like any learning experience, if you go into self-portraiture with an open mind, the sky is really the limit on what you will learn. A lot of photographers shy away from self-portraits, because they’re so used to being behind the camera, that it feels strange and narcissistic to be in front of it! It is a great way to learn how your subject feels being in front of the camera, and as a photographer, a little bit of empathy can go a long way. On a more personal level, it will definitely make you more self-aware, and self-awareness is something that everyone probably longs for, and is a trait that can help you develop on a more artistic level.

554162_10150639920062314_839567623_n

How important are props in self-portraiture?

Personally, I have found them to be very important. Not only do they help set mood and add visual interest by indicating time, place and emotion, they can also give you something to focus on while taking your self-portrait, rather than worrying too much about how you look in front of the camera. If you do a quick search for self-portraits on a photo-sharing website like Flickr, you will find many of the photographers are using props.

anna

I read you offer tutoring for photographers.  Can you share more about that?

I mainly offer tutoring in Photoshop and Lightroom to absolute beginners. Honestly, I love sharing what I know about photography with other people, whether they’re a professional, or someone who just wants to know how to upload and edit photos of their kids. I think as photographers, sometimes we tend to bottle up our knowledge and not share it with other photographers, which is really a shame, because we can all learn so much from each other.

10153143_10152007730957314_1317917170_n

What advice would you give new photographers just starting out?

Know that photography is not an easy business. It is absolutely cut-throat at times because there is so much competition. The key for me so far, in terms of actually paying my bills, has been to network as much as possible using Facebook, Twitter and Flickr, and to also keep an open mind. At first, I wanted to classify myself as strictly a portrait photographer, but I quickly realized that for the time being, that just wasn’t going to work, so I got rid of my tunnel vision and started doing everything from portraits, to weddings, to advertising, to selling my own Photoshop actions and textures. You definitely have to be self-motivated in that regard. But, overall, the key is to really love what you’re doing. Also, just practice as much as possible! Find other photographers in your area, and spend a day shooting with them. Not only will you make new friends who share your passion, but you will begin to network and build professional relationships with other photographers.

blog_separator

About the Author: Anna Gay is a photographer based outside of Atlanta, GA. She holds an MFA in Art (Photography) from the University of Georgia, and is the author of the dPS ebook, The Art of Self-Portraiture. When she is not photographing or writing, she can be found spending time with her husband, Evan, and their two cats.

Tweet


8 Comments

Photographer Spotlight

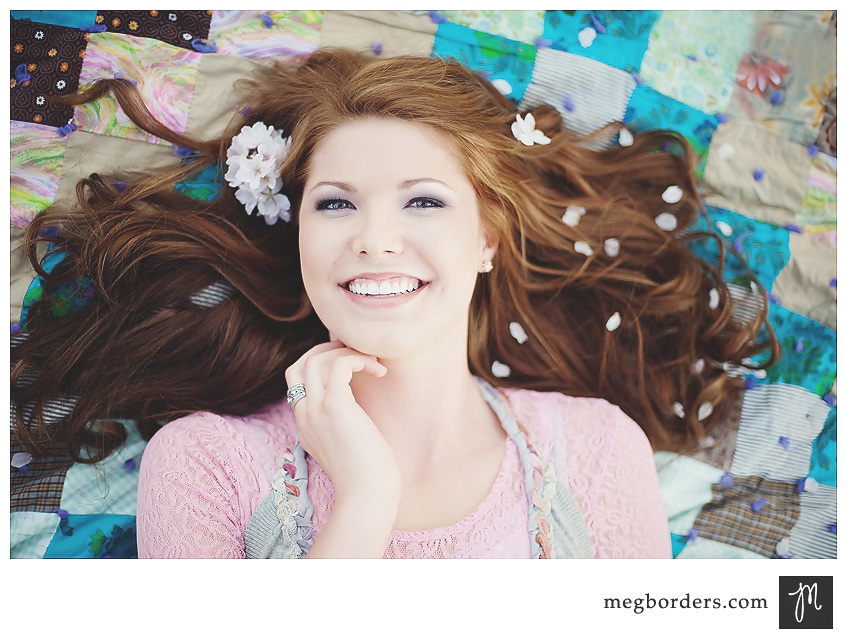
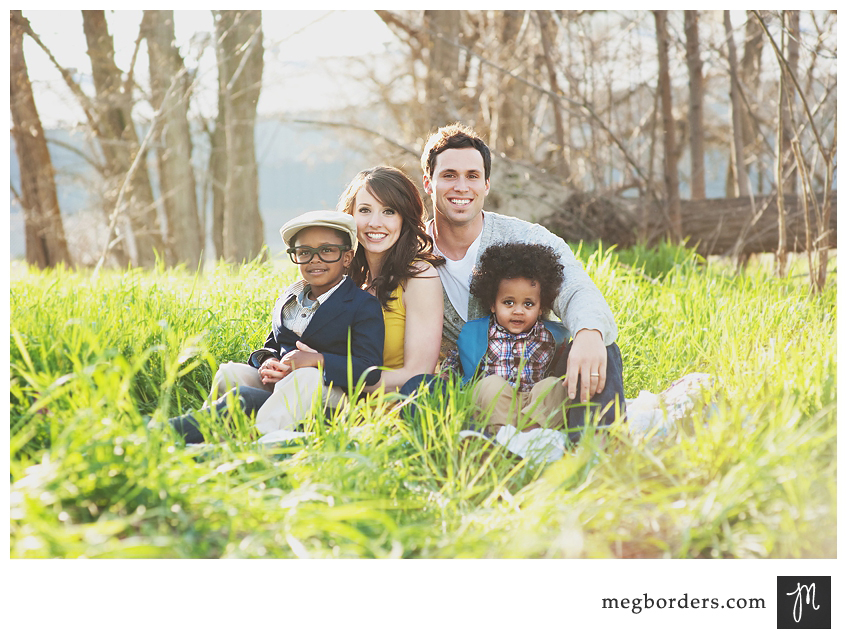
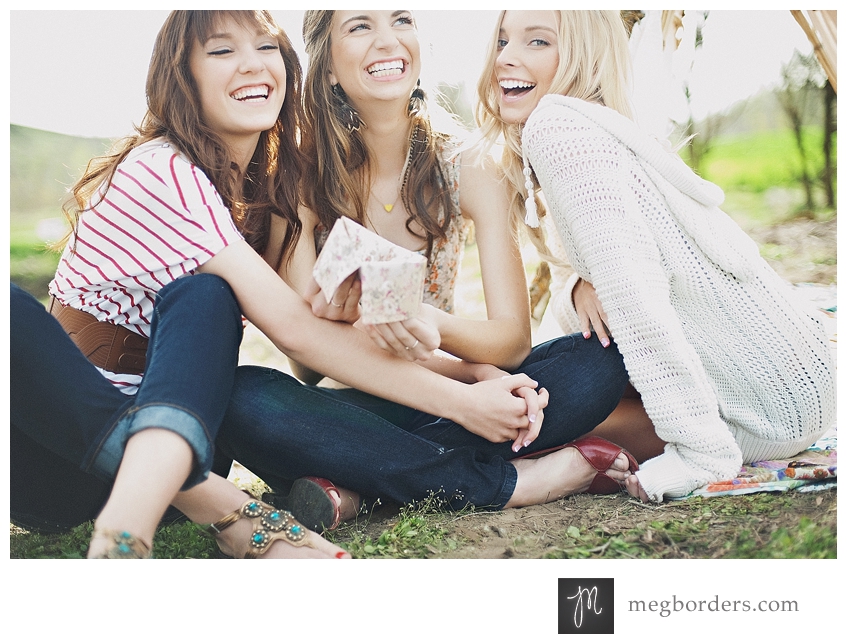
Photographer Spotlight: Meg Borders

This week, Pretty welcomes Meg Borders.  Meg Borders has an eye for beauty and that beautiful light that we all love.  We are so excited to have Meg on the blog today as she shares some tips on taking such beautiful pictures and running a successful business.  Thank you, Meg!

How did you get started as a photographer and what inspired you to start your business?

Mine is the classic story. I picked up my first DSLR after my first daughter was born couldn’t get enough of it. I had more photos than I needed, and soon realized that the joy wasn’t just in capturing my daughter, but in the art and the possibility. I spent a year learning intensely, soaking up everything I could about the science of photography. I opened for business in January of 2009 and have been humbled by the ascent. I am a relentless learner and desire to grow and evolve constantly.

What do you love most about your job?

My favorite thing about my job is the relationships I make along the way. I love interacting with and getting to know my clients and peers. After all, relationships are one of the most important things in life.

How do you balance your business and family life?

I struggle daily with finding the balance between mom and photographer. If someone has figured this out, please email me! My compass is to remember that above anything else, my children are my priority. With that core value underlying everything I do, I then make photography work in and around it.

What is the best way you’ve found to promote your business?

Word of mouth and Facebook have been the top two contributors to my influx of clients. I believe that if you give your clients top notch customer service and an experience they will not forget, they will be more effective in spreading your praises than any mailer or promotional piece.

You have such beautiful lighting in all of your pictures. Any tips or tricks on achieving such a beautiful look?

I love evening light and always schedule sessions for the evening (2 hours before sunset.) I look at how the light falls and wraps around my subject and move him/her around until I am seeing through my lens the image dancing in my head. I am a huge fan of backlighting. I love when my subjects look like they are bathing in sun rays.

What is in your camera bag today?

My bag itself is a beautiful gray Kelly Moore classic bag and I LOVE it. I shoot with a D700 and my 50mm 1.4 and 85mm 1.4. If I had to choose just one lens, I think it would have to be the 85. The bokeh is so creamy.

How important are props and do you have any favorites?

I don’t use many props in my photography anymore. I may bring one or two pieces to compliment an image to bring color or texture,  but I feel my favorite images are the natural images that convey love and emotion, where no prop is needed.


How do you get couples, children and seniors to look so relaxed in your pictures?

I think the way to get people to feel relaxed in front of the camera is to have a genuine connection with them and to create a sense of trust and confidence. Not many people step in front of a camera and feel relaxed and confident. My job in the consultation, before, and during the session is to help break the walls of insecurity and nerves down. I want who they are to shine through the images.

How do you encourage clients to invest in your products? And how do you convey the value of your products to your clients?

I have learned now that having a consultation before the session is key. The more time you invest in getting to know and educating your clients about the process of custom photography, the more they are going to invest with their wallets.

What piece of advice would you offer new photographers who are just starting their businesses?

To let who you are shine through your work. It’s easy to look to someone else’s work or style, compare yourself, and feel less than adequate. Don’t be afraid to be you and let that be enough.

blog_separator

Meg is a wife, mother and photographer in eastern Washington. View her beautiful website and be sure to follow her on facebook, too.

Tweet


9 Comments

Business & Marketing Guest Contributor

Free/Cheap Marketing Ideas & Tips: What has worked for me, and what hasn’t

by Guest Contributor Tara Staton
 

MARKETING:  The big bad scary overwhelming term that makes a lot of photographers instantly want to curl into a ball, cover their ears and pretend to not hear it.   It really shouldn’t though! I love marketing. I know it isn’t as fun as shooting or editing, but the business side of things can still be fun! I always tell my husband that if I wasn’t a photographer I would love to be in a marketing field.  However I know that is also partially because of my personality type and I know not everybody loves the whole interactive side of  it as much as I do.   For me, when I think of marketing I am not thinking about product sales, but as selling myself.  As a photographer, I am really selling ME, my style, my vision, my work.  So it is really important that all of that be authentic and central in anything I do in the area of marketing.  My products, session environment, business policies, etc ALL are controlled and molded out of my personal style.  YES, this means that not everybody will like you or enjoy your work. YES, this means you should be turning away clients that aren’t a good fit, and YES you will be much happier with the results of your marketing and the clients you get out of it if you stay true to yourself.  So, what has worked for me, and what hasn’t in the area of marketing?

MASS MAILING:  Huge fail. Definitely didn’t work.  I made the mistake of spending a lot of money on having a service that “targeted” the market I wanted and mailed out postcards, etc. Definitely not worth the money I put into it.  I should have realized from the start that it was not personal, did not match my style of interaction with clients, and did not really leave me much control over who it was reaching.

COMMUNITY INVOLVEMENT:  One of the biggest successes I had marketing wise, was getting involved with the local highschool community.  I taught for a day for the photography class, I donated to different events and fundraisers for the sports teams and cheerleaders (both time and some money).  The end result was a network of connections and amazing relationships with the students who not only come to me for their senior pics because of style, but because of the reputation and relationship I have with the schools network of people/students.

Another way of getting involved in the community is to donate to special events, charities, and causes that are special and important to you.  You will get asked to donate to a lot of different things, but make sure that you are giving your time and money to causes that you really want to support and that have special meaning.  Because you will find your time and talent best served on things that you are passionate about!

For me getting involved in the community is a perfect match for my style. It is technically marketing, but at the same time builds lasting relationships and allows me to use my talents in a way that gives back. Which is the best part!

BOUTIQUES/CROSS ADVERTISING:  This can be very successful, but once again be very careful who you “get into bed with” so to speak.  You can offer to do wall displays, or cross advertise with local boutiques and businesses that might offer mutual benefit.  However, like I said, be sure that you know the company/person well. Once you attach your name to something, you are somewhat vouching for that person/product/business.  Also make sure that these businesses really do reach your target market!

WORD OF MOUTH:  My main method of advertisement is word of mouth.  However, this whole process is pretty involved.  I am selective about clients that I accept. I have them fill out a questionaire to make sure we are a good fit before I even send them an info packet.  So because I have amazing clients, they usually refer some pretty cool people.  There is nothing better for business than a happy client!  So my clients that are referring their friends are often referring the type of client that I want to have!  I offer a 25.00 credit for both participants for referrals and I give referral cards BEFORE sessions.  Because most clients forget about it after. By giving them out before, they try to get their friends to book so that they can get a discount on their upcoming session.  A lot of my best word of mouth referrals was a mom was had a goal in mind of certain products she wanted, so she actually referred over 10 clients in a very short amount of time. She was very goal driven! 🙂  I was more than happy to give her that amount in credits for purchases when she essentially helped build a fabulous network of clients.

PHONE BOOK/PRINT ADDS:  Another fail.  Once again. Too impersonal, and I am not as much in control of who the adds reach.  I changed my listings in phone books to the very basic and have not done any print adds again.

I know a lot of people tell me that they are just too shy or they don’t want to approach people, etc. However, the reality is that if you want clients you have to be willing to put yourself out there and open yourself up in ways that you might not always be comfortable doing. I am a pretty outgoing person and I don’t usually get nervous at all. That has come from years of performing in highschool and college and forcing myself out of my shell though. I used to be painfully shy and rarely talk, but I soon realized as I grew up that in order to accomplish what I wanted to, shy just wasn’t an option. So if you find that you are one of those shy personality types, take baby steps. Jumping head on into it might be to much for you, but I REALLY encourage you to step out of your box and build your courage up a little bit at a time. Every positive response that you get will help boost that confidence more and more!  The worse people can say is no!

blog_separator

About the Author:   I am a mom, wife and photographer based out of Washington state.  I specialize in environmental portraiture and offer workshops and resources for other photographers.  I am absolutely IN LOVE with what I do and love sharing it with others!

Visit Tara’s website at Tara Staton Photography


Tweet


14 Comments

Guest Contributor

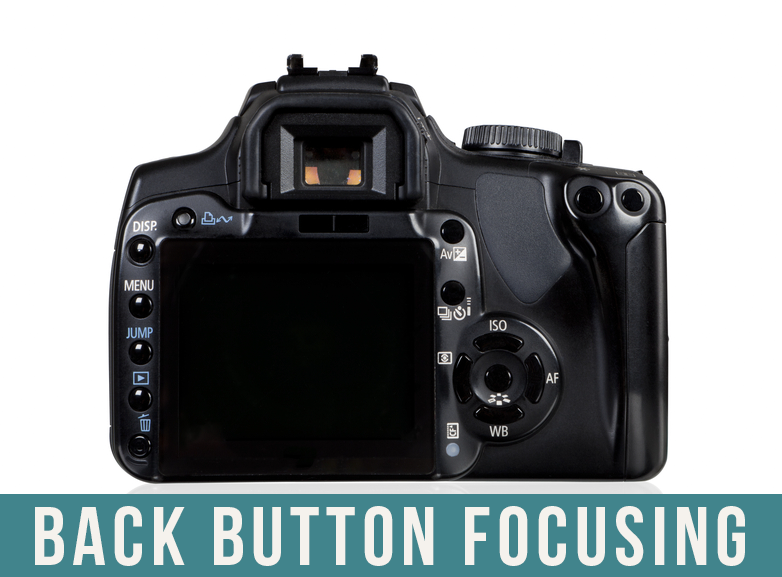
Back button focusing in real.plain.english {and 3 reasons you want to do it}

by Guest Contributor Elizabeth Halford

So let’s get real…don’t we all have photography terms that make us say “huh?” Yet we nod and say “oh yeah I do that too” even though we don’t have a clue what that means? I muddled through the beginning of my photography hobby this way and of course, Google has been this girl’s best friend. I Google everything. Literally everything. If my husband and I disagree about anything that can be proven online, I’m there. From the names of pieces of art, the year of a catastrophic event or even the age of an actor. And -sorry honey- but I’ve got lightening speed Google skills.

One of these terms I’m going to talk about today is ‘back button focusing’. And if you can Google it, why am I here telling you about it now? Because I pride myself on giving advice in real.plain.english and most of what you find out there will still make you say “huh?”

There are two ways you can focus your shot. Personally, I manually select my focus point by pressing a button on the back of my camera and toggling the red square on screen until it’s where I want it. Another option is full auto focus where you let the camera light up all the focus points it can grab instead of choosing them yourself. In addition to these two methods of choosing where to focus, there are two ways to select when to focus. You can use the shutter release button or a button on the back of the camera.  Oh, a note: if you don’t see focus points in your screen, just turn them on in your settings

Normally, you press the shutter half way until it’s focused and then press the rest of the way to release the shutter. With back button focusing, instead of pressing the shutter button half way, you press a button on the back of the camera to focus and then the shutter button to take the picture. You’ll have to check out your manual for where this button is located and how to turn on the option, but it’s usually in a spot that’s convenient when holding the camera to your eye. So my thumb is on the focus button while my index finger is on the shutter.

What are the reasons you’d want to employ this method instead of the usual way?

  1. Solves the problem of the heavy trigger finger pressing all the way before you’re ready
  2. This separates the steps of focusing the shot from taking the picture. Which is an important thing to do. This extra step confirms that mentality.
  3. You’ll have more control over when and where the camera focuses. Who doesn’t want that?!

Give it a try for a day or two. I think you’ll love it!

blog_separator

About the Author: Elizabeth Halford is a professional photographer and blogger in Hampshire, England. She owns Glacier Cake Photography and a blog for photographers. Elizabeth is a second generation home educator and is, regrettably, quite addicted to Facebook.


Tweet


16 Comments

Guest Contributor

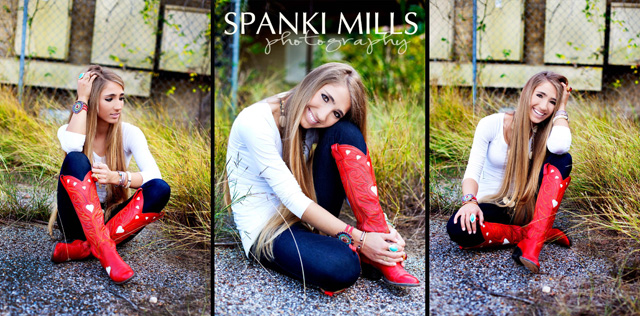
Don’t Market to Seniors…WHAT???

by Guest Contributor Spanki Mills

You just put the last spoon full of sugar in your freshly brewed cup of coffee, sit down at your computer desk and see…
INBOX (3 NEW)
*Pottery Barn SALE 10% off
*Congrats, you just won the British lottery!
*New Client Inquiry: Sarah

I am not sure about you, but this is just about how my day starts every morning.
*Pottery Barn…my husband would kill me if I spent more in that store…Delete
*Well if that darn British lottery was real, I could use that 10% off at PB! …Delete
*Hummm, new client… Sarah, a local senior ready to take her senior pictures…

Now WHAT? Want to make sure you make the most out of every senior you get?  It is all in the details…

First bit of BUSINESS info: You DON’T market to seniors.

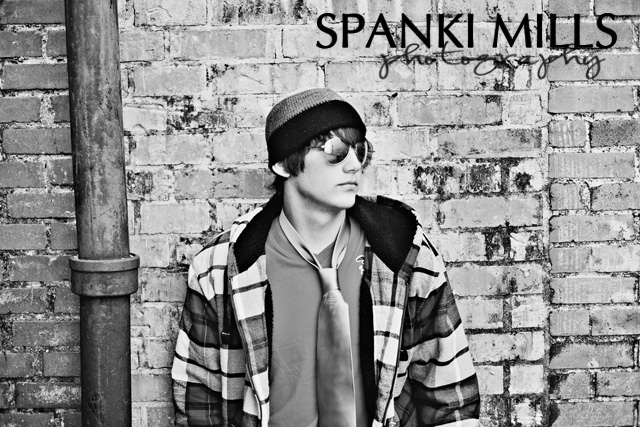
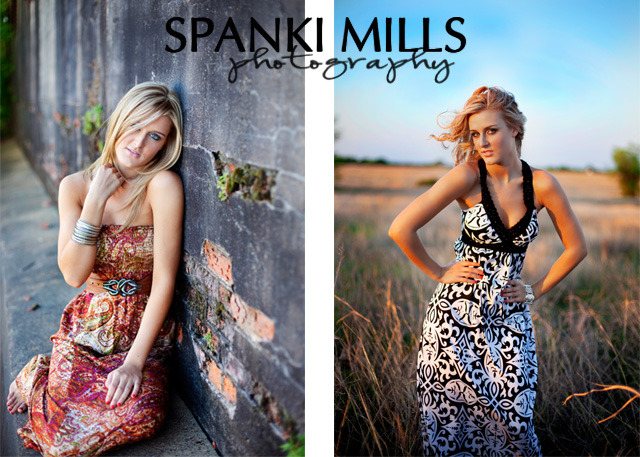
They do not care if they get $20 off or a FREE 8×10… they however DO care if they get a custom iPhone case or C.A.S.H.!  So remember that when you are running any kind of marketing or ad – only the parents care about a good deal and let’s face if the parents are the ones telling the senior to use us, we are doomed! “Parents just don’t understand…” remember 😉  So. It is all about getting in with the seniors. To do that, you have to be COOL. HIP. and down right GROOVY. Which I happen to be all of the above , so let me help you join me in the “cool club” …Yes, I have a club, all the cool kids do!

How to be COOL. HIP. and GROOVY, without being seen: You have to care about what they care about and go to the places they go to.

For instance, is there a local hair dresser that is the “go to girl”  that you can have her hang some of your stuff in her salon? Same goes for the tanning and nail salon. What about a local boutique? As you drive around, pay attention to where they go. Coffee shop? Burger joint? You have to think out side of the box, and do a little work but it pays off. Remember, what you leave in these places will be your “first impression” so spend some time thinking about what you want that impression to be.

When doing marketing pieces, make sure to design it to what they will find appealing and what will show who you are. You might not want to use primary colors and give the impression you are talking to a kindergarten class. Word things to make them relate to you, (you might not want to let them know we use words like “groovy and hip” ). Look at designs from popular bands or clothing stores, to help give you inspiration for design.  Remember to make it sound FUN.

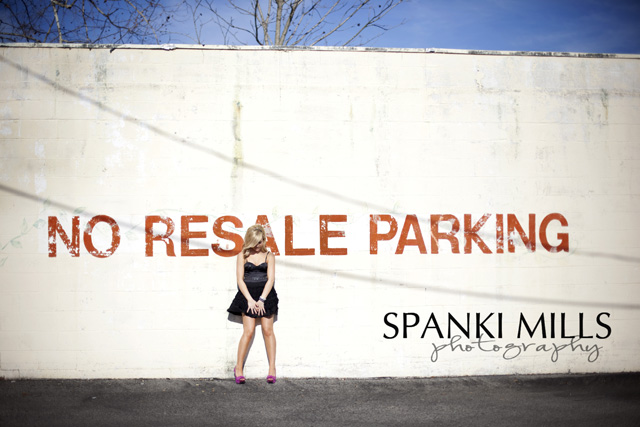
One of my best selling sessions for seniors is my group session. I have sign ups for this type of session, one of two ways -either I will set a date and let 4-5 sign up (kind of like a mini session) or I will allow ONE senior to get 4 of their friends and give them a little something for putting it all together (like extra FB images or 3 wallet accordions, etc.). I sell it by letting them know because it is a group, we get to travel to a location that has more to offer for backdrops and create unique images by going there. I also let them know how much fun and more relaxing it is to have your friends around, laughing, sharing clothes and accessories, and we all get to go to dinner before we head home. This is a favorite among many of my seniors. So I make sure to include images and details in my marketing pieces.

Okay so now to the actual senior session…

They have e-mailed you, it is generally a very simple “I like your work, my friend used you. etc. etc.” e-mail.   How in the world are you going to find out WHO this person is, what do they like, how do they dress, what is their personality? Isn’t it our job to represent that in their photographs?  I start off sending them the “thank you for contacting me” e-mail and it has a few questions attached. BUT… not the typical  “What is your personality” question. I make mine a little more off the wall and unexpected fun.

For example:
*You can drive any car you want, you choose:
A. Jacked up 4×4…because there ain’t NO mud gonna stop me.
B. Sporty red convertible. Because it is ALL about looking good while the wind blows through my hair.
C. A yellow VW Beetle. I like to be different and besides,  yellow is the perfect accessory to my blue VANS.

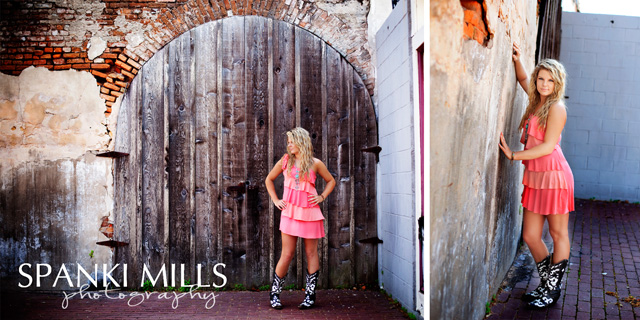
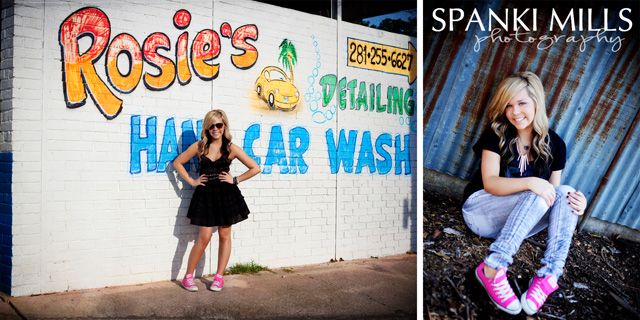
I also give them my suggested “what to wear guide” and explain to them the importance of details, and how real fashion is clothing that won’t be dated once they graduate and look back at these images 20 years from now. Then I ask them to e-mail or text me a few of their ideas for outfits.  From there I will suggest to add or layer, accessorize, etc.  We then discuss a location. If the clothing is plain and simple, it is great to suggest a fun urban backdrop for that outfit. If the outfit is bright and bold with a lot going on, then I might suggest a more simple location so the background won’t compete with the clothing.

Once you have a better feel for their personality, you can tell what they will be up for. I find it is best just to be fun, down to earth, and make them as comfortable as possible.  I don’t expect my senior client to be relaxed in front of the camera until about the second outfit change, or 30 minutes into the session, which ever comes first. So I always use the more simple poses and outfit first.

I think it so funny, the first hour is like pulling teeth and right about the time we are about to totally lose light, I can’t get them to stop coming up with new ideas and poses!

I try my hardest to let their personality shine through along with remaining true to myself my work.  The seniors always come away from the session saying what fun they have had, and to me that is number one! It helps that the more fun they have them more they tell everyone about the session and it builds interest so when I post the sneak peeks on Facebook and my blog, their friends are ready to see!

The session is over, now the BUZZ begins: For me, it is all about word of mouth and the buzz the seniors can create among each other.

Like I said, teens do not like being “sold” to, but they sure love telling and showing their friends how much fun they had and the cool new stuff they got. With the senior market, it is more important than any to always offer top of the line, new and unique products. I also offer several “smaller than wall print” products so they can carry them to school and show them off, such as rep cards, wallet accordions, and the 4×8 senior books. We all know it is natural to want what someone else has… I am not saying I want the new iPad just because my friend got it… I don’t do that….I  actually “need” mine. *wink*wink*

I know that just like everyone else, seniors want to feel like their experience is different and unique from start to end. Just because they are younger, doesn’t mean they do not appreciate quality and special treatment. So don’t skimp on any detail. The more you get their heart to smile from the attention, the more they will share your name and brand with their friends!


Make them feel like they won something: It is wise to make them feel like they have something exclusive with you.

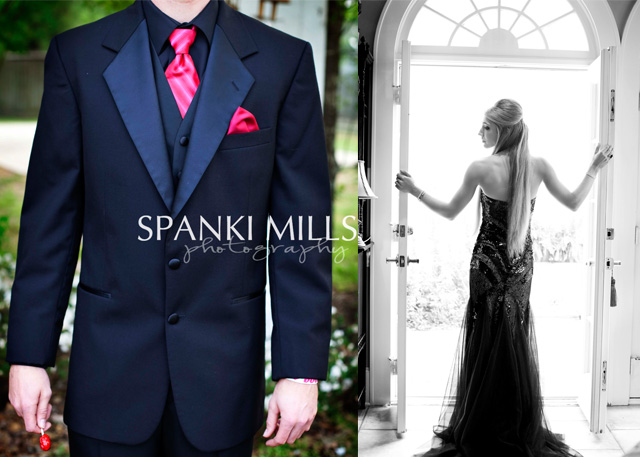
One thing that I have done, that has gone over really well, was to offer to my current clients ONLY, a “pre-prom” session for all of their friends. So ONE current senior from each High School can have me come to their home a few hours before the limo picks their group up for dinner. I will shoot each couple, friends, the entire group, candid images, etc. Only for the cost of the digital images for each couple there. The kids LOVE this, it gets fun and relaxed pictures of a night they will always remember with out the stuffy balloon arch and harsh light that is offered at the prom itself. It is also something the moms appreciate, they get to take the moment in and not have to run around trying to get all the pictures, that is why I am there! This also is a great way I get my name in the mouths of some of the next year seniors since most proms are a Senior/Junior prom. It is a win win for them and me!

Closing the deal: Make packages that have bonus incentives.

I try to think of all the details when creating my packages. Scholarship applications, sorority packets, family, friends, wall hangings, and the important…SENIOR! The stuff they want to show off as well! Don’t forget to put a little “special” into the packaging of their products. This too should mirror your marketing and branding. I personally wouldn’t make it too “young” or too “old” I like to think simple is safe. Never forgetting the special details, like the hand written notes to not only the mom or dad that actually wrote the check, but include one just to the senior and leave something momentous from the day…like “I had a great time, even though I did step on a dead bat to get that perfect shot…totally worth it! Thanks for making my work look fab…you ROCK!”

Congratulations, you have just joined me in the cool club! WELCOME.

blog_separator

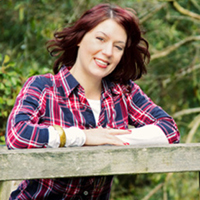
About the Author: My REAL name is Spanki! I will go by just about anything…Stacy, Becky, and Sparky are what I get the most often. (I guess no one really thinks they hear right when I say Spanki).  I am a thirty “something” mother of 4 (if you don’t include my husband who acts 12 most of the time)!  I have 3 boys one 11yr old, twin 10yr olds, and a daughter AKA the “boss” who is 5 (and to think I was told I couldn’t have children) pshhhh!
I am no good at math, or spelling…I tend to make up words. My poor friends and family have learned they have to de-code me! I have no problem laughing at myself! I sing really good when my radio is REALLY loud, I still think I can cheer just as good as the girls who can actually FIT in their uniform, and there is never a dance competition I won’t break it down in!
I am a self taught photographer, who loves photography for the memories it captures. I wish I could be the “artist” that can cry over an image…nope, not me, I am just the one who had always had a camera in hand not wanting to forget a moment in time I knew I’d never get back!

Visit Spanki at her WEBSITE, BLOG, and FACEBOOK page.


Tweet


19 Comments

  • « Previous Page
  • 1
  • …
  • 26
  • 27
  • 28
  • 29
  • 30
  • Next Page »

Popular Categories

You might also like

Love of Lifestyle Photography Workshop by Ashley Spaulding

Love of Lifestyle: The Fundamentals of Lifestyle Photography

The Lightroom Lab: An 8-Week Course to Mastering Lightroom

Pretty Forum for Photographers

Let Them Eat Cake—A Marie Antoinette Inspired Shoot

Tips to Keep Your Images Interesting in Limited Surroundings

Natural Light: The Art of Finding Magical Light

Copyright © 2025 · Divine theme by Restored 316

Copyright © 2025 · Divine Theme on Genesis Framework · WordPress · Log in

×
Never miss a thing!
Sign up for Pretty Forum Newsletters and get all the latest news on our upcoming:
  •  
    ​Workshops
  •  
    Celebrity Mentors
  •  
    Free Downloads 
  •  
    Photo Challenges
  •  
    Vendor Discounts
  •  
    and much more...