• Pretty Forum
  • Pretty Presets
  • Pretty Actions

Pretty Forum

Online Photography | Forum | Workshops | Tips | Tutorials | Classes | Business | Courses | School

  • Home
  • Blog
  • Enter Forum
  • Workshops
  • About
    • Meet the Team
    • FAQ ABOUT JOINING THE PRETTY FORUM
    • WHY JOIN THE PRETTY FORUM
    • Testimonials
    • Privacy Policy
    • Site Terms and Conditions of Use
  • Advertise
  • Contact
  • Join

Photographer Spotlight

Photographer Spotlight : Angie Monson of Simplicity Photography

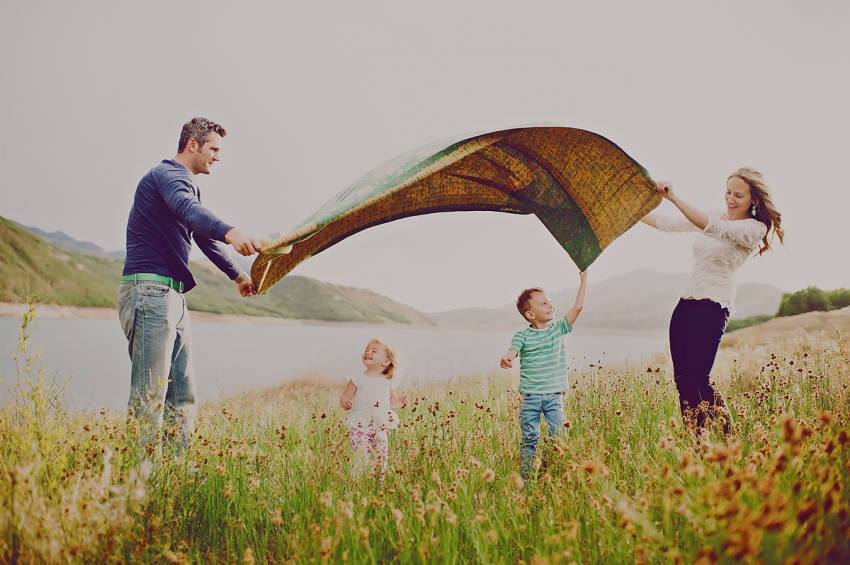
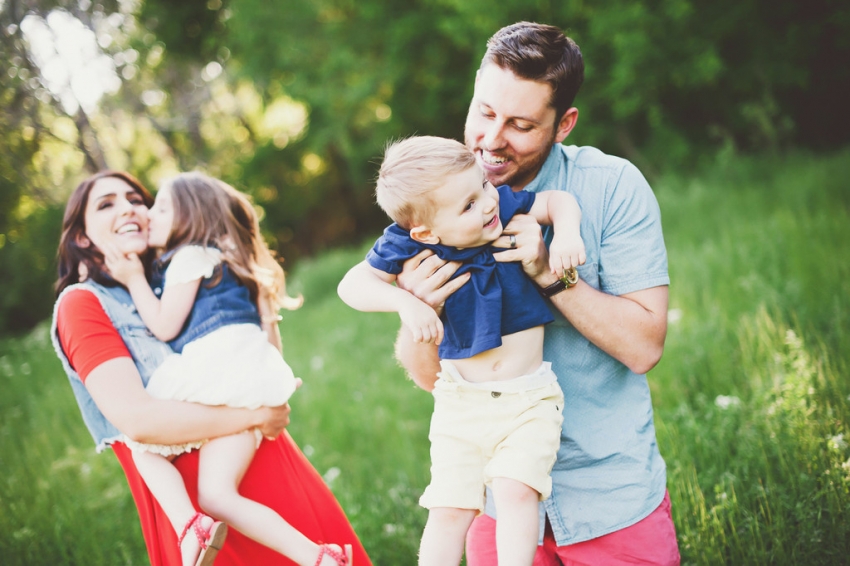
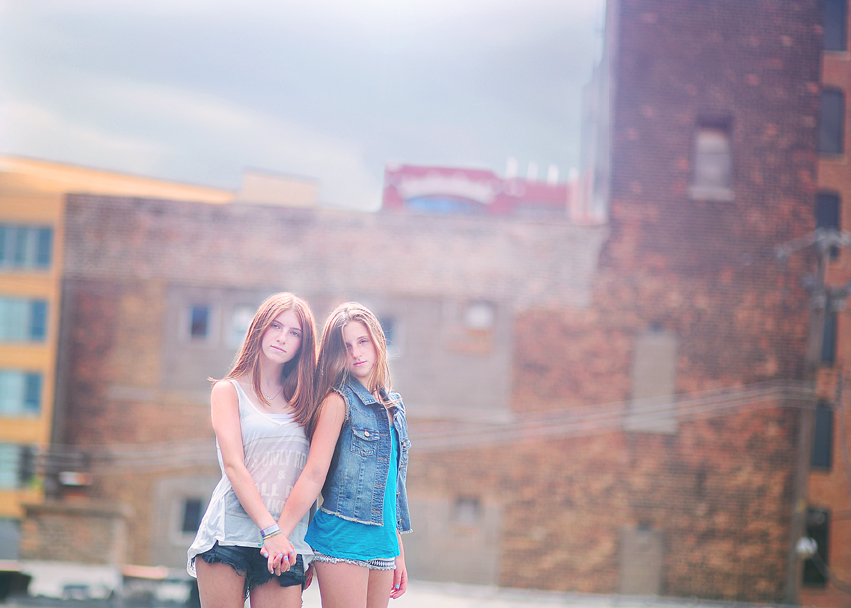
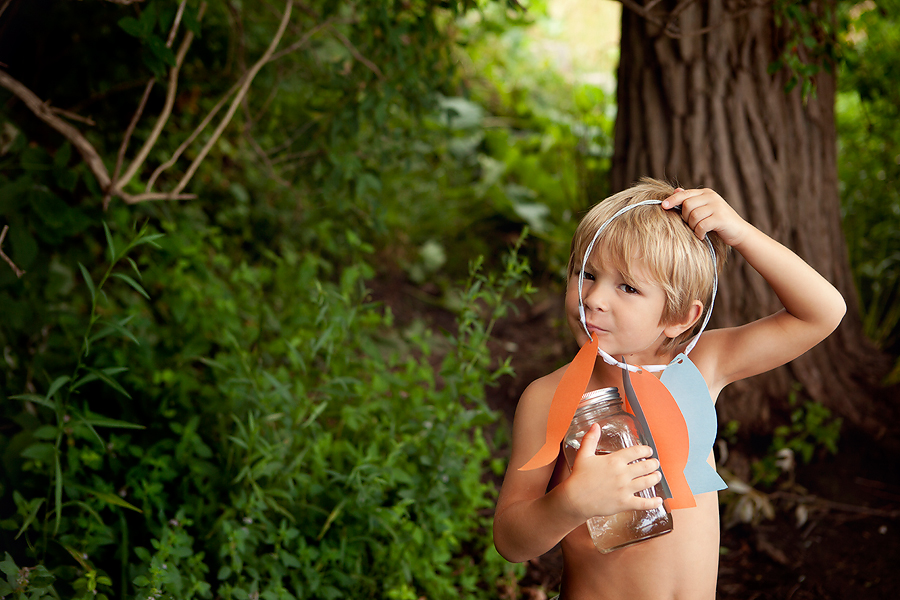
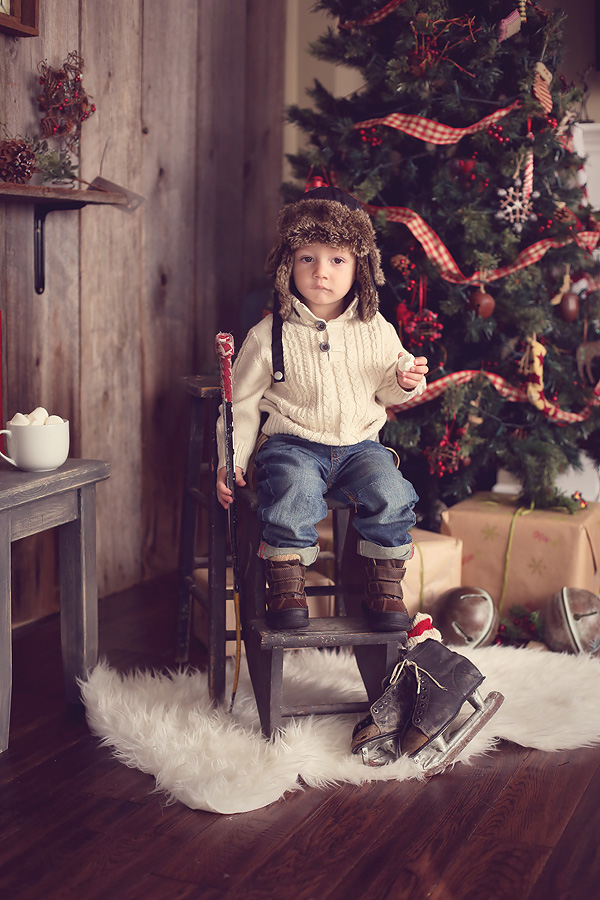
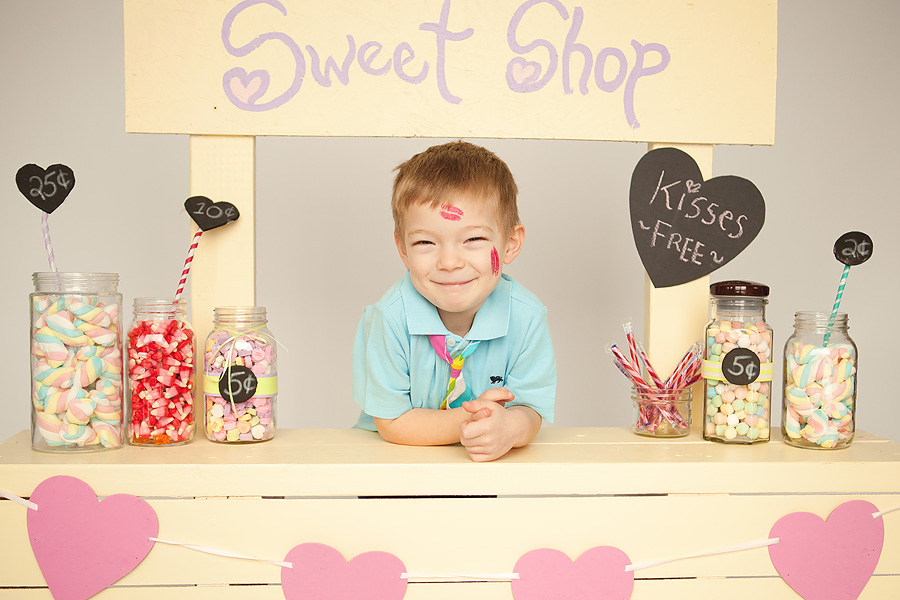
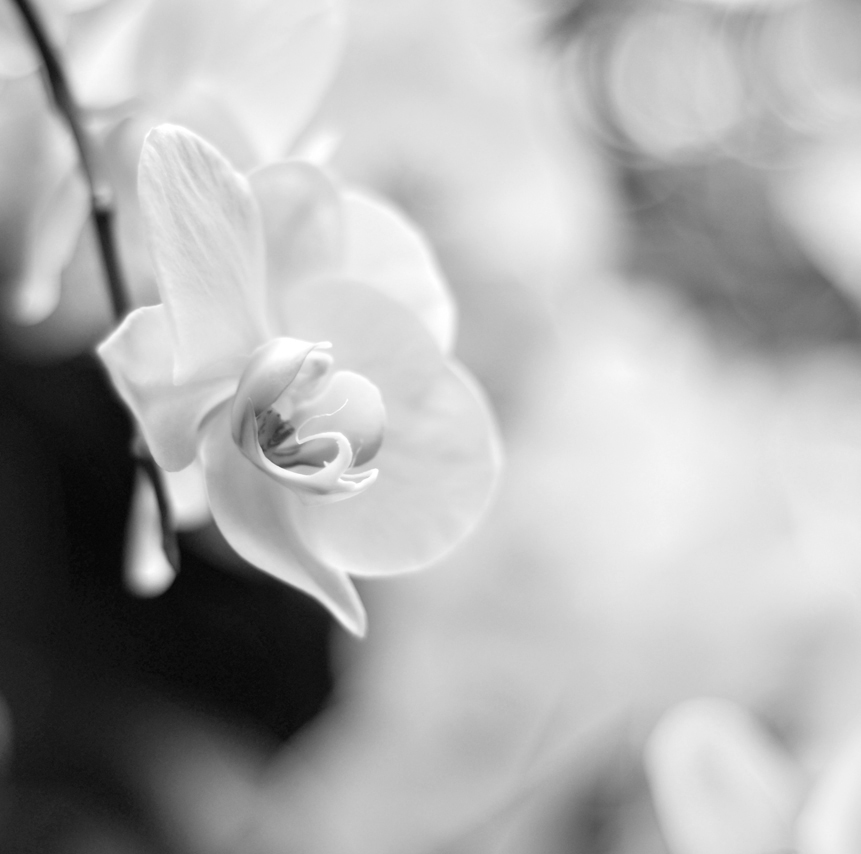
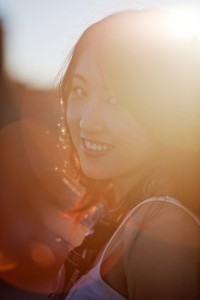
Today, we welcome the talented and inspirational Angie Monson of Simplicity Photography to the blog! Take a moment to learn more about Angie, and visit her website.  Thank you so much Angie for taking the time to share your work with us today!

Where did your inspiration for photography begin?
My dad gave me a Pentax film camera when I was 13. I was hooked with the first roll of film. I had my friends dress up and we would go shoot by old buildings and train tracks. Not much has changed

How would you describe your photography style?
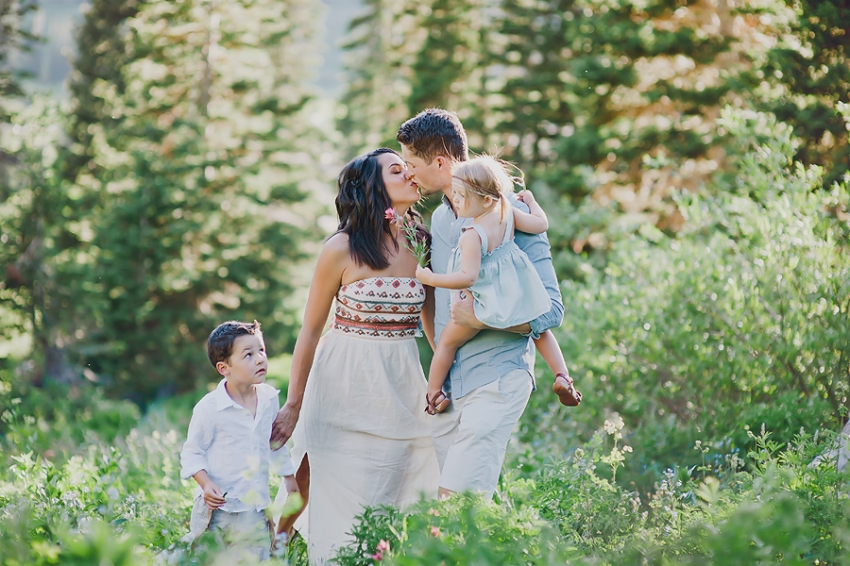
I really try to have a natural approach with my work. I want people to feel something when they see my images.

Did you study photography in school or are you self taught?
Both. I learn best by trial and error so I tried over and over until I got it. I did take courses in College and a few workshops once I knew I wanted to photograph family & kids.

Do you shoot Canon or Nikon, and what is your favorite lens?
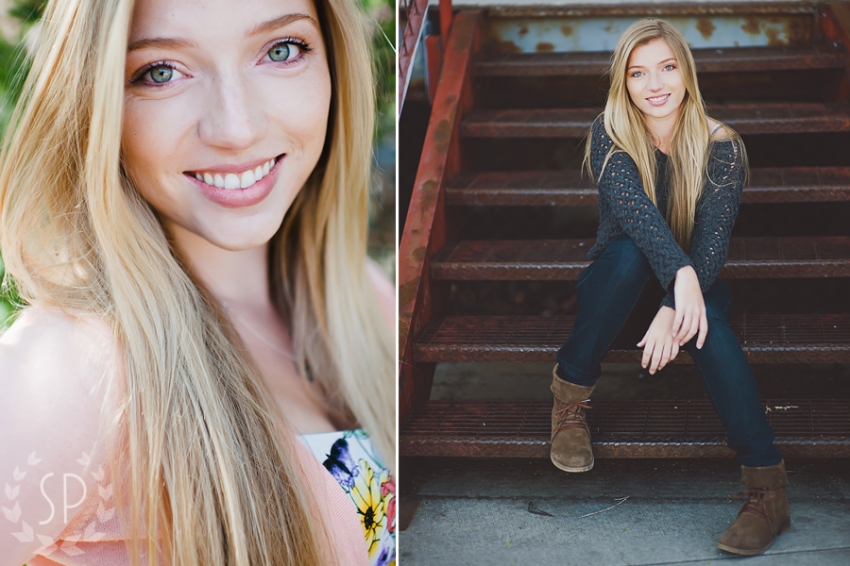
Nikon. The 85mm has been my favorite for so long, but the 35mm 1.4 comes in pretty close lately.

Do you have any tips for photographers on how to find the light?
PRACTICE EVERYDAY! Learn to shoot in all types of light! The way I found to find the light was just to move around your subject slowly and shoot from all different angles- this helps you see light and learn to read it. Sun flare is so beautiful, but can be tricky! Again, shoot at different angles to cut off the flare coming into your lens. Just keep trying and it will come naturally over time.

What is the most challenging thing about photographing children & families?
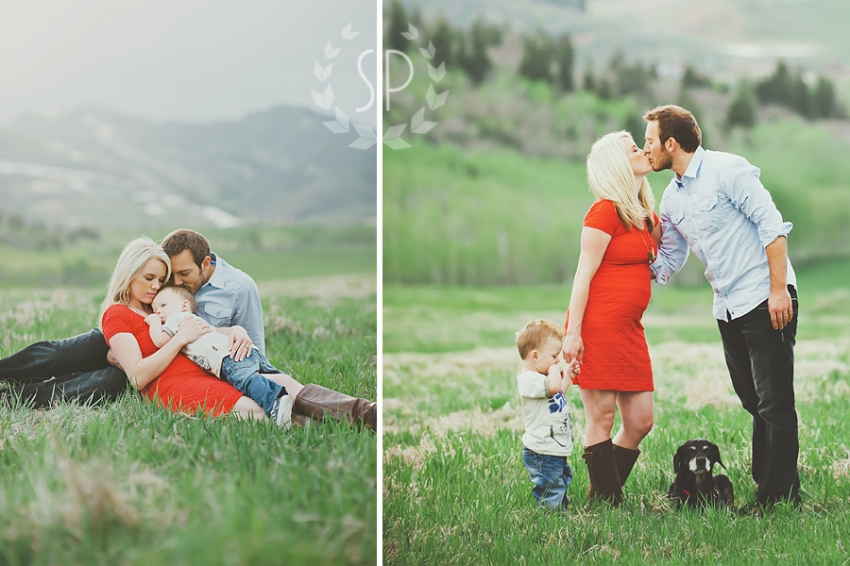
You never know how kids are going to act! I love that about my job, it’s a challenge and if you know me you know I get bored easily so it always keeps me on my toes! Kids are hard, but dads can be even harder so I have learned how to work with them also. You learn eventually what works with different age groups. It takes time to find your groove. I really love photographing families!

What is a good lesson you have learned this year in photography or in your business?
Letting people take control of the session. Some people think they can do your job better than you. TAKE CONTROL and show them that you know what you are doing. The session goes south very quickly if you let them call all the shots.

If you could encourage a new photographer in one area, what would it be?
Treat your clients like gold! They will come back again and again just because of the experience they had. Our jobs are so personal and we see into our clients lives so take them in as they are your own family! I seriously love my clients so much and they make my life fuller.

What do you love most about being a photographer?
The friends and connections I have made. I love that I get to meet such amazing people through my job. I wouldn’t have it any other way. I truly feel like I am living my dream. People ask me all the time what I am shooting for next… this is it. It’s all I ever wanted and I feel so happy to do what I love!

Where do you see yourself in 5 years?
Doing the same thing most likely, but working less. I want to travel a lot more and do some home exchanges with my kids overseas! Travel & Photography are my two biggest hobbies, so combining them would be really fun.
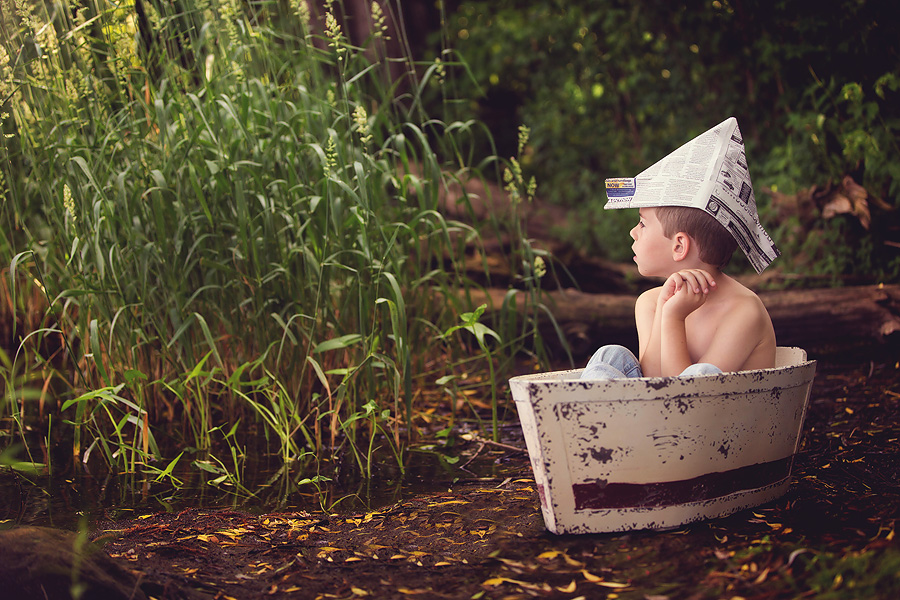
blog_separator

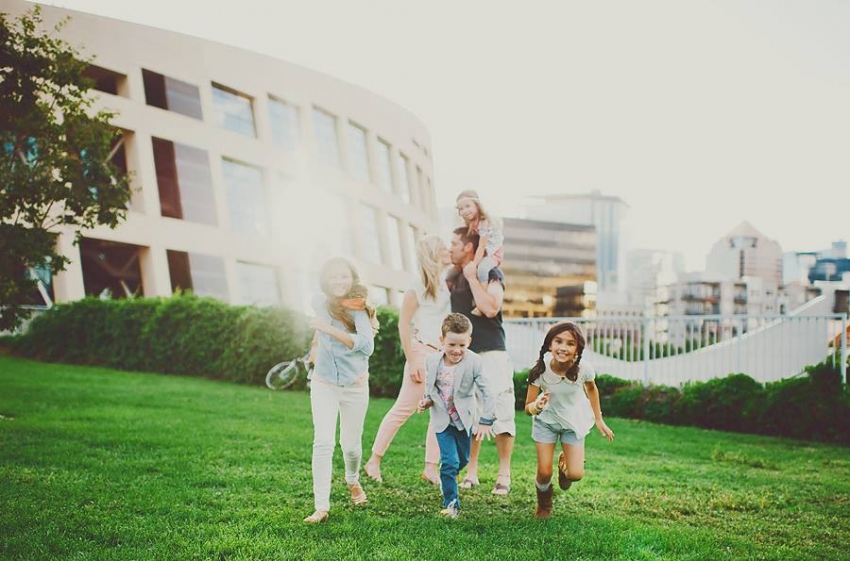
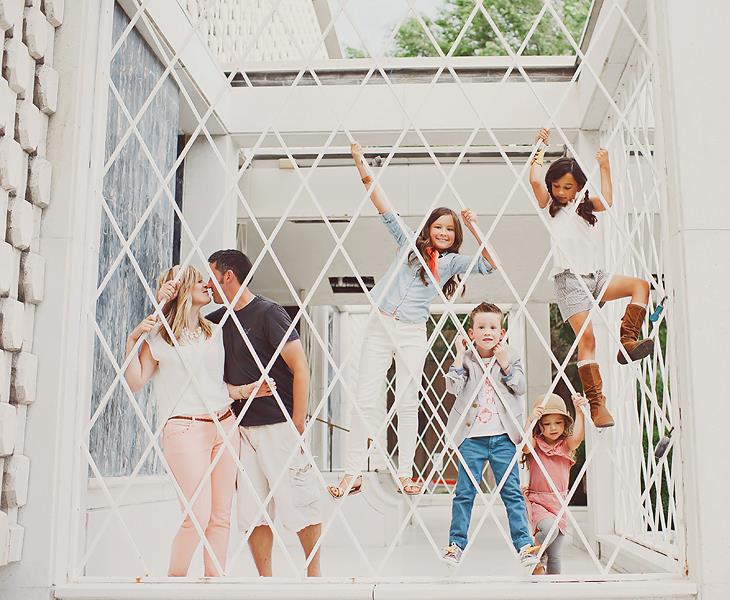
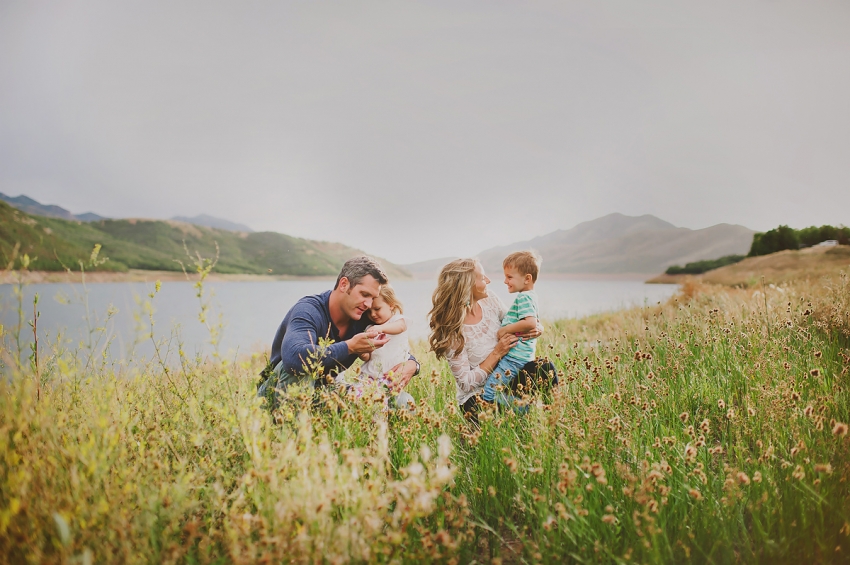
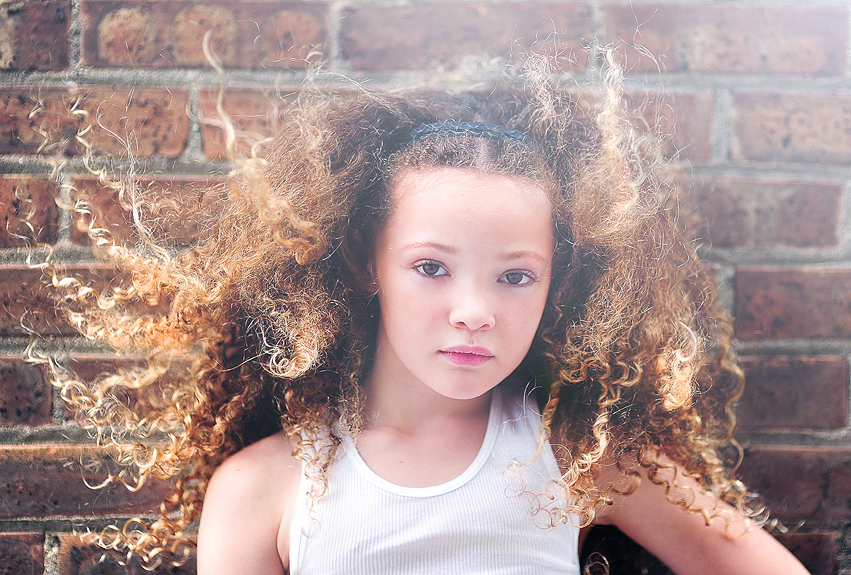
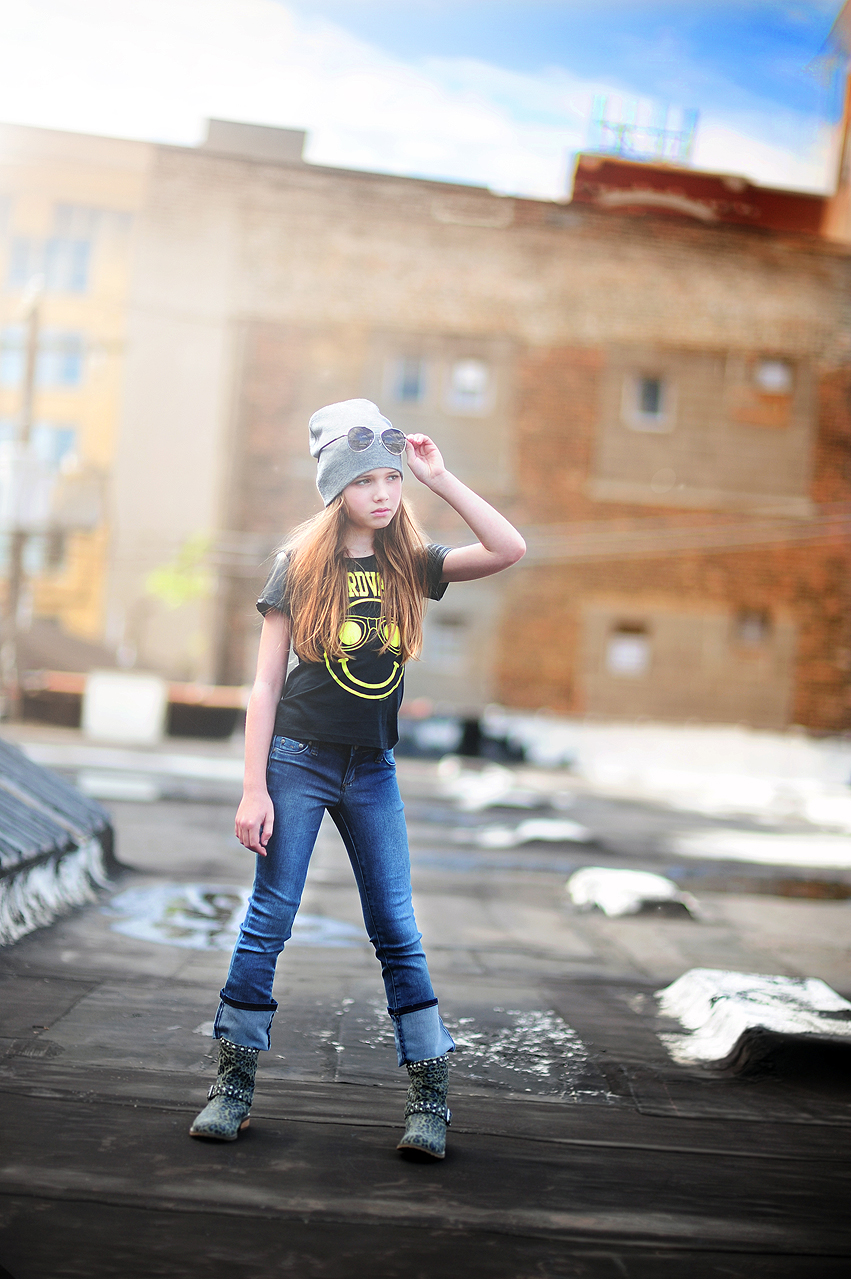
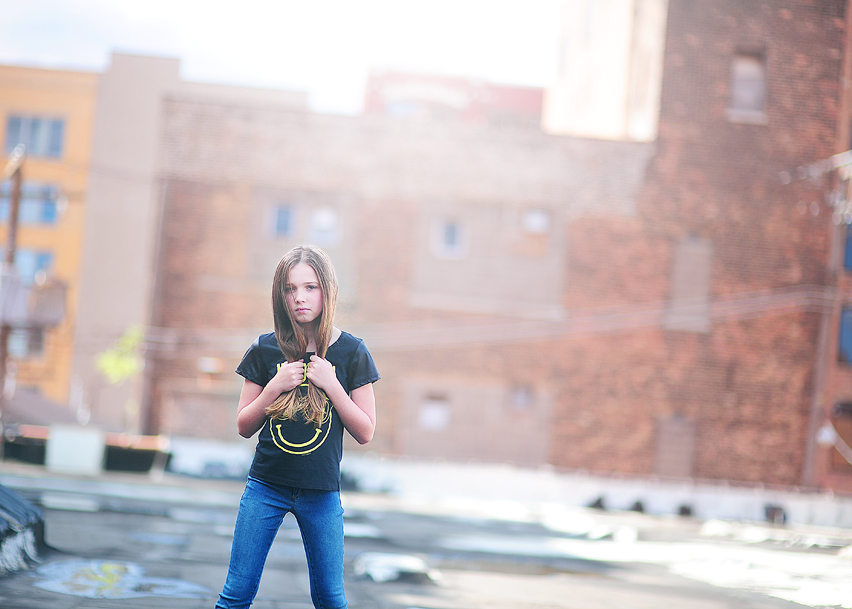
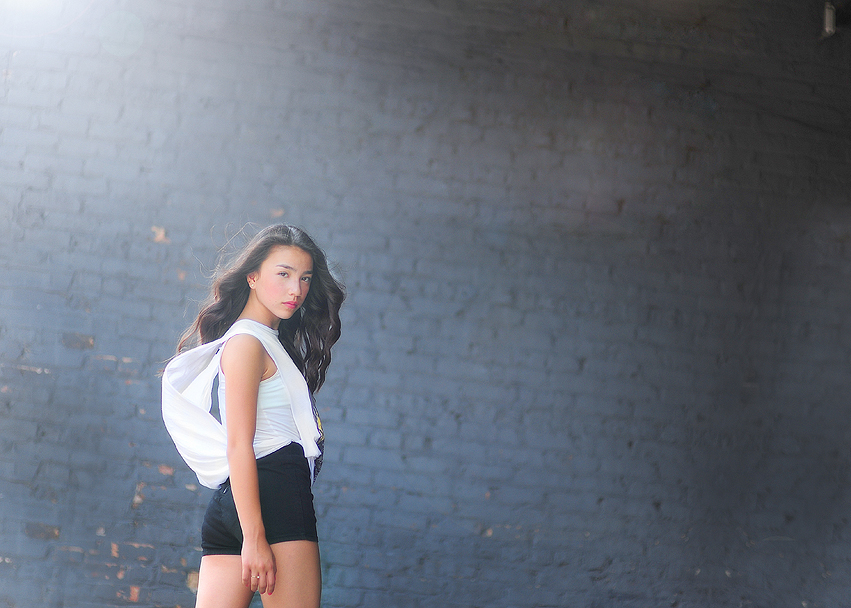
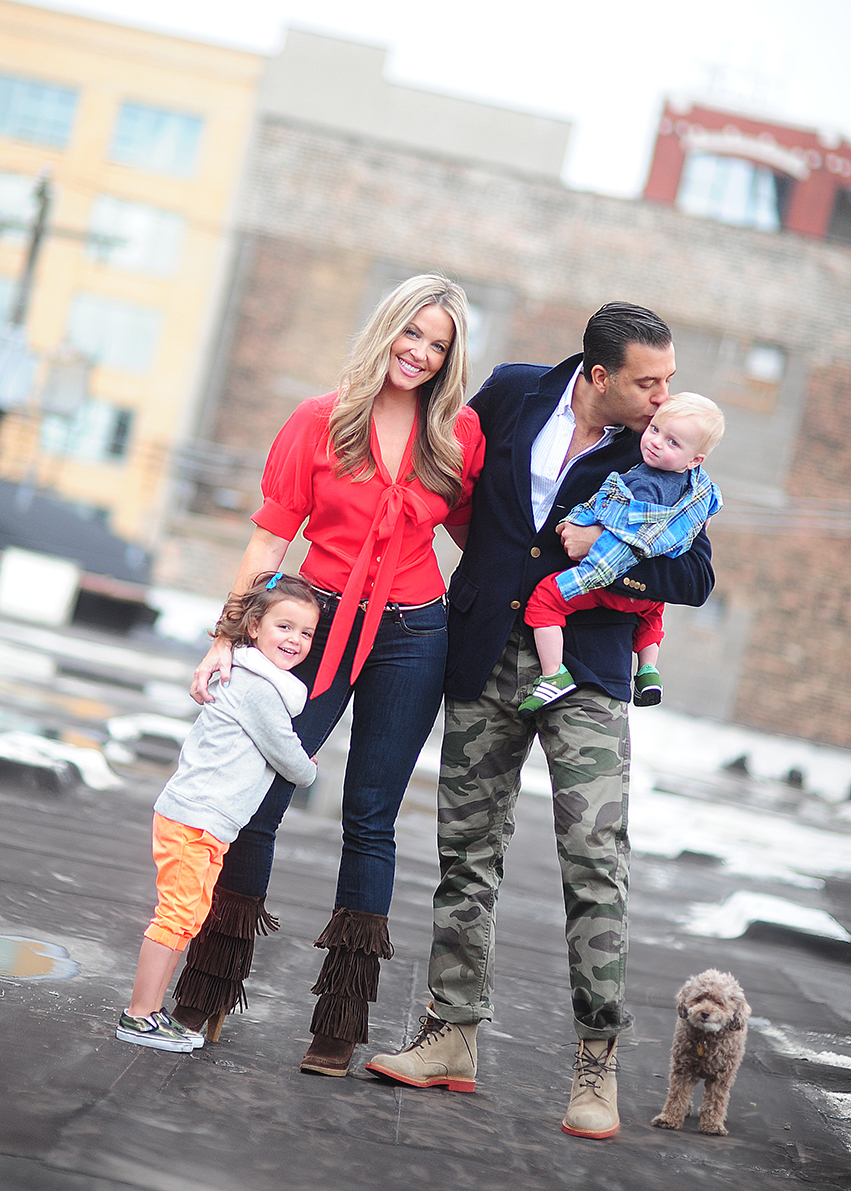
About the Artist:  I’m Angie Monson, a portrait photographer located in Salt Lake City, UT. Just a gal trying to make a living while pursuing her dream. I am a mother of three sweet babies that keep me on my toes.

Visit Angie at her WEBSITE | BLOG | FACEBOOK pages today!


Tweet


Leave a Comment

Guest Contributor

Preparing Parents for a Successful Newborn Session

by Guest Contributor Cris Passos

Today, our own Cris Passos of Cris Passos Photography shares a step by step plan for getting your clients prepped for a successful newborn session!

For us newborn photographers, one of the most important things for a successful newborn session is to have great communication with the newborn’s parents. Most of them are going to meet us for the first time at their baby’s session so they need to have the confidence in our expertise to _hand over their little bundle of joy. An important point that most parents don’t realize is that we need the baby sleeping soundly in order to get all the cute poses. And most importantly, we must always advise that for the best results babies should be photographed within 15 days of life.

There is a lot to go over before the actual session. For my clients I always send a PDF letter with all the information needed to prepare for the session and what to expect when they arrive at my studio. I then contact them 2 days before their session by phone or by email just to reinforce the topics from the letter.

Here I’ve listed the important topics to discuss with the new parents before their baby’s session:

1.Do they have any color/prop preference;

2. If mommy is nursing I always advise to avoid spicy foods or drinking/eating acid citrus juices and fruits, because it can upset the baby’s tummy and they will feel uncomfortable and not sleep. For bottle fed babies I’ll advise them to bring extra formula to last our long session;

3. I ask that they interact with their baby to try to keep him/her awake 1-2 hours before we start the session. It’s also ideal to schedule the baby’s feeding about 2-3 hours before arriving so they can feed him/her again just before the session starts. A tired baby with a full tummy results in a very sleepy baby and cooperative model. I also instruct the parents to feed their baby as much as they can 12 hours before the session, that way baby will be really full and sleepier;

4. The baby should be dressed in comfortable loose clothing to prevent marks on the skin. Buttoned up pajamas are easy enough;

5. Parents with baby boys that will be circumcised are advised to schedule the session before the circumcision or 5 days after the procedure, because baby will be very sensitive and uncomfortable for some poses;

6. A pacifier is a lifesaver, so I remind parents to bring one for the session;

7. The studio will be very warm. Babies are very sensitive and because normally we will be photographing in the nude, it’s best to keep them comfortable. I suggest that parents come to the session dressed in layers so that they can comfortably remove some clothing if they feel the room is too warm;

8. Parents should be comfortable during the session. If they want to they can sit and relax with a book or magazine;

Don’t be afraid to remind parents of these steps as much as you feel necessary, this way you and your clients will have the best experience with their new baby session.

blog_separator

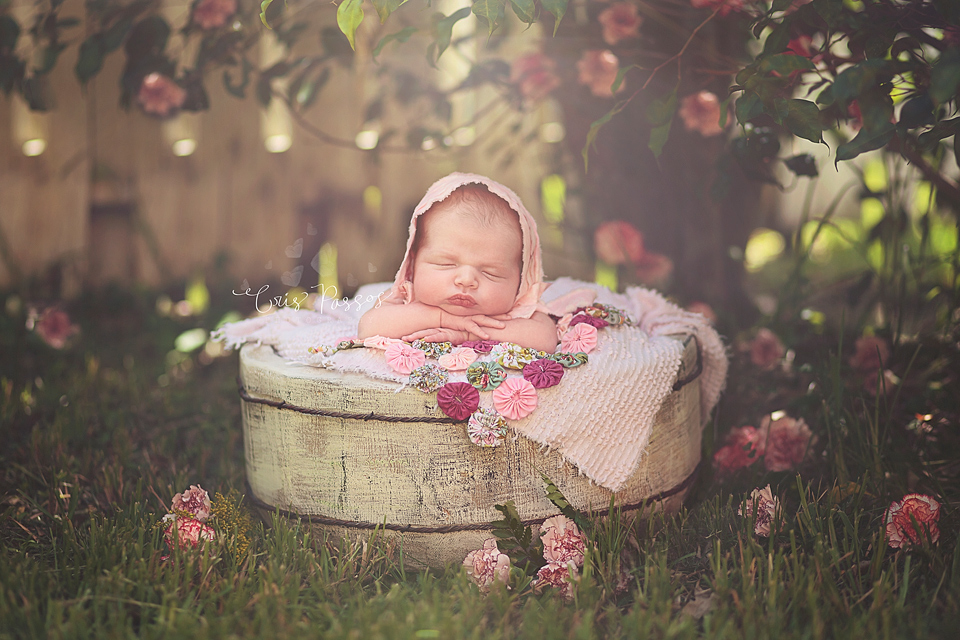
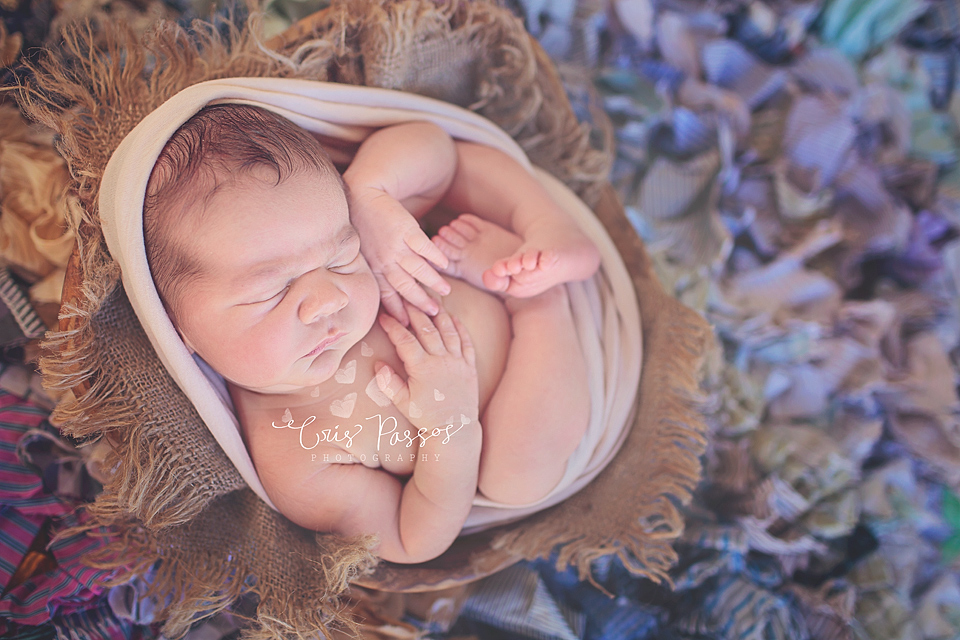
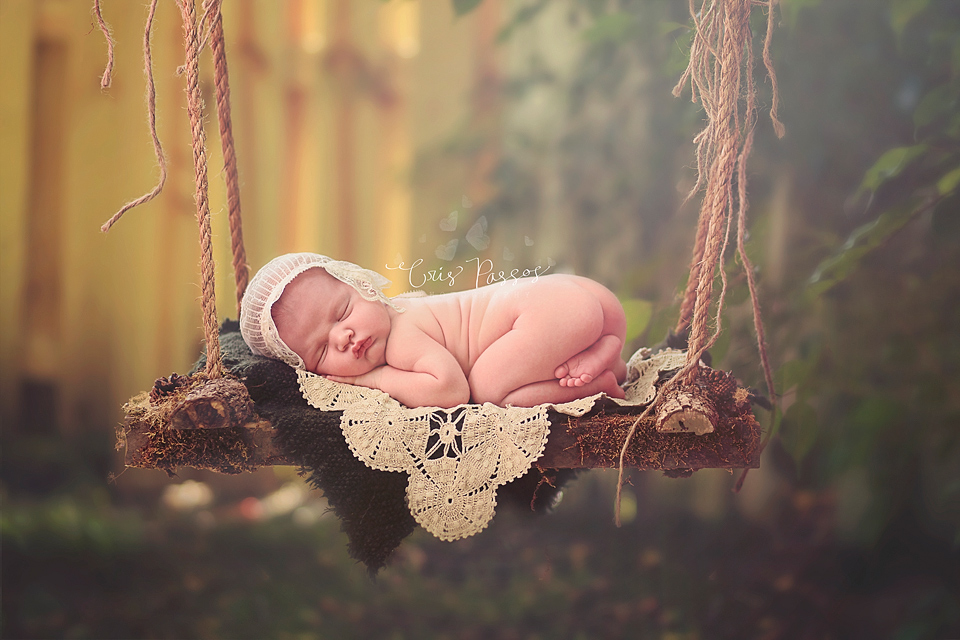
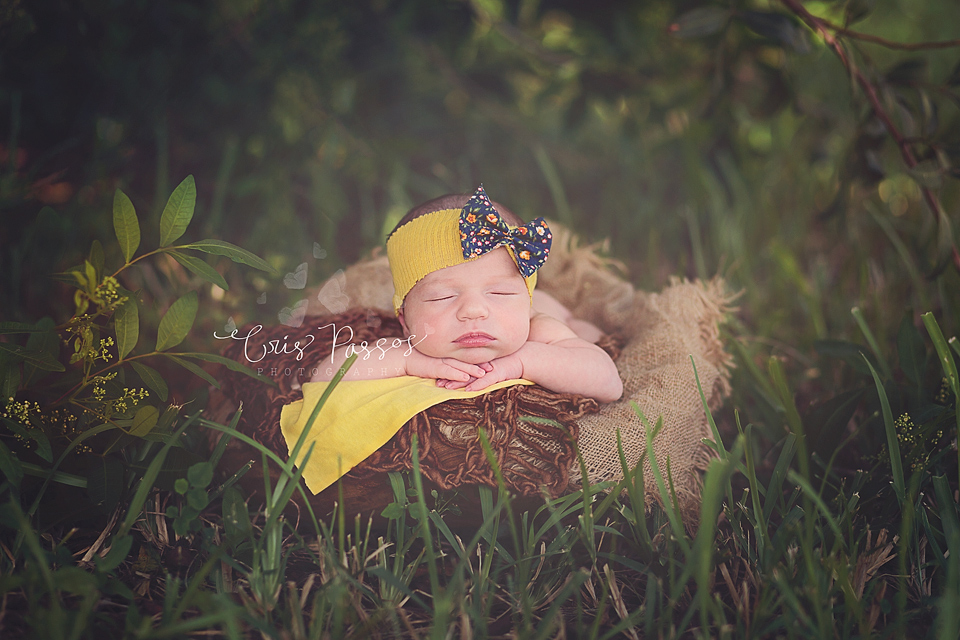
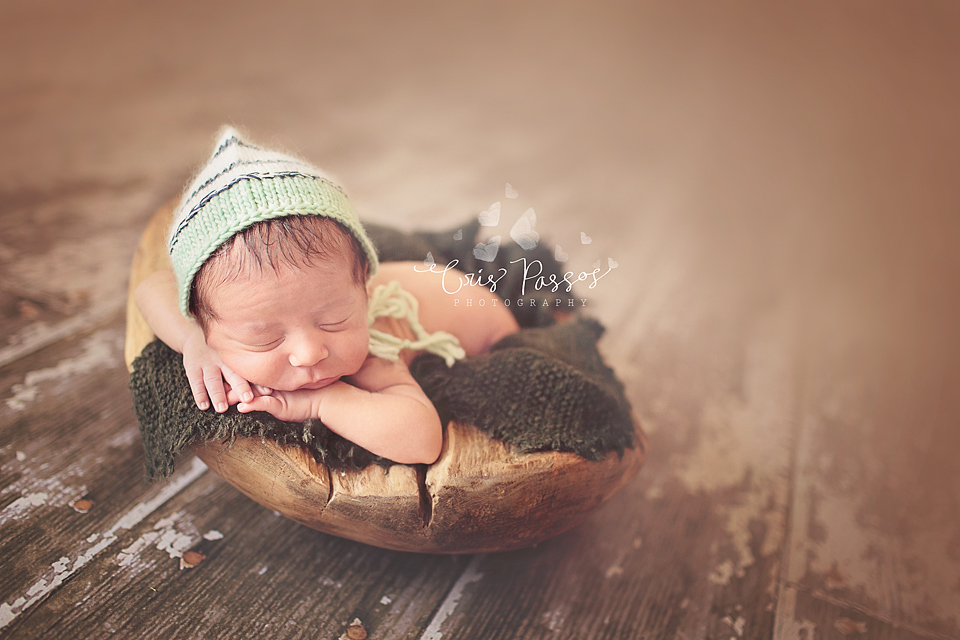
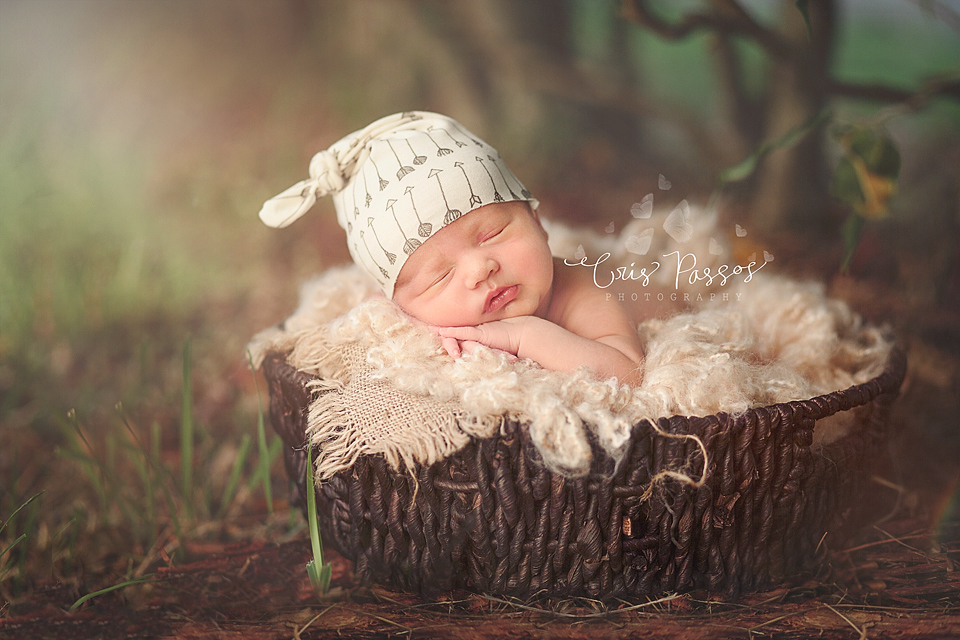
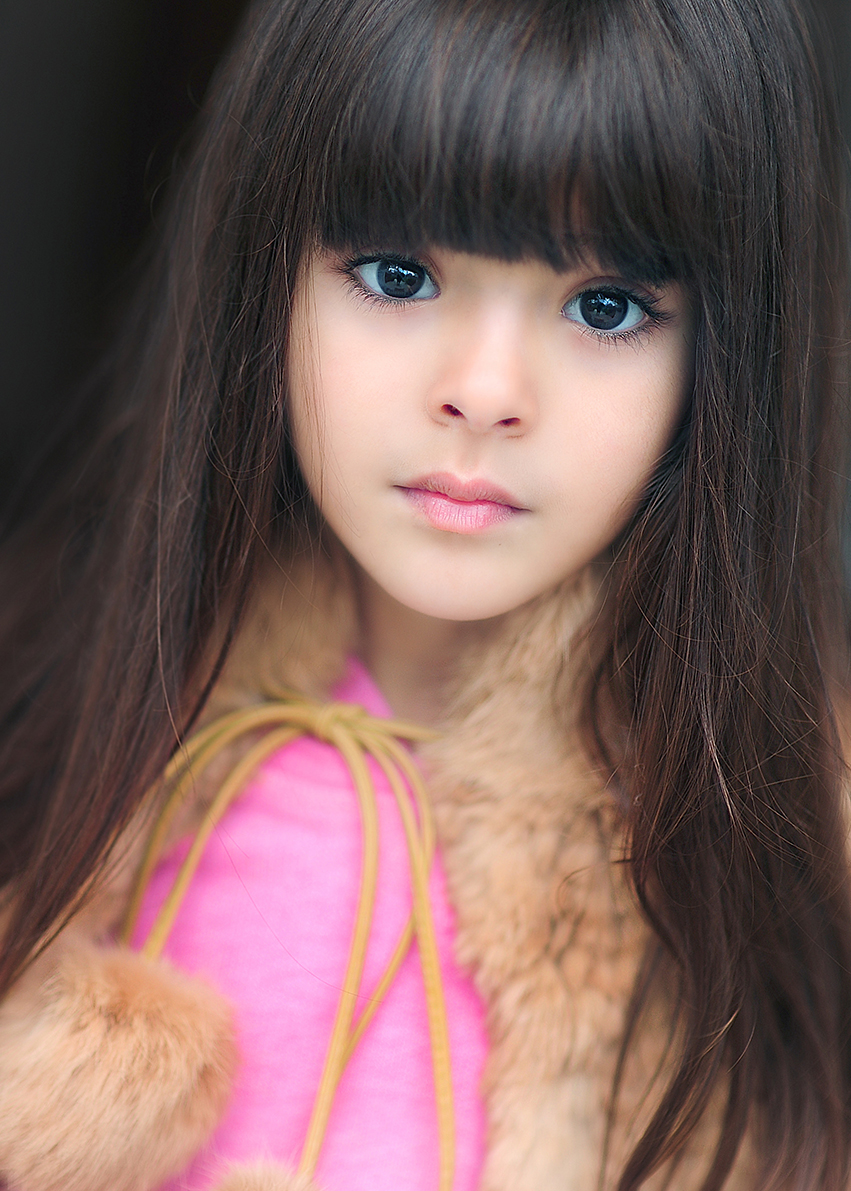
About the Artist: My Name is Cris Passos and I am a natural light photographer based in South Florida. I am specializing in Maternity, Newborn and Babies but my HUGE passion are the newborns.  I always loved photography but never thought I would be a photographer. I’ve been in this business for almost two years and this has been my passion since then. I am married to my High-school sweetheart and we’ve been together for 19 years, we have two beautiful kids: Victor is 9 and Bella is 7. I am a Brazilian girl but I move to the US in 2001 and have already lived in 11 different addresses..I am a chocoholic and a coffee lover.

Visit Cris at her WEBSITE | BLOG | FACEBOOK  pages today!


Tweet


6 Comments

Photographer Spotlight

Photographer Spotlight : Audrey Woulard

Today, we have the incredible Audrey Woulard on the blog! Take a moment to learn more about Audrey, and visit her website.  Thank you so much Audrey for taking the time to share your work with us today!

Where did your inspiration for photography begin?

Like a lot of photographers who were mom’s first, inspiration came after the birth of my children. I was hooked.

How would you describe your photography style?

Thats a hard one as I try not to pigeonhole myself into a box. If I had to describe it I would say modern and trendy.

Did you study photography in school or are you self taught?

I am 100% self taught. In fact, I taught myself off of a film camera, and a teeny tiny 1.3 megapixel digital camera.

Do you shoot Canon or Nikon, and what is your favorite lens?

I’m a Nikon shooter, and my favorite lens is my 85mm 1.4.

Do you have any tips for photographers on how to find the light?

Oh definitely! I always tell photographers to have your subjects stand in the area where you want to photograph them. The light tells the story by how it registers on their faces, body……their clothes. The vision they want should be a clear before they start shooting so when they see that light….it all clicks! Just look at the faces… the light tells you what your going to get. You can also look at foliage. Look at how the light falls on trees, the limbs, the leaves… Thats how it will fall on your subjects. I could go on and on about this!

What is the most challenging thing about photographing children?

I find children rather easy. They are so honest. My only challenge is making sure I am the main adult they are connecting with during the session. In other words, I can’t compete with mom or dad. 🙂

What is a good lesson you have learned this year in photography or in your business?

That your work must evolve with the times. If you remain the same forever, you will be left behind.

If you could encourage a new photographer in one area, what would it be?

Find a photographic style that comes from within. The way you execute the creation of images from the time you snap the shutter, until the time you hit save in your editing software should all be uniquely you…. your vision. If you are successful at doing that, you can never be duplicated. In regards to business, your brand should never be only about colors, logo, and the latest website. It should ALWAYS be about what can you…only you bring to the table. Its not about the latest and greatest product….its always and only about you. Thats the key to longevity.

What do you love most about being a photographer?

By far the best thing is the relationships Ive built. I have a very, very loyal client base. Some of these kids (who are now teens), I have been with since they were very little. Ive become involved with families that I would have not otherwise met had I not been a photographer.

Where do you see yourself in 5 years?

I’ve been a photographer for the last 10 years, and I still regularly photograph today many of the kids I serviced during my first 2-3 years in business. I am moving into being a Tween photographer 100% of the time now!

blog_separator
About the Artist:
Audrey Woulard is a 100% natural light photographer based out of Chicago. She specializes in children’s portraiture and commercial children’s work and shoots in her 2100 sq foot natural light studio in Downtown Chicago as well as on-location. She is a regular platform speaker for the WPPI conference as well as PPA’s Imaging USA.  She also hosts workshops at her studio and writes online ebooks for photographers.
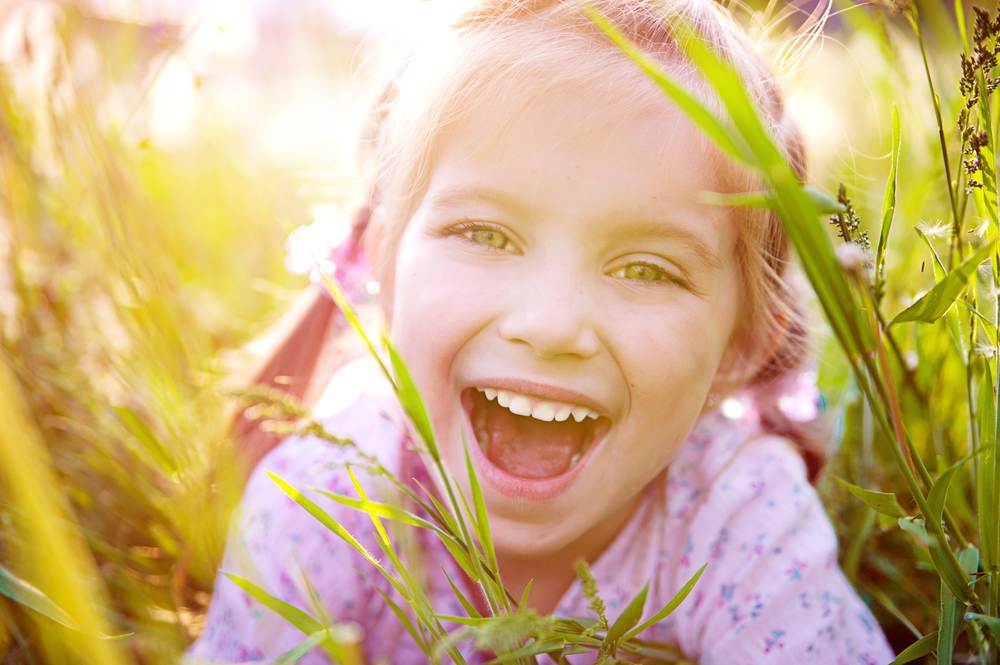
Visit Audrey at her WEBSITE |  FACEBOOK | BLOG pages today!

Tweet


4 Comments

Guest Contributor

Three Tips to Help You Take Advantage of Backlighting

by guest contributor Anna Gay

Backlighting can pose a huge challenge to photographers, and while it may seem a bit tricky to master, here are a few simple steps that can help you take advantage of backlighting, and use it to create a dreamy, ethereal look:

Expose for the Subject

The most important thing to remember when your subject is backlit is to make sure your camera settings are set to expose your subject, not the background. If you are shooting in Auto, most likely, your camera is going to expose for the bright light behind your subject, and your subject will be underexposed in the image.

Switching to full Manual mode will help you tremendously in this situation. This way, you can get the correct exposure on your subject. Since your subject is in shadow from being backlit, using Manual mode will help you get the correct exposure on them, and the light behind them will appear even brighter, resulting in that hazy light all of us love so much!

Reflectors and Fill Flash

Using a fill flash is a quick way to achieve the correct exposure on your subject, but keep in mind that you may want to use some type of diffuser on your flash in order to prevent harsh shadows on or around your subject. The amount of flash you use will depend entirely on how backlit your subject is, but in most cases, you will not need a lot of light from your flash in order to properly expose your subject. The key is to get just a tiny bit of flash on your subject so that the light appears natural.

If you are unsure about using a flash, a classic, silver reflector will work, too. The challenge with reflectors, though, is that you will need to position them perfectly so that they bounce the light onto your subject. This can sometimes be tricky, and you may need either a stand for your reflector, or an assistant to hold the reflector for you.

Post-Processing

While getting your shot exposed properly in-camera is the ultimate goal, sometimes, it doesn’t always work out that way. While there are many different ways to correct the exposure in post-processing, here are a couple of quick-fixes:

  • In Lightroom – Using a Graduated Filter to increase the exposure on your subject is useful. Also, doing an overall adjustment to the Shadows and Blacks sliders will brighten your subject, while maintaining the bright backlighting
  • In Photoshop – In your Levels adjustment panel, increasing the exposure on the Shadows and Midtones will brighten your subject.

Keep in mind that, when adjusting the exposure on your subject, you do not want to push the levels too far, as this will result in the dreaded digital noise issue, which may look fine on your monitor, but once the image is printed, the digital noise will become painfully visible. Shooting in RAW is also a good practice, as this will reduce a good amount of digital noise in your shadows, allowing you to make more adjustments to the exposure.

blog_separator

About the Author: Anna Gay is a portrait photographer based in Athens, GA and the author of the dPS ebook The Art of Self-Portraiture. She also designs actions and textures for Photoshop. When she is not shooting or writing, she enjoys spending time with her husband, and their two cats, Elphie and Fat Cat.


Tweet


1 Comment

Photographer Spotlight

Photographer Spotlight: Summer Murdock

Today, we are so thrilled to share the amazingly talented Summer Murdock with you.  She has an ability to capture children in a way that is so natural and beautiful!  Learn more about Summer in our Photographer Spotlight and visit her at her website Summer Murdock Photography.  Thank you so much Summer for sharing your work with us today!

Where did your inspiration for photography begin?

I have always loved imagery since I was a little girl. I used to walk around the neigborhood with my little wind up 35 mm or my parents polaroid taking picturesof whatever I could. I took a film class in college but the dark room was very tedious for an impatient girl like myself. Like many photographers these days, I didn’t get a 100 % grip on manual mode until after the birth of my second child. I have pretty much been obsessed ever since then. I have always been inspired by the light and this gorgeous world we live in but when I had kids something clicked. The trifecta of inspiration for are my kids in pretty light discovering the world around them. Childhood is pure magic to me and I do my best to create images that convey that!


How would you describe your photography style?

Authentic and full of light and life.

Did you study photography in school or are you self taught?

I took a B&W film class in college and a Photoshop 5.0 class at a local community college while I was pregnant with my first child. Everything else I learned by scouring books, online tutorials, and hours upon hours of experimenting and practice.

Do you shoot Canon or Nikon, and what is your favorite lens?

I shoot a Canon 5D Mark II. I only have four lenses. I use them all pretty regularly but my 24-70 is my most used lens. It’s perfect for the way I shoot because I am able to capture fast moving kids, zoom wide to get the whole scene as well as take nice flattering portraits at 70mm. If that lens went down to 1.8 it would probably never come off my camera. A girl can dream right?

Do you have any tips for photographers on how to find the light?

Light is everywhere. When I first started this journey, I was told that certain types of light just weren’t good. I have definitely learned that all light is not equal but that with a little bit of vision and creativity you can take a cool image in almost any kind of light. You just have to think outside the box a little bit. I pay attention to the light pretty much every waking hour. I can’t turn it off now. It has just become part of how I see. My advice is to simply pay attention to the light and be conscious of it and practice, practice, practice in all kinds of light.There really is no magic bullet in finding the light.

What is the most challenging thing about photographing children?

My number one goal when working with children is to get authentic images, so for me it has been letting go and letting them sort of tell me how they want to be captured. All kids are different. You can’t fit them all into one box. You have to make them feel comfortable to be themselves. I just try to let the kids be kids. That requires me to be REALLY flexible. I can’t get stuck on getting this one shot I had in my head. I have to take cues they give me and roll with it. Some kids are really easy and other make you really work for it. Just encourage them to play and play right along with them capturing them all the way though.

What is a good lesson you have learned this year in photography or in your business?

This business can be all consuming. I have learned a lot about balance this year. I can’t do it all. I am a Wife, and a Mom to four awesome kids who are my priority right now. I have learned (or am trying to learn) to be more present with them. My emails and Facebook comments can wait for responses sometimes. I have set times for work and I try really hard to stick to it. This lesson is one I am still learning and is my biggest challenge right now!

If you could encourage a new photographer in one area, what would it be?

Shoot what you love. Make sure you leave time to shoot for yourself. If you get too bogged down with client work, you will likely get burnt out and forget why you love photography in the first place. Tune out all the noise and find the place where you can find your own voice and shoot with vision. Shoot what speaks to your soul. That’s when the magic starts to happen.


What do you love most about being a photographer?

To me being a photographer is a passion and it’s magic. It allows me to pause time in a sense. Childhood is so fleeting. Kids grow up and change so much and so fast. When I am shooting my own children I almost always have the thought in my head “I never want to forget this moment”. When I photograph my kids, it’s really an expression of my deep love for them. I shoot clients this way too. I focus on creating images that will forever preserve memories of this particular stage in these families lives. Authentic, interactive, visual memories that hopefully will last a lifetime.


Where do you see yourself in 5 years?

You know 5 years is a long time. One thing I have learned is that you just can’t predict the turns in the road that life can take but I really see myself continuing down the road I am now following. I hope to continue to strengthen my vision as an artist and be able to continually learn and grow. I feel so blessed to be able to do something that I love so much. I’ll just take life as it comes to me. Life always seems to be an adventure and a challenge that never quite turns out like you thought it would. I’ll just keep plugging along and trying to be the best human being, mother, and artist I can.

blog_separator

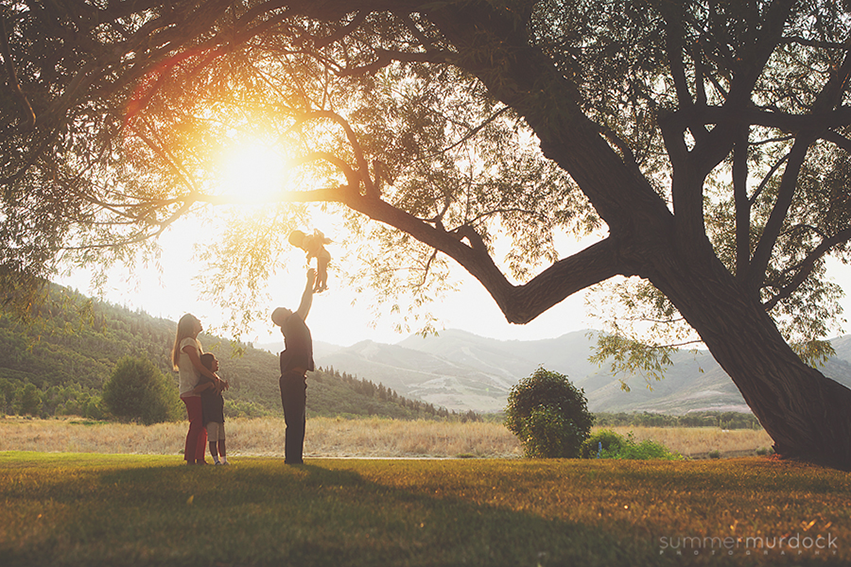
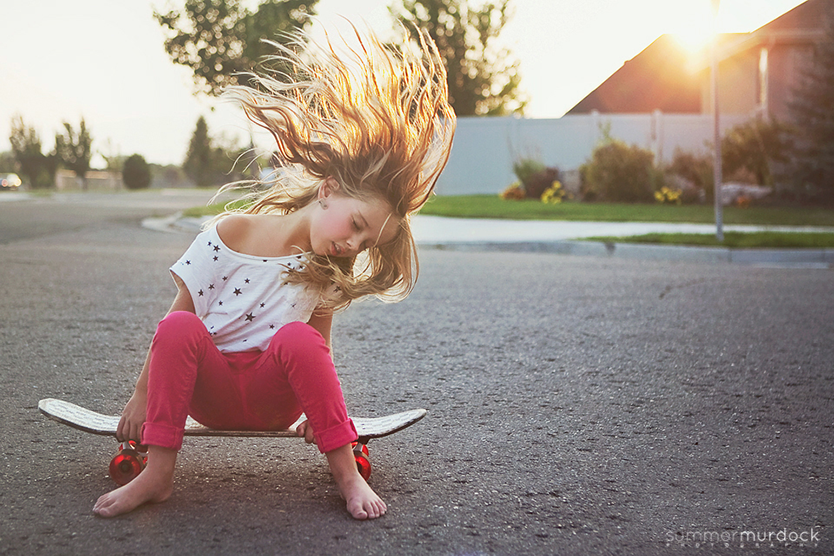
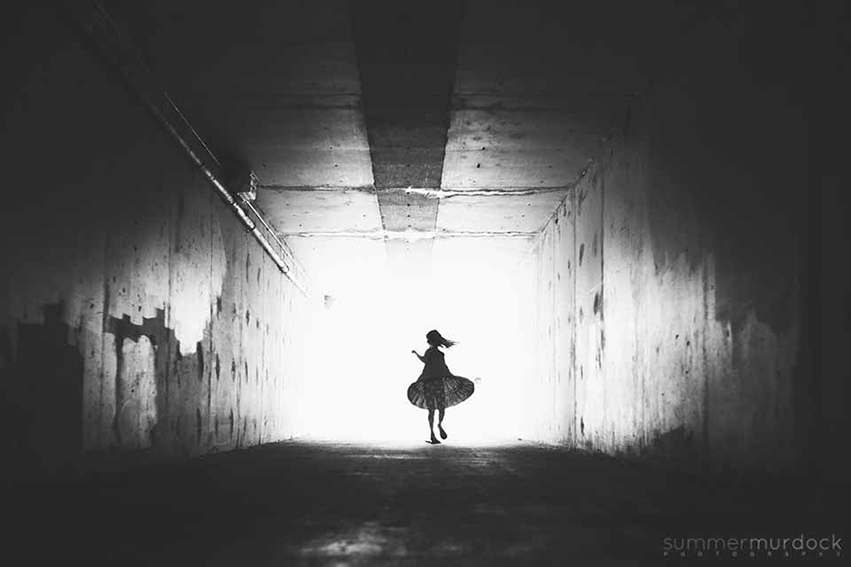
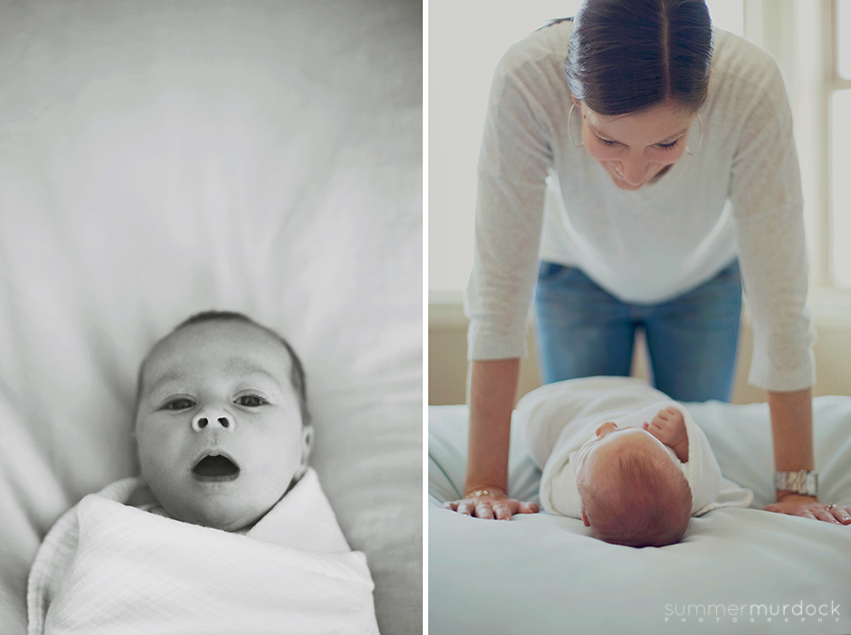
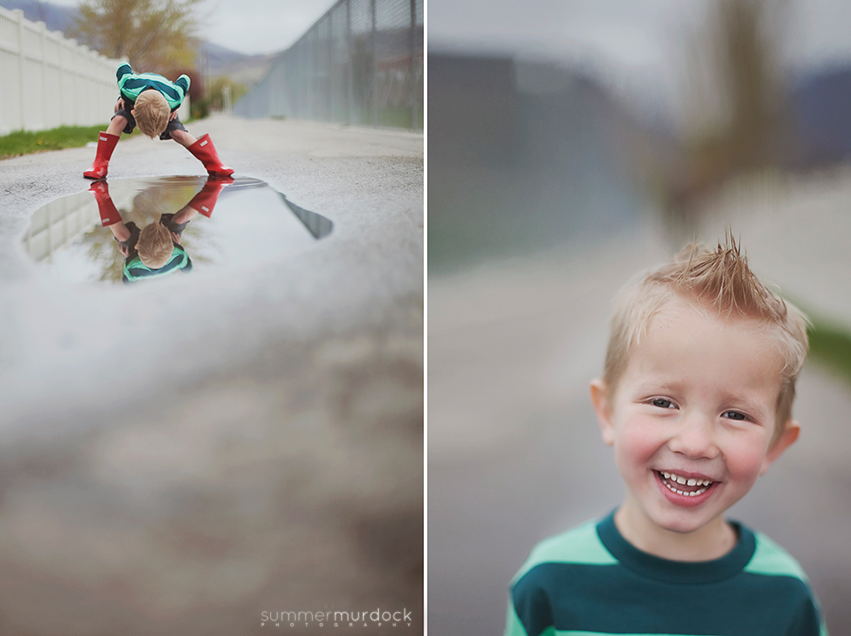
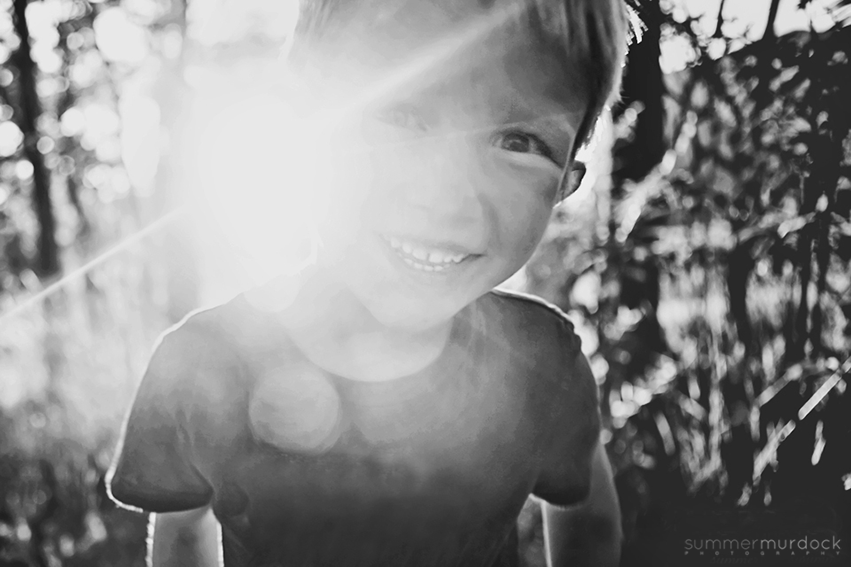
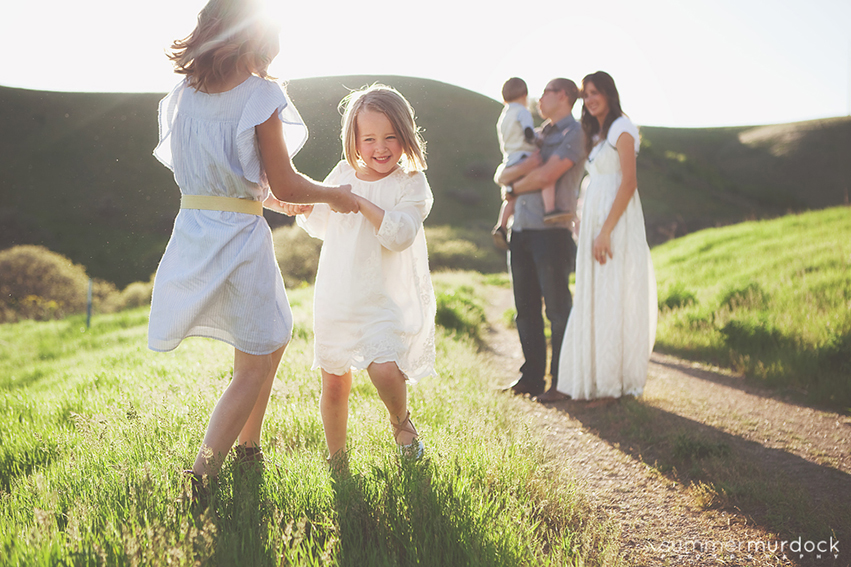
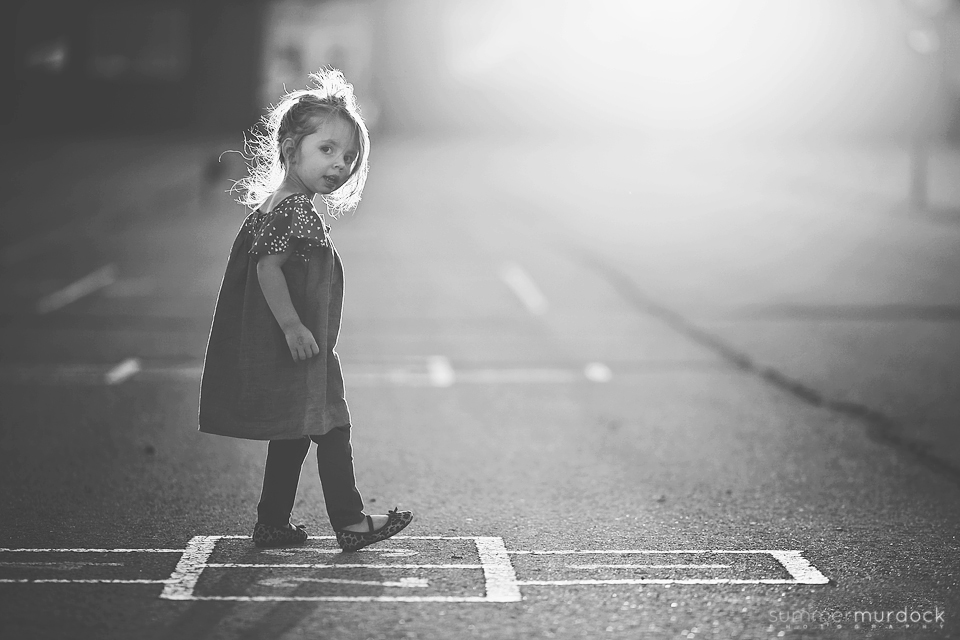
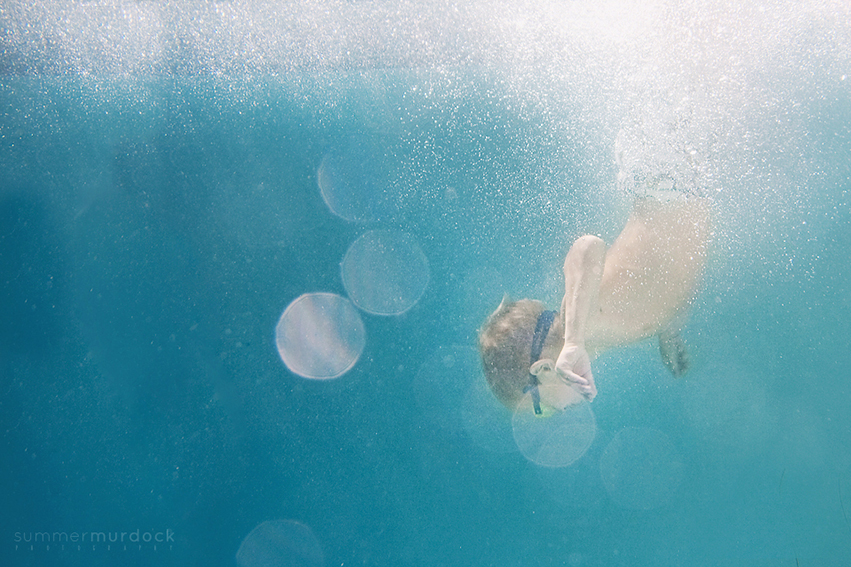
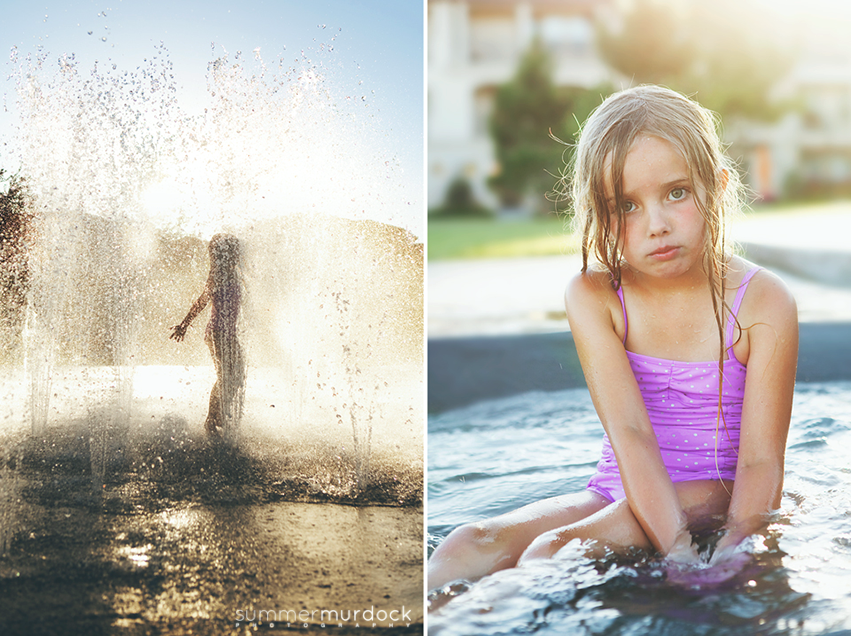
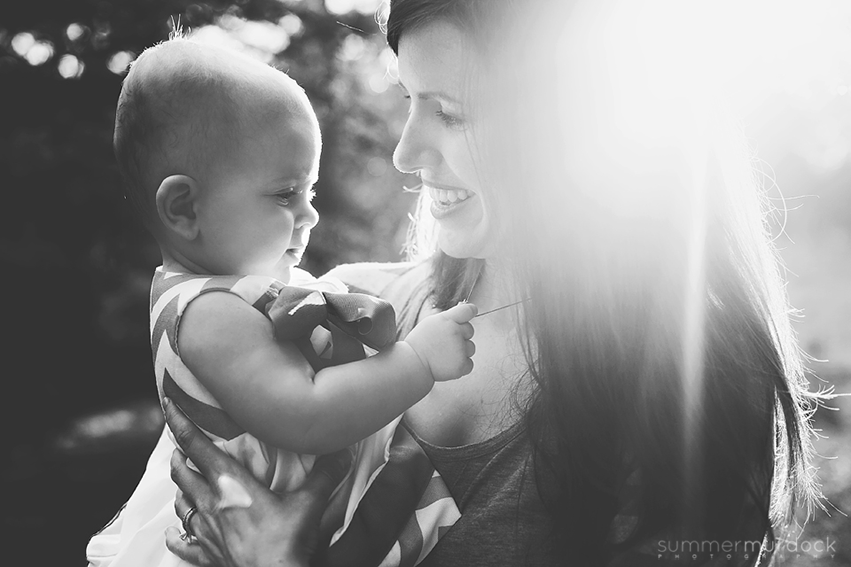
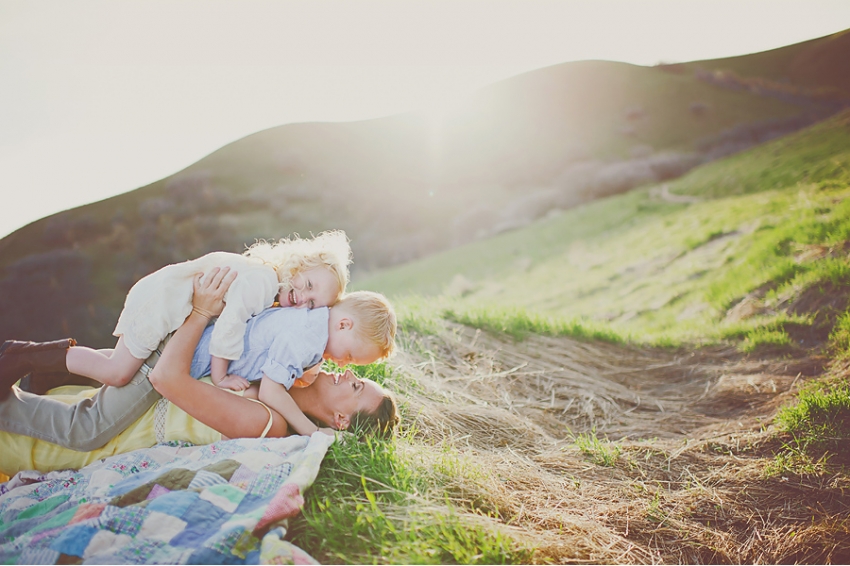
About the Artist:  I’m Summer Murdock and i’m an on location, natural light photographer located in the Salt Lake City, Utah area. I adore my husband, my four kids, Diet Coke, new places, Bit O’Honey, sunshine and pretty light, photo gear, reality tv, instagram, the beach, pop corn, mid century modern anything, quirky movies, bike rides, a good book, starting new projects (that I often don’t finish), and being outside exploring whenever possible. Life is good and I am blessed!

Visit Summer at her WEBSITE |  FACEBOOK | TWITTER | INSTAGRAM | PINTEREST pages today!

Tweet


1 Comment

Guest Contributor Post-Processing

Three Methods for Toning Black & White Images in Photoshop

by guest contributor Anna Gay

In Photoshop, there are many different ways to color tone your images, and you can tone your images with any color that suits your preferences. In this tutorial, we will look at three methods for toning a black and white image.

Method #1:  Hue/Saturation

This is the image we will be working with:

Once you have opened your image in Photoshop, create a Hue/Saturation Layer

Check the Colorize box. Then, move your Hue slider until you find the color you would like to use (the color can be any color you like, but for this tutorial, I am using a warm tone). You can also adjust the Saturation to make the color either very subtle, or very saturated.

As you can see here, I went with a very subtle warm tone.

Method #2:  Photo Filters

Create a new layer by selecting Layer>New Adjustment Layer>Photo Filter

With Photo Filters, you can either choose from a preset list in Photoshop, or you can choose your own color. I am using Warming Filter 85 here. Photo filters are a bit more intense than Hue/Saturation, so I drastically reduced the Density to 28%. I also felt as though the filter made my image too bright, so under my Layers tab, I set the Blending Mode to Multiply, 76% Opacity to restore the highlights. This is the result:

Method #3: Textures

Another great way to tone your images is by using textures. Not only do textures provide color, they also provide depth and visual interest in your images. This is the texture I am going to use:

Drag your texture onto your image, then use the Move Tool (V) to stretch the texture to fit your image. Two popular blending modes for textures are Overlay and Soft Light. For this image, Soft Light created more haze than I wanted, so I went with Overlay, 50% Opacity.

Here is a composite of all three images so you can see the differences between each type of editing:

About the Author: Anna Gay is a portrait photographer based in Athens, GA and the author of the dPS ebook The Art of Self-Portraiture. She also designs actions and textures for Photoshop. When she is not shooting or writing, she enjoys spending time with her husband, and their two cats, Elphie and Fat Cat.

Tweet


3 Comments

Business & Marketing Guest Contributor

Keeping the ‘Mini’ in Your Mini Sessions

by guest contributor Nicola Toon

Have you ever fallen into the mini-session trap? Lots of us have. We start off thinking we have found the world’s best way to attract new clients and boost our income. We soon realize that the very strategy we thought would bring us more business is stealing it away. Our minis are stopping clients from booking full sessions. Never fear, there is a way out. With some careful strategizing, minis truly can be the business boosters we always intended them to be!

The operative word here is ‘mini’.  Mini sessions should be pint sized, a sampling.  They should be the bait that gets clients in the door for the big kahuna – a full sized session with totally awesome you!  When used effectively mini sessions can work FOR you and not against you.  They should be the appetizer to your main course and your main course is a full sized, full paid session.

Here are a few tips on how to ensure that you are getting the most out of your mini sessions and how to offer them in a way that makes sense to both your business and your clients and keeps them coming back for more.

Don’t serve dessert for dinner – Take mini sessions off of your regular menu!  Keeping your mini sessions to a special offering only a few times a year is a great way to ensure that your mini session business will not encroach on your regular business.  Try running mini sessions during seasons that are typically slow.  It’s a great way to keep your mind fresh and your business active during those dreary winter months.

Kitsch is Key – When running mini sessions try to think of a fun theme or work with an uber creative set.  A themed mini session is a great way for your clients to have fun and playful photographs and also for them to get a taste of what working with you is like.  Lets face it a themed mini session is never going to replace those classic family photographs that your regular clients receive by working with you.   Mini sessions should never be a substitute for a full sized session, but merely a fun add on!

Short and Sweet – Mini sessions should be exactly that.  Mini.  Keeping your mini sessions to a strict time limit of 15 – 20 minutes keeps the workload down and sets clients expectations.  Stick to your time limits and only provide clients with 5 -10 images from their session.  Running your mini sessions over the course of one or two days with appointments booked back to back will help you stick to your timeline.  A five or ten minute buffer between sessions is always a good idea incase of an unsure toddler or a client that is running late.

Marketing Machine – Choose your mini sessions wisely.  A well-timed mini is key!  Running mini sessions at Valentines Day not only brings some business in the door during a typically slow time of the year.  It also works to your advantage as a killer marketing tool.  Try providing a watermarked set of Valentines cards for your clients classmates as part of your fee.  Now you have just sent out hundreds of marketing pieces to your target market – local moms with young children!


Why buy the cow when the milk is free?  –  You don’t need to give away the farm.  When structuring your mini sessions try offering a complimentary print instead of digital files.  If you are offering digital files, instead of providing clients with five high-resolution files, try offering a single file instead.    Lets not forget that you are running a business and at the end of the day you are trying to earn some money.  Offer your clients a promotion that is specific to your minis.  A canvas at 30% off, a print credit towards the purchase of additional prints, a personalized ornament with those adorable Christmas photographs.  The possibilities are endless.  Get creative and give your clients a reason to get excited and a sure fire way to ensure they walk away with a tangible product that they can enjoy for years to come.

blog_separator

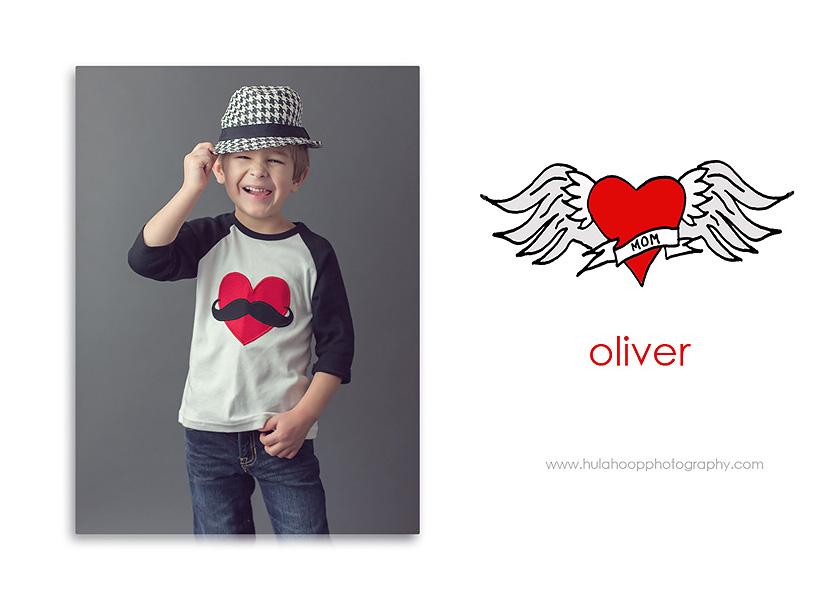
About the Artist: Nicola Toon is the owner of Hulahoop Children’s Photography, based outside of Toronto, Canada, where she lives with her husband and three young children. Nicola is a natural light photographer whose lifestyle centric work has a playful quality and editorial flair.  She strives to tell the stories of her clients through her imagery and find the whimsy and beauty in the everyday moments of their lives. Nicola’s work has been featured in Professional Photographer Magazine and Chic Magazine.

 WEBSITE | BLOG | FACEBOOK


Tweet


11 Comments

Guest Contributor Post-Processing

Black and White Conversion

Have you ever converted your images to black and white in Photoshop, only for them to lose a lot of their luster in the process? If so, here are a few steps you can take to bring them back to life. The steps outlined here will work in Photoshop Elements, as well as Creative Suite.

Here is the color version of the image we will be working with:

Now, there are many ways to work with B&W in Photoshop. The fastest way is to go to Image>Adjustments>Black and White. You will then see this screen:

For the sake of keeping it simple, in this tutorial, we won’t go into the RGB and CYM channels. Instead, just press OK and go with the values that Photoshop assigns to your image.

This is what the image looks like after it is converted to B&W. While it isn’t too bad, it could look better. The highlights are a little bit blown, and it could use a bit more contrast.

There are a few steps you can take to enhance your image at this point. First, create a new Curves layer by selecting Layer>New Adjustment Layer>Curves. You will then see the above histogram. If your image is too bright, like mine, gently drag the center of the diagonal line down, to the right, until you are happy with the results. The goal here is to keep your highlights as bright as possible, while still being able to see details in the highlights.

Now, we can fine-tune the shadows, midtones and highlights even further by creating a Levels adjustment layer. Select Layer>New Adjustment Layer>Levels, and you will see this:

The sliders highlighted above control your shadows, midtones and highlight, respectively. Most likely, you won’t need to adjust them much.

As you can see above, the most significant change was to the midtones, while the shadows and highlights were barely adjusted. This is because I did not want my shadows to be too dark, or to lose detail in my highlights by making them too bright.

Here is what we’ve done to the image so far, but I’m going to make one more adjustment to it using Brightness/Contrast by selected Layer>New Adjustment Layer>Brightness/Contrast.

I still felt as though the image was too bright, so I took down the Brightness to -15 first, but, when I did that, I lost some contrast, so I boosted my Contrast slider to 6.

Above is a comparison of the image before, and after I finished editing.

So, to recap: Curves, Levels and Brightness/Contrast and extremely useful in editing B&W images in Photoshop. As with any type of photo editing, the amount of adjustments you make will vary from photo to photo, so be sure to experiment if you are new to editing in Photoshop. Also, don’t be afraid to try pushing the values further than I pushed mine in this tutorial! You may find that, for some of your images, really dark shadows and bright highlights work better than trying to balance the two.

blog_separator

About the Author: Anna Gay is a portrait photographer based in Athens, GA and the author of the dPS ebook The Art of Self-Portraiture. She also designs actions and textures for Photoshop. When she is not shooting or writing, she enjoys spending time with her husband, and their two cats, Elphie and Fat Cat.


Tweet


Leave a Comment

Business & Marketing Guest Contributor

First Year Business Tips You Can’t Afford Not to Know

by guest contributor Ling Wang

Many of us, prior to having our own photography business, worked for someone else.  At the “other” job, someone else took care of the books, we handed in receipts and got reimbursements, taxes were taken out of our paychecks.  At the end of the year, we filed our W-2’s, and we were more or less done.  No major meltdowns during tax season.  Easy.

Maybe I can’t speak for everyone, but that was how my life operated until I started my own photography business.

It’s not the same anymore.  Having a photography business is way more than photographing clients and editing photos.  After months of drowning in paperwork, and swimming in the sea of first year business mistakes, I sought help and finally got some answers.

Here are some solutions that I discovered that may also work for you:

1)  If you’re legally in business, strongly consider hiring an accountant/CPA to do your taxes.
Every year tax laws change, and it’s nearly impossible to keep up with them unless it’s your profession to know all the details.  During my first year of business, I thought sales tax was filed yearly instead of quarterly.  Big mistake.  Thankfully, I had been collecting sales tax and saving it, so I paid it off without problems once I discovered my mistake.  If the CPA I hired eight months after I started my business hadn’t told me so, I would have been in deep trouble. Each state varies in sales tax laws, but you need to figure out what that is.   You don’t want to owe the government money.  Currently, my CPA notifies me exactly when I need to file, how much, I hand over my books to her, and it gets done.

2)  Keep track of your mileage.  You might be saving thousands.
Did you know that the gas money you spend driving to and from photoshoots is actually tax deductible?  In 2013, IRS.gov states that you can deduct “56.5 cents per mile for business miles driven.”  Let’s pretend that you drive 5000 miles this year for your photography business ($5000 x .565 = $2825).  That means you can deduct $2825 from your mileage alone, if you keep track of every one of those miles.  That’s money that you can spend on vacation, your kid’s education, or new gear.  If you are app savvy, I recommend Trip Cubby (http://appcubby.com/trip-cubby/).  If not, manually write down your starting and ending miles, or use google maps.

If you drive to any business related activity, your mileages can be deducted: location scouting, photoshoot, pre-session consultations, ordering sessions, going to and from the bank, driving to the store for office supplies, etc.

3)  Organize your client folders on your computer, and stick to your system religiously.
Let me show you my system, which I started to implement towards the tail end of last year.  It has saved me so many headaches, and now I no longer scramble to find my files.

Notice how I highlight the month that I’m in, so I don’t have to read to get to my sessions.  Efficiency is key.
I highly recommend organizing your system by month because of the next step, which is organizing your receipts and expenses.

4)  Scan the loose receipts and have a binder for your expenses.
Loose receipts are the bane of my existence.  They pop up in the most random of places, my cat likes to chew on them, and they’re as hard as heck to file because they keep falling out of the files.
So now I tape them to a piece of paper, scan them, and if I happen to lose the original, at least I have backup.  I file them with the month, and if it is session related, I also create a duplicate for the receipt folder of the client.

My physical expense binder is organized by the month, and has expense receipts from paypal, labs, and various purchases.  Diligent photographers also make copies of receipts for each client folder, and log how much was spent for each specific session.  I want to do the least amount of bookkeeping possible, so I just track by month.  If I ever need to double check, I have the files on my computer to tell me which client I photographed which month. Every month, the expenses also get inputted into a spreadsheet.

Why keep track of expenses you ask?  They’re tax deductable too, and who doesn’t like that?

5) Save 25-30% of everything you make.
It’s very important that you don’t spend every cent you make because you might regret it when tax season comes around.  Even with all the deductibles, you won’t know how much you owe the government until your CPA does all the calculations.  Always reserve 25-30% of your earnings, so that in case the government asks it, you can write a check instead of having a financial crisis.

If you keep up with your expenses, you shouldn’t have to pay such hefty tax percentages from your gross.  If you save up well and don’t have to pay out all of it by the end of the year, it just means that you get a huge bonus for yourself after taxes are done.   That’s money that you’ve saved for something good, like the new camera you’ve always wanted, or the workshop that you’ve always wanted to go to.

blog_separator

About the Artist: Ling Wang is a portrait photographer from Houston, TX with a penchant for travel, music, and the creative arts. Before photography, she was a musician and recording engineer. She discovered her love for photography while photographing bands and artists in college. Currently, she is also mentoring a few photographers on how to launch their business legitimately.

Visit Ling at her WEBSITE | FACEBOOK | TWITTER | PINTEREST pages today!


Tweet


3 Comments

Business & Marketing Guest Contributor

Set Up a Custom Email Address

In my job, I get to chat with a lot of photographers from all over the world. It’s mainly by email and so I am privy to a unique identifier. Something that makes me cringe just a little is when I see that their email address is something like thebestphotographyever@gmail.com or amazingphotography@yahoo.com or even yourimages@comcast.net.

There is no reason for this! You can have a personalized email address and most likely, it won’t cost you a dime!

To begin with, let’s start with what you need.

1) Your Domain Name
2) Access to Your Hosting Company

That’s it! Of course, this can be more difficult for some and that’s okay. If you don’t have a domain name or hosting for your website (i.e. your blog is at wordpress.com or blogspot) then this can be motivation to get you going! The couple bucks a month will immediately lend you prestige and boost your professionalism which can help you book clients.

It’s super simple, only a few steps!

Now, I use Tiger Tech as my hosting. It’s a small company and they have amazing support and servers, but you can use whomever you want! Host Gator and Go Daddy are two big names. Chances are, your hosting and domain name are all through the same company as well.My steps are going to be using Tiger Tech, but I’m including links on how to do this for Host Gator and Go Daddy as well! For Blu Domain, click on this link and scroll down to “How do I set up my E-Mail addresses? “

I log in and find the email option right at the beginning. Talk about super easy!

Then are the options for what you want to do with emails. You want to set up a new one so choose .

Bam! You now have an email address! The next step is to add it to wherever you want to read those emails. There are steps on how to check it on your smart phone, desktop, even have it read through your Gmail account, all available on your particular web host’s help page.

So now you don’t have an excuse! But if you are still nervous or are confused even now, contact me! Email me and I can help you out. I want you to be successful and having a real email address is a great way to start.

blog_separator

 About the Author: Kathy is a wife, mother, photographer and helper based out of Oregon. She has a talent with computers and technical things, even to the most technophobe. More than anything, she wishes everyone would be successful and able to do what they love and truly believes in the power of the individual.

WEBSITE | FACEBOOK | PINTEREST


Tweet


5 Comments

  • « Previous Page
  • 1
  • …
  • 13
  • 14
  • 15
  • 16
  • 17
  • …
  • 30
  • Next Page »

Popular Categories

You might also like

Love of Lifestyle Photography Workshop by Ashley Spaulding

Love of Lifestyle: The Fundamentals of Lifestyle Photography

The Lightroom Lab: An 8-Week Course to Mastering Lightroom

Pretty Forum for Photographers

Let Them Eat Cake—A Marie Antoinette Inspired Shoot

Tips to Keep Your Images Interesting in Limited Surroundings

Natural Light: The Art of Finding Magical Light

Copyright © 2025 · Divine theme by Restored 316

Copyright © 2025 · Divine Theme on Genesis Framework · WordPress · Log in

×
Never miss a thing!
Sign up for Pretty Forum Newsletters and get all the latest news on our upcoming:
  •  
    ​Workshops
  •  
    Celebrity Mentors
  •  
    Free Downloads 
  •  
    Photo Challenges
  •  
    Vendor Discounts
  •  
    and much more...