• Pretty Forum
  • Pretty Presets
  • Pretty Actions

Pretty Forum

Online Photography | Forum | Workshops | Tips | Tutorials | Classes | Business | Courses | School

  • Home
  • Blog
  • Enter Forum
  • Workshops
  • About
    • Meet the Team
    • FAQ ABOUT JOINING THE PRETTY FORUM
    • WHY JOIN THE PRETTY FORUM
    • Testimonials
    • Privacy Policy
    • Site Terms and Conditions of Use
  • Advertise
  • Contact
  • Join

Guest Contributor

21 Creative and Surefire Ways to Make More Money

By Guest Contributor Alex Beadon

So you run a photography business. But let’s be honest here – it’s not really much of a business, is it? You only have a handful of clients, and you’re definitely not making enough money to support yourself full time. You feel disappointed in yourself, and constantly find yourself wondering what you’re doing wrong. You’re following all the “rules”, yet the same things that are working for other successful photographers simply AREN’T working for you. Ahhhh!

Not to worry – we have all been there, and I’m going to explain exactly what you need to do.

Have you ever seen a hair tutorial online, copied it step by step, but your final hair style looked nothing like what it looked like online? And then you realize that your short, frizzy hair simply can’t do the things that her long, thick hair can do? It doesn’t come out the same. The things that work for her hair, simply aren’t working for your hair. Because your hair is different.

Here’s the thing – business is a lot like hair. In the same way that different people’s hair will react differently to the same products and styles, your business will react differently to the same business formulas that may be working for other business owners.

Do you really want 21 surefire ways to make more money?

The only way you can do that is to figure it out for yourself. It sounds simple, doesn’t it?

Here’s what you forget – YOU ARE INCREDIBLY INTELLIGENT. Yes, you. All on your own. You have a brain. Use it.

Not only are you incredibly intelligent – but YOU are the only one who knows the DNA of your business!

Therefore YOU are the best person to go to for advice when it comes to your own business. Because you know your business.

Honestly – when was the last time you sat down by yourself and brainstormed ideas that will pro-actively make your business more money?

You are a creative. Why can’t you use that creative power for the benefit of your business?

Sue Bryce, one of my favourite photographers, once mentioned the fact that we could all easily find ten creative ways to move across a room. 1) hop across the room. 2) slither across the room. 3) cartwheel across the room. 4) hopscotch across the room. 5) do the macarena across the room. 6) crawl across the room. 7) zigzag across the room. 8) walk like an egyptian across the room. 9) dance across the room. 10) walk backwards across the room.

So why do we make it so hard to come up with ten creative ways to get more clients? Why do we make it so hard to come up with ten creative and surefire ways to make more money?

Right here, right now – stop whatever it is that you are doing. Grab a pen or paper and write down 21 creative and surefire ways your business could make more money. Take FURTHER action by sharing your ten favorite ideas in the comment section below! Not only will this help inspire you, but you will help inspire others! And inspiration makes the world go round!

Rock on, my friends!

blog_separator
About the Author:  Alex Beadon is a creative portrait photographer, blogger, and creator of The Inspired Store. Her number one mission is to inspire those around her to creatively live an inspired and passionate life. That means doing what you love and loving what you do every step of the way.

Visit Alex at her WEBSITE |FACEBOOK pages today!


Tweet


12 Comments

Guest Contributor

Learn to See the Extraordinary in the Ordinary

by Guest Contributor Valérie Jardin

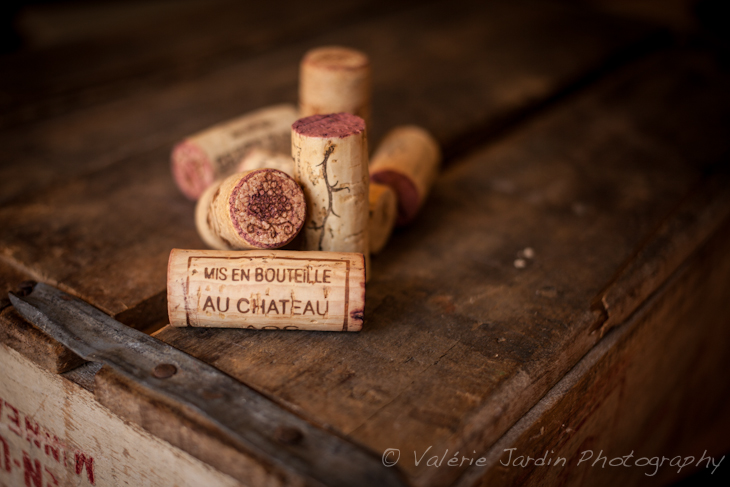
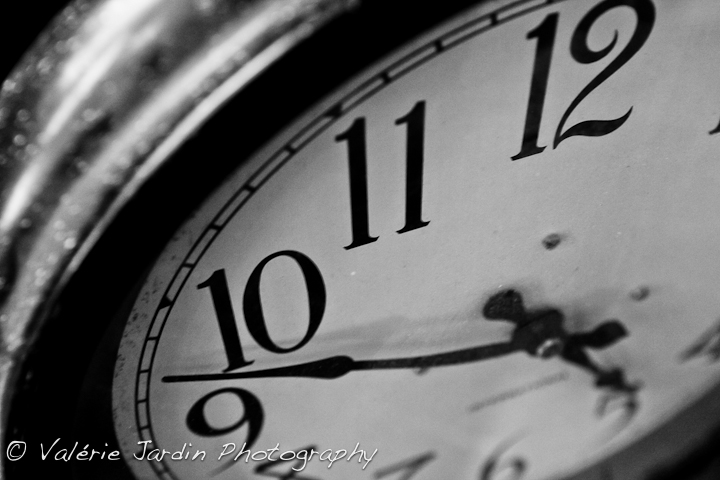
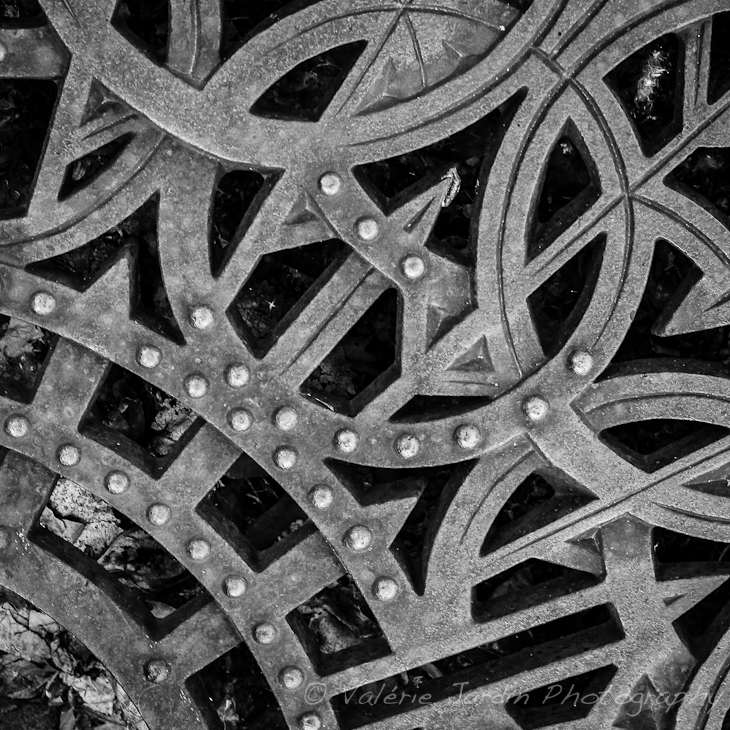
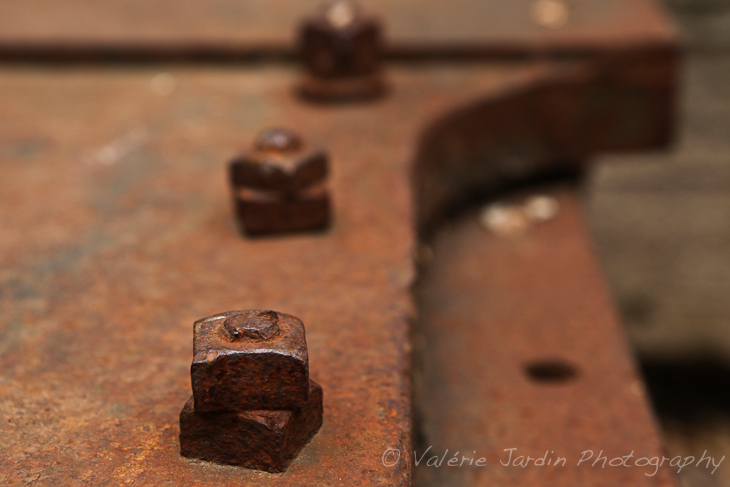
You know the feeling when you find yourself in a place where there is nothing interesting to shoot. It may be because you’ve photographed it a million times before and you just don’t see anything new to frame. You go home with an empty memory card wishing you could go to an exotic destination to shoot new vistas. We’ve all been there but this situation can easily be turned into a journey of new discoveries.

I’ve been so impressed at the growth I’ve seen in many new photographers who have embarked in the journey of completing a 365 photo/day project. Most photographers who start this type of project are determined to find something really exciting to shoot every day. However, to maintain that daily photographic commitment, each one eventually needs to become resourceful enough to see the extraordinary in the mundane. It is at this stage of the project that I see them take a big step forward in their craft. They suddenly get the confidence to experiment and to see the ordinary world around them with new eyes.

Whether you are ready to make the commitment to start a 365 photo/day project or not, make it a goal today to get out and shoot an ordinary object in an exciting new way. Don’t want to leave the house? Perfect! Just open the kitchen drawer and pick one object. Now using just one lens, shoot it from different angles and depths of field.  Then let some direct sunlight shine through it or bounce a flash on colored paper. Make a reflector with tin foil, look for an interesting backdrop, or textured surface on which to place the object. Experiment!

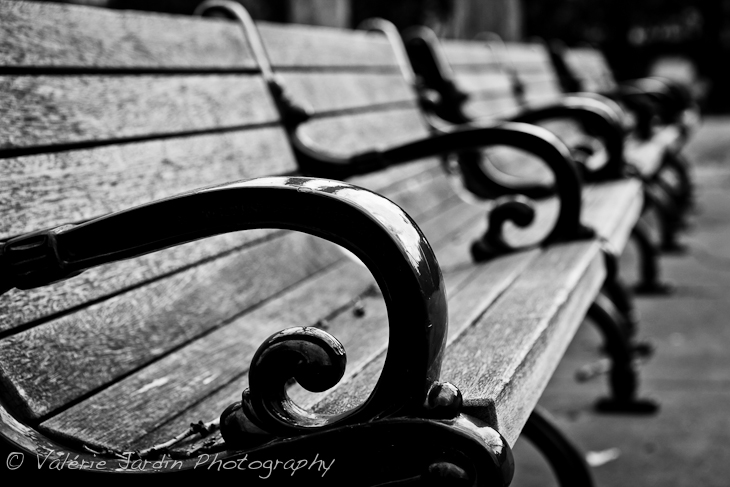
Now go outside, walk down the street and stop randomly. Look around you and pick one object, it can be a door knob or a park bench, anything will do. Study it from different perspectives and then shoot. Play with shadows and light.  Get down on the ground or shoot from above. The point of the exercise is to challenge your skills to make an ordinary object look extraordinary. One day you may only experiment with depth of field or composition, but isn’t it through this type of exercises that we learn and grow the most as photographers?

The camera you use doesn’t matter. This is all about vision – your vision. You may surprise yourself by how much you learn from this exercise, so do it often.  This is also a great way to know more about your camera’s capabilities which will prepare you for the time when you need to shoot something really important for yourself or a client.

blog_separator

Bonjour! I’m Valérie Jardin and photography is my passion. It’s what I do to earn a living and for pleasure on my days off. I live and breathe in pixels. I love to share the passion and teach this beautiful craft. YYou can connect with me on Facebook, visit my website. I also offer online consulting HERE  and teach week-long photography workshops in France. (CLICK HERE)


Tweet


3 Comments

Guest Contributor

Three Things to Know About DNG

Last year when I went to Photoshop World I arrived knowing the basic concept of DNG file types but not really seeing the pressing importance of switching over to using them. Well, I definitely “drank the cool-aid” while I was there because I left being a firm DNG convert.

I don’t want to beat you over the head and demand you starting converting your raw files to DNG files, but I do want to explain what a DNG is, then three things about them, to give you a taste of the cool-aid.

First let me explain what a DNG is:  DNG stands for Digital Negative and it is an “open source” format created by Adobe that effectively standardizes the raw data. Each camera brand has their own format for collecting the data when an image is captured. In other words, a raw file by Canon, a CR file, may have different data than a NEF file, which is a Nikon raw file.

1. How DNG Files are Edited

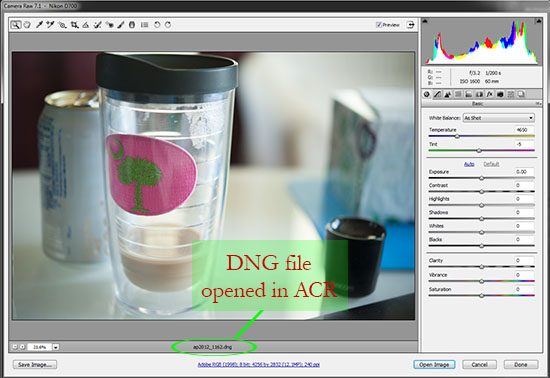
You edit DNG files exactly the same way you would a raw file. This usually means through Adobe Camera Raw (ACR) or Lightroom, although some may use Aperture or other editing software. A DNG opens just as a raw file; you will see no differences there. All the same data is available to you.

In the example, I opened a DNG in Photoshop, which made ACR open. I circled the file name at the bottom, so you can see that it is a DNG file being edited in ACR.

2. No Metadata Sidecars

Whenever a NEF or CR (or other camera brand raw files) file is edited in ACR, metadata sidecars are created to store the edits made. You will see them as .xml files that are listed next to your raw files on your hard drive.

Digital negatives do not require those sidecar files because the metadata is saved directly to the DNG file.

Why does that matter? With raw files, all your edits are in the xmp sidecar. If you back up your raw files but not the sidecars, when you go to access that file you will only have the original raw data, not the edit, and you will need to re-edit.

I edited both the NEF and DNG files (of the same image) in ACR. You can see below that the raw file has a .xmp sidecar but the DNG file does not.

3. Smaller File Size

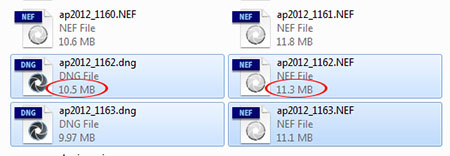
Raw files are huge files, often being twice the size of their JPG counterpart. My Nikon D700 raw files are around 11 MB, but newer cameras with higher megapixels create raw files that are 24 – 36 MB. However, when one of my raw files is converted to DNG, it is a whole MB smaller. That might not seem like much, but when you are storing thousands of images on your hard drive(s) it can really add up.

Below is an example of two raw files compared to their DNG counterparts. I imported the raw files into Lightroom, then converted to DNG via the export function.

At this point you may be thinking you like the sound of all this but how the heck do you convert your raw files to DNG? It really depends on your editing program and when you want to convert.

  • Lightroom – you can convert directly at import, which is what I do. At the top of the import screen you have the choices of Copy as DNG, Copy, Add, Move. Choose “copy as DNG” and your image will be converted during the import process.
  • Lightroom – you can also convert at export. This would mean you imported as raw, and when converting at export you create new DNG files, so you will have both. Some photographers choose to import as raw, then export as DNG for their back-up.
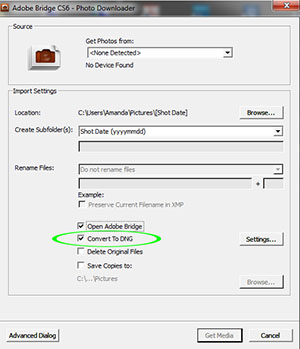
  • Photoshop – you can also convert at import, shown in the image below.
  • Photoshop Elements – you do not have the ability to import as DNG or convert later. You can, however, open a DNG file in ACR once it has been converted (like in Lightroom).

This is a lot of information, even though it’s only “three things.”  Take some time to digest it, read out it via Internet searches and then try it out yourself.  I am not saying you HAVE to change, but I do encourage you to explore the option so you can make an educated decision for yourself.

blog_separator

Hello!  I’m Amanda, a quirky, introverted Mom of four, who is passionate about helping others learn their cameras and editing software. I also currently homeschool my four kids, ages 13 to 6, all whom run away when they see me carrying my camera.

Visit me at my WEBSITE and FACEBOOK page!


Tweet


13 Comments

Photographer Spotlight

Photographer Spotlight: Jen Bebb

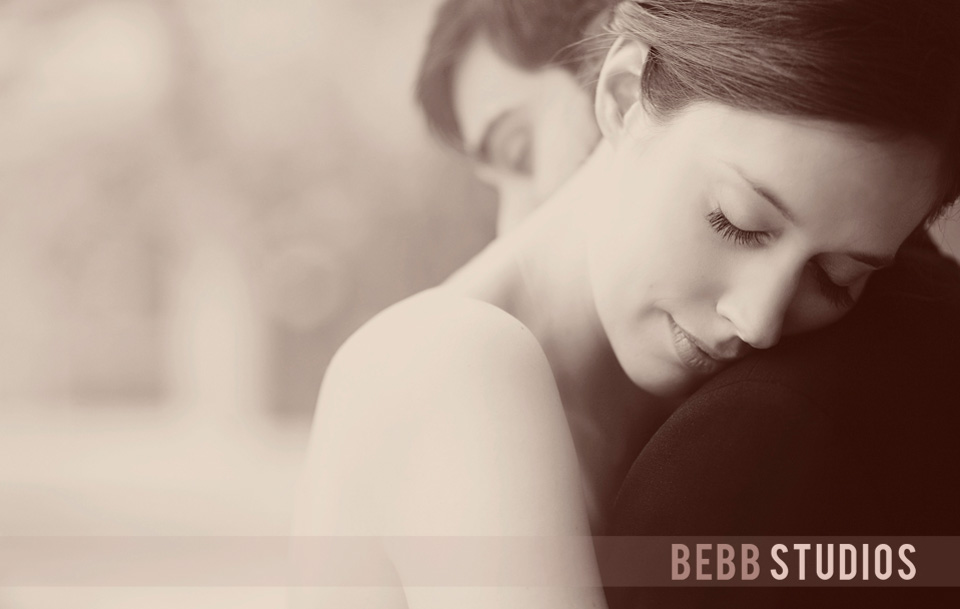
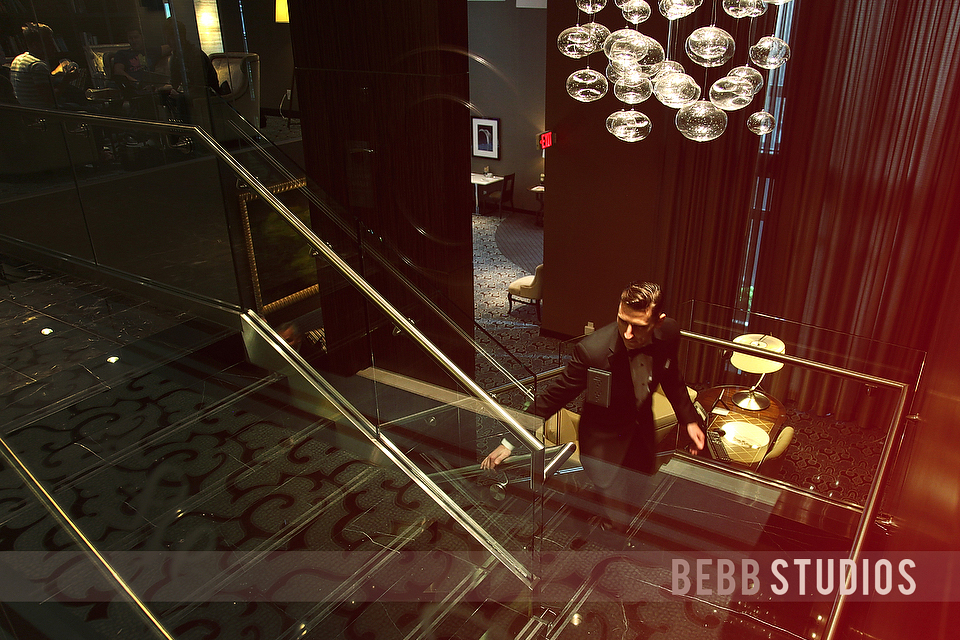
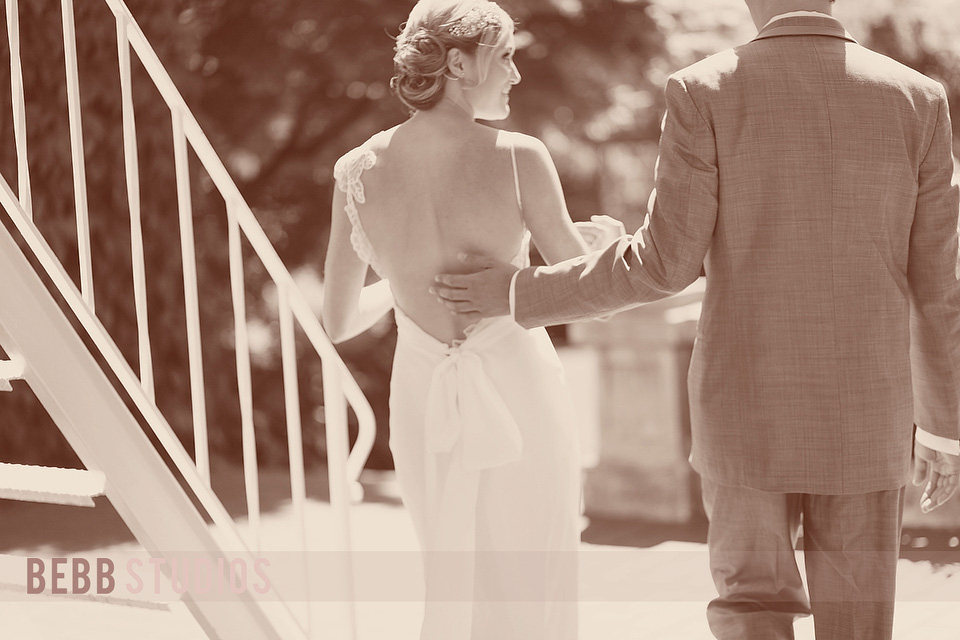
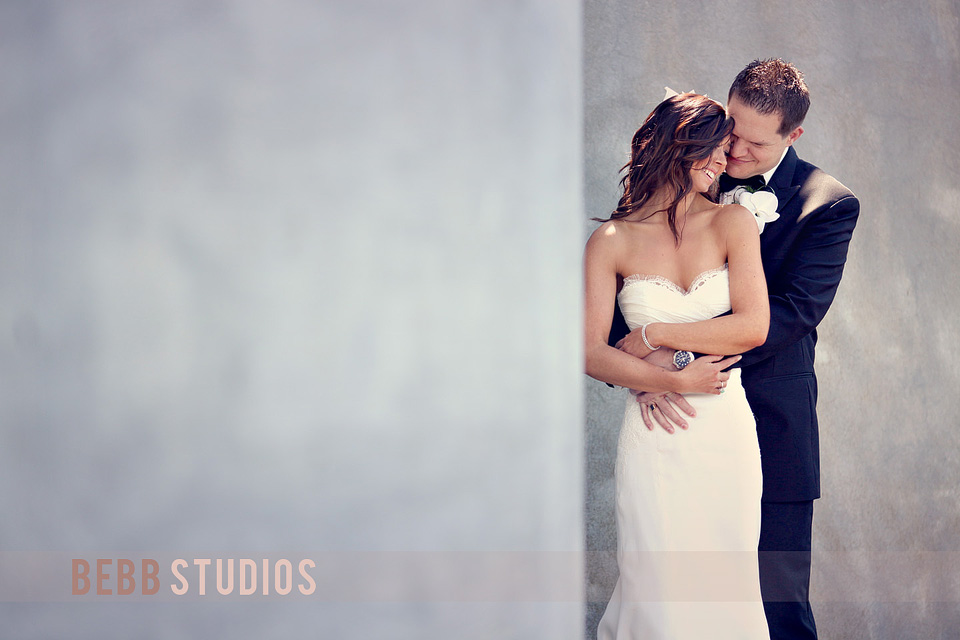
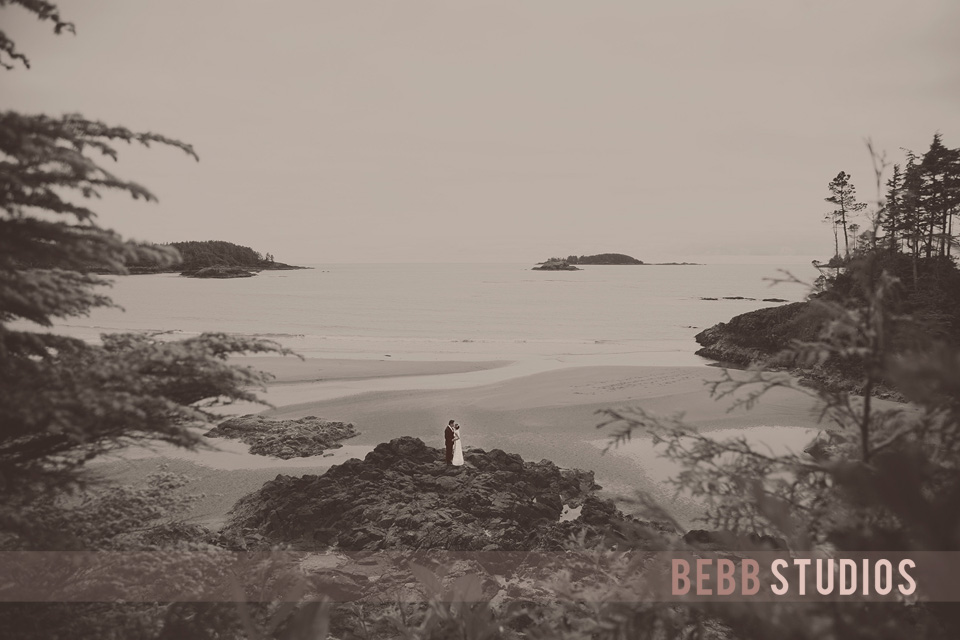
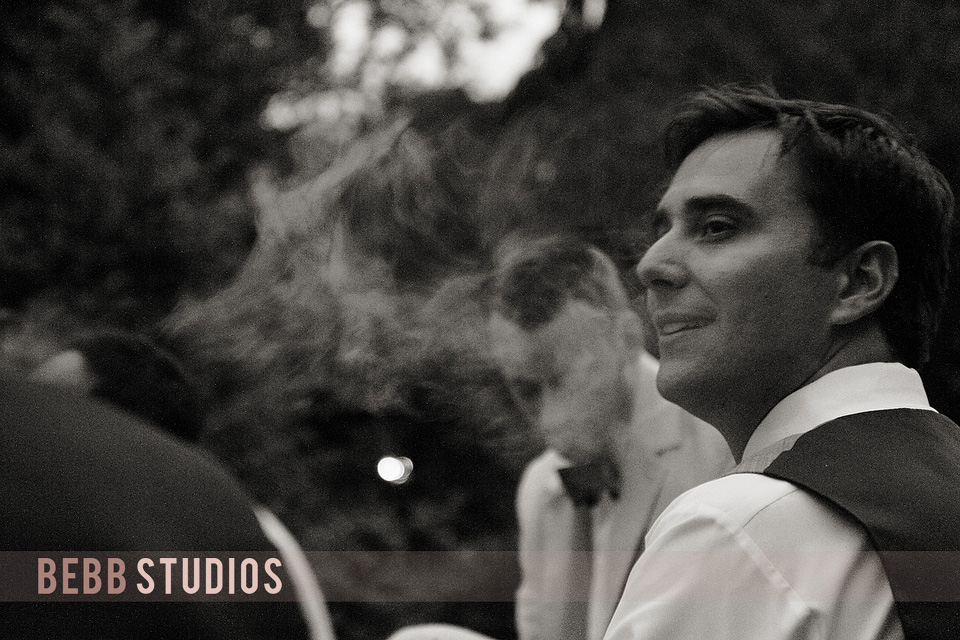
This week, Pretty welcomes Jen Bebb of Bebb Studios! We are so excited to have Jen share her and her husbands work with us today and hope you enjoy getting to know her better!

Where did your inspiration for photography begin?
I don’t think I can pinpoint one moment – I took my first photography class when I was 10 years old, shooting and developing my own black and white film. I took pictures all through trips to London and Mexico as a teen, but the camera was not my constant companion otherwise.

And then one day, after shooting a wedding for a friend, going through my film I had a moment where I looked at a photo and got goosebumps. It probably was not a perfect image, although the light and the depth were perfect to my eyes. It was a perfect moment, between two people in love, as they shared their first dance. I could feel the love and see it in their eyes, and to this day that image still gives me goos bumps. It was the first time I realized photography was about more than pictures, it was about being part of a family’s visual legacy.

How would you describe your photography style?
After years of struggling with this very question, I give up. I can’t describe my style anymore than I describe what makes me who I am. My images are a collaboration between myself, my subject and the viewer and, as such, are outside style descriptions.

Every time I work with someone, I come in fresh, with an open mind, using who they are to guide the images I make. Some of my images are more natural, others more posed. Some of my images are more stylistic and fashion inspired, others are very relaxed and carefree. Some of my images  are soft, some are not. But all of my images are made with intention and purpose, whatever labels others put on them.

If you were to make me pick one word, though, it would be “genuine”

Did you study photography in school or are you self taught?
I’m Steve taught 🙂 Steve took a couple of classes and really knew the technical aspects of image making, inside and out. He taught me the technical, I taught him the heart of image making.

Do you shoot Canon or Nikon, and what is your favorite lens?
We shoot Canon and my favorite lens actually changes almost weekly. I go back and forth between the 85 f/1.8 and the 135 f/2.0

Do you have any tips for photographers on how to find the light?
There is a difference between what our eyes see and what our cameras see, so learning how to see light and what that will mean to your camera is super important in my opinion. Light is something you see or you don’t see – once you see it, you’ll never stop seeing it, but it takes time to recognize. Start looking for nuances of light and shadow, start watching for bounce from windows or other surfaces, turn lights on and off and see what happens, walk your neighbourhood at different times of the day and see how it changes. Walk around your subject and watch the light change from frontal, to side (with rim light too) to backlight and around again. Take images at each angle and see the way the light is different from each perspective. Be patient – it takes time to train yourself to see this way if it doesn’t come naturally.

What do you feel is the most challenging thing about photographing weddings?
Managing expectations.

How important is pricing when starting a new business?
It’s important, but it’s not the most important thing. I think you need to be able to make pictures of equal or better quality every time you shoot, first. Then you need to really think through the business side of this – it’s complicated, hard work and will take the joy out of image making if you’re not ready for it. Then it’s time to look at how much money you need to survive in your life – every single dollar you need to live for a year. Then triple that amount and that is what you have to gross from your business to just survive. Divide that number by the number of jobs you want to shoot each year and you will quickly learn what you need to charge to make this work.

Pricing is not simple – there are a lot of factors at play. Almost every photographer I speak with has underestimated what they need to make to live, not to mention grow their businesses. Starting too low will cause problems later, starting too high will hurt you when you can’t back it up. But if you look at what you need and weight that against what you have to charge, that will go a long way to helping determine your price.

How do you sell value to your customer when the price tag may be higher then they expect?
I don’t know that you can sell value per se. I think clients see value in what you offer or they don’t. All we can do is build a solid brand reputation, work hard to make exceptional images each and every time we shoot, and treat our customers like gold to build a strong referral base. People will pay more for something they value, so it often comes down to what you’re selling. If we are selling the first images in a family’s visual legacy then people expect to pay more than if we were simply selling pictures.

What is a good lesson you have learned this year in photography or in your business?
Trust your gut and be true to each moment as it unfolds.

If you could encourage a new photographer in one area, what would it be?
Know your camera inside and out. Understand image making. But most importantly, build a business that is right for you and your life.

What do you love most about being a photographer?
The reactions from our clients.

Where do you see yourself in 5 years?
That’s the great thing about being a creative – I could be just about anywhere in 5 years. I have a feeling I will have written more books, run more conference, mentored more creatives in business and photographed more weddings. I will have traveled more, fallen more in love with my husband, raised my boys to be men, and be planning the next big move in my life. One thing is for certain, I won’t be sitting still 🙂

blog_separator

About the Artists: To Steve and Jen, life is a progressive journey with obstacles and successes scattered throughout. Passionate about everything they do, these two embrace life as though each day counts, more than the one before. And despite all their professional accomplishments and accolades, their proudest project to date is the two boys they are raising to be men. They truly believe in leading by example and always being the very best you can be.

Visit Bebb Studios at their WEBSITE | FACEBOOK pages today!


Tweet


3 Comments

Celebrity Mentor Photographer Spotlight

Celebrity Mentor + Photographer Spotlight: Gary Fong

We are so excited to welcome Gary Fong to the Blog today! Take a moment to learn more about Gary and visit his website !

Gary is featured as our “Celebrity Mentor” in the Pretty Forum for the entire month of September, so come on over and ask him anything you like. Thank you so much Gary for taking the time to share your work with us today!

Where did your inspiration for photography begin?
My inspiration wasn’t photography – it was the idea of being a wedding photographer.  Wedding photography was honestly the best way I could think of to make great money and not have to be the doctor that my parents forced me to be.  I was a songwriter/guitarist, and I knew that I wouldn’t do well financially at that.  I was deathly afraid of living around the poverty like my parents.

One day, as I was about to graduate from the University with a degree in Pharmacology (of all things), I was freaking out, and telling my girlfriend how bad I wished I could find a way to do something/anything to make a great living besides being a doctor.  I shared with her how one of our family friends had started out as a struggling guitarist like me, and wound up being on the “Kung Fu” television series as an actor.  As I was telling her the story about this man, Rocky Gunn, I was turning through the pages of Life magazine when I said:

“I wonder what he’s doing now?”

And I turned a page in Life Magazine in a moment that changed my entire life.  There was an eight page article, starting with a centerfold spread, saying, “Nobody Shoots Weddings Like Rocky Gunn”.  I looked around the room wondering if there was a hidden camera or something.  It was so eerie.  And I’m a big believer in signs, so I figured I had better pursue this guy.  Especially since the article said that he made about $1 million per year shooting weddings.

I was not into photography at all, and had never touched a professional medium format camera, nor had I even been a guest at a wedding.  I honestly just felt the universe was giving me a sign (through that “Life Magazine” moment) that I had to meet him.  When I finally caught up to him (after many letters and phone call attempts), he fondly remembered me and asked if I had brought my guitar.  I had one in my trunk, and we went out to the Redondo Beach Pier and sang a few duets together.  A lady dropped a dollar bill in his camera bag, and he said to me, “Hey you and I – we make a great team!”  Thus began my close friendship with the most famous wedding photographer in the world.

I carried bags for him for an entire summer and was amazed at how he handled the most intense disasters at weddings, and how he was able to work with people.  At my first wedding with him, the groom came running out of the church screaming and jumping, “Rocky Gunn is here!  Rocky Gunn is here!” and while I knew my friend was famous, I had no idea a groom would care so much.  The reaction from Rocky was not what I expected.  He looked at us, and in a very solemn tone, said – “today it is very important that you two assistants work double-time, but speak very quietly – I’ll explain later…”  We worked quietly and with hushed tones through one of the most somber days I’d ever seen outside a funeral home.  We’re at a wedding, yet people are randomly breaking out in tears crying and leaving the room?

As we were doing the group photographs, one of the bridesmaids said loudly enough for all of us to hear, “I don’t care what that photographer says, I am not going to be in any photographs!” (which was weird).  Rocky turned around subtly and looked at “Julie” and expressed amazement at the lighting that was hitting her.  From what I could see, she was lit terribly by overhead fluorescent lighting, but what did I know?  He asked her not to move from where she was, and gathered everybody in the family to surround her as she sat.  She lit up with a smile, and then Rocky said, “Let’s go to the altar and do the group photos” and up she went.  I was amazed at his people skills.  To me, he was the “bridesmaid whisperer”!

Later that evening I found out that the groom’s mother was killed the night before in a car accident.  Julie was the groom’s sister.  All of a sudden, everything made sense – the random outbursts of tears and the funeral home feel.  So I asked Rocky how he knew the groom’s mother died the night before?  Was he told?

“What?  She died?  I had no idea!  That’s awful!” Rocky said.  This confused me.  I asked him how he knew to direct us to speak in hushed tones and work double time, especially since the groom showed no signs of being in grief.  And he told me that he knew that the groom was in grief because even though he acted tremendously happy when we arrived, “he had a rage in his eyes”.

From that moment on, I was fascinated by the amount of intuition he had for people, and that’s what I really wanted to experience more of.  By the time I had finished the summer carrying bags for him, I knew that wedding photography was going to be my life’s passion.

Did you study photography in school or are you self taught?
I learned everything about photography from Rocky and a book called, “The Handbook Of Photography” by John Hedgecoe.  It was a book full of illustrations and few words.  It taught me so much.  It showed before/after pictures with amazing diagrams that made perfect sense.

And then being with Rocky was amazing.  I’d absorb everything as I was watching him work – which lenses he chose, how he found the perfect spot for lighting, how he worked his flash units.  Most remarkably, he never used a meter.  He would just stand in a spot and say, “hmmm, right here it’s 1/60th of a second at f4” and he was always 100% right.  He taught me that skill, and it’s the weirdest thing.  It’s like knowing the temperature of your room.  You know when it’s 71 degrees, you know when it’s 84 degrees, and you know when it’s 67 degrees.  You know because you’ve stood in many different rooms and made note of what the thermometer said.  Similarly, your body knows how much light surrounds you, you just have to memorize that number too.

What do you love most about being a photographer?
The gift you give.  When you photograph someone’s wedding, or engagement, or child birth, it’s a gift of a lifetime, of priceless value.  We just had our fifth wedding anniversary, and when I went back through the photographs our amazing photographers (Jessica Claire and Jennifer Bebb) did for us, I thank my lucky stars that we had photographers with the eye, the skill, and the expertise to do such an amazing job of capturing the day.

Conversely, I know people who get sick to their stomach looking at their wedding photographs.  Disappointing photographs can turn a beautiful day into a sad memory.  They thought they knew what they were doing by saving a few thousand dollars and hiring a less expensive photographer.  I guarantee you – every single one of those brides would give practically anything now to be able to go back and do it over with a skilled photographer.   I think that it’s a huge responsibility that I remind people of this constantly.

What kind of camera do you use and what is your favorite lens?
Part of my job as the owner of a photo accessories company is to test all of the cameras with my products.  So I have everything – Nikon, Canon, Pentax, Lumix, Olympus and Sony.  And the only camera I use anymore is the Sony A77.  It is so far beyond any other camera technologically.  Things I could never do with my Canon or Nikon are unbelievably simple for the Sony to accomplish.  The eyepiece is not optical, it’s an extremely high resolution electronic viewfinder.  It’s so high res, you think it’s optical.  Until you switch it to black and white mode, or intentionally overexpose.  You see the digital image before you even squeeze the shutter.  It’s like “pre-chimping”.  And it shoots at an incredible twelve frames per second at over 23 megapixels, with flesh tones that are so lifelike.  If I were to claim expertise at anything, I would say it is in camera nerdiness.  There’s nothing that comes close to the Sony.

My favorite lens for most everything I do is a 50mm f1.4 on a crop sensor, giving it an effective focal length of 75mm.  Shot wide open, it’s a beautiful look.  And with my Sony, there is an instant 2x zoom that is far more advanced than the typical digital magnification.  So I effectively can have a 150mm f1.4 with the push of a button.

As inventor of “Lightsphere”, what advice do you have for photographers on finding the light?
Learn to shoot in Manual.  Shooting in Program mode is like auto-correct on your cell phone.  If you don’t know how to spell, you wouldn’t know that auto-correct made the hilarious errors that it does!  Learn the basics of available light and when to adjust for contrast and exposure.  Learn to find where the sweetest light is.  When a photograph comes out “weird”, it’s because your camera guessed wrong.  Knowing how to shoot in manual mode allows you to eliminate the guessing.

Once you’re able to “see” beautiful available light, you’ll quickly understand that it’s limited to a tight spot, at a particular angle.  If you move three feet, it’s ugly.  That’s why I invented the Lightsphere.  It softly fills in unflattering shadows and weird color cast in flesh tones, because beautiful light is a tightly controlled spot and angle where you must bring your subjects.  You don’t have this luxury if you are a wedding photographer, or someone who photographs children, etc.  You can’t stop your subject and freeze their faces in just the right spot all the time.

With the Lightsphere placed off-camera, the things you can do with it are amazing.  One of my favorite projects is on my YouTube channel, which I call the “ugly room” series.  I literally take a model to the most awful spots (for example, a parking lot on a rainy day, the area outside a men’s room in a public building, etc.) and create studio-quality lighting right then and there.

Tell us about your inspiration for writing, and a little about your latest book:
Writing a book is a lot like writing one very, very long blog post!  So many people now are amazing bloggers, each one of them has the potential to write great books!

I was lucky enough to photograph Sidney Sheldon’s daughter’s wedding at their incredible 20,000 square foot mansion.  Mr. Sheldon was one of the biggest best-selling authors in history.  As I was getting to know the family, I had a tour of the author’s office.  What I saw was that day was so cool.  He had a flowchart of characters on a write board.  There would be arrows from one name to the other, with scribbles over the arrows.  (gay?  jealous.  lover of…) etc.  Once he had the characters all diagrammed out, he was able to bounce around the plot window while (in the background) the characters were developing conflicts and relationships on a moving timeline behind the description window.  Once he had the people on the flowchart, he’d pick a city or town.  If it was a small town in Louisiana, he’d get an apartment in the neighborhood, eat in the local diner, get his haircut at the local barber, shop at the corner grocery store.  While soaking up all of the visuals of the local color, he’d record the storyteller’s visuals in words, and weave it into the story.

The books I’ve published have a flowchart in mind.  Even though they are non-fiction, they are stories.  For example, in “So You Want To Be A Rockstar Photographer”, I treat the social network audience as a singular individual.  A tempestuous person who has the attention span of a gnat, and “favorites” only the most colorful and shiny characters… a “fan” who can drop the Jonas Brothers in a split second and worship Justin Bieber the next.  I develop a plot line showing how this character’s relationship with “Rockstar” photographers changes the Rockstars.  That’s why I’m so proud of it.

My own memoir, “The Accidental Millionaire” was the same way, but the characters that weaved in and out of my storyline were so random that until it reached “assembly”, we had no idea what the point of the book was.  Assembly is when you put all of your random “blog” posts into a continuous thread that either works or it doesn’t.  I have two books, over two hundred pages each, that have not “assembled” to my liking.  When it does you feel like you’ve written a hit song.  Seeing my life story in the biography section at “Barnes and Noble” (between Jane Fonda and Michael J. Fox’s books) gave me that feeling.

Can you share some tips for marketing and getting your business out there?
The best piece of advice I ever, ever got was, “nobody wants a salesman knocking on their door, but everyone would welcome a new friend”.  So when I was starting my wedding photography business living with mom and dad, with one camera and $254, all I did was contact caterers, bakeries, dress shops, etc. and say that I’d like to come by and introduce myself.  When I got face to face, I didn’t have a sales pitch.  I just said that I’m a fresh new photographer in town and, would you like some photographs of your flowers?  I’d like to shoot your samples.  And from that came relationships, which turned into friendships.  And everybody refers their friends.

What do you feel has been the most important factor of your success in this business?
Getting the referrals.  I read an amazing book, “Marketing Without Advertising”, which revealed an startling statistic.  If a customer uses your service twice, the likelihood of them using you a third time goes up to 800%.  So when I was shooting weddings, I wasn’t focused on the size of the order so much as I was about getting them to refer me to two friends.

Everybody has a favorite product or service.  It might be Starbucks.  It might be Panera Bread, or an honest mechanic.  Hopefully on that list is a Gary Fong product.  If someone loves me enough to refer me to two friends, or purchase two of my items, the third referral or purchase goes up 800%.  That is free advertising, and that is built-in growth.  You won’t see advertising campaigns from any of my companies.  But what you will see is our honest attempt to make you so thrilled with what we offer, that you’ll refer two friends.  And it’s worked.  We went from a little idea to becoming the world’s largest diffuser manufacturer, with nearly half a million Lightspheres sold.  They’re everywhere.  And all of that was accomplished without the need for advertising.

If you could encourage a new photographer in one area, what would it be?
Don’t go into business before you’re completely geared up and ready.  Carry bags for an entire summer without second shooting.  Have deep, deep training.  Know your equipment so well that you can operate it subconsciously on an expert level.  My book, “Rockstar” opens with disaster stories of well-meaning photographers who went into business too early.  One lost all of her husband’s retirement money, their house, and everything they had because of a $500 wedding shoot.  I know of many photographers who went through bankruptcy, and even two who actually served jail time because of their handling of wedding clients!  And most of the photographers I’ve ever mentored shot one paying job, and experienced so much grief that they gave it up forever.

One of the most irresponsible trends in photography is the fraud that exists in inspirational speeches by “Rockstar” photographers who tell you that you should just “face your fears, leave those insecurities behind, and jump in and do it!  Go full-time!”.  If you ever, ever hear this from a so-called famous photographer, look a little deeper and you’ll see that they have something to sell you – a workshop, a DVD set, maybe a template website service or Photoshop Actions.  In my mind, these people are saying these things to get people to buy their products.

What is next for Gary Fong?
Watching our beautiful ten month old twins grow and change.  That much I know for sure.  Everything else, I have no idea.

I’ve never known the correct answer to that question my entire life.  Every goal I’ve ever set, I never accomplished.  And all that I accomplished I never planned.  I never thought I’d be a wedding photographer, then inventor, then author, or that my name would be synonymous with a piece of plastic, and that all of that would be appear on Wikipedia.  Can you imagine anybody making the flowchart that I’ve gone through in advance?  Impossible.

Steve Jobs said it best in his commencement speech at Stanford.  He explained that your life only makes sense when you connect the dots going backwards.  Where you are is because one step led to the next, and most likely little of it was expected.  I’ve learned to focus on the process, not an outcome.

blog_separator

About Gary: Gary Fong is an American entrepreneur and former wedding photographer. After twenty years, Fong ended his photography career in 2002 to pursue business interests such as marketing photography products, plastics manufacturing, a distribution and fulfillment center, and authoring a successful inspirational memoir. When he isn’t enjoying his beautiful wife and twins, he spends his spare time making educational videos for novice and professional photographers.

Visit Gary at his WEBSITE, BLOG, and FACEBOOK page today!

And don’t forget, you can “Ask Gary” anything you like in the Pretty Forum for the entire month of September!


Tweet


2 Comments

Guest Contributor

Get Into Shape!

by Guest Contributor Shannan Painter

We all know exercise is essential to maintaining a healthy body – but that doesn’t mean we’re all in great shape. Have you ever had January 1st roll around and resolve to be different? You might even march down to the nearest health club and spend lots of money on a gym membership that you don’t even end up using!

Hmmm, busted, but…what does this have to do with my photography business anyway?

Grab a latte, keep reading, and I’ll explain.

Accounting can kind of feel like going to the gym sometimes – we know it’s part of business, and something we should probably pay more attention to, but just like a lot of our good intentions, it gets pushed down the to-do list until it can’t be put off any longer. So, what do many of us do? We run out and spend lots of money on software that is too complicated, and beyond our knowledge – and just like a new gym membership – we feel overwhelmed and don’t ever use it.

In the same way that a novice exerciser shouldn’t hit the free weights with the body builders (unless you like the sound of grunting) a photographer without a lot of business experience doesn’t need anything fancy to track business expenses. What you do need is to learn how to track them, and have a simple tool to do so!

It’s hard to believe, but we are nearly 3/4ths of the way through the year already! NOW is a good time to evaluate your accounting practices: think of it like getting to the gym – are you paying for something you aren’t using, or are you in tip-top shape? If you need a little help, check out our Business 101: Setting Up Shop self-study guide to walk you through all the business and accounting basics. It comes with a simple spreadsheet to help you track revenue & expenses – and it won’t make your head spin!

Also, not all body builders grunt.

blog_separator

About the Author: I graduated Magna Cum Laude with an Accounting Degree from the University of Montana. Instead of pursuing a career in public accounting and being stuck behind a desk for 70 hours a week, I turned down jobs at big accounting firms to pursue a different love. I chose instead to work from home where I live with my husband, two boys and a puppy named Growler. I live a glamorous, exciting life working from my living room in my pajamas, cleaning crayon off the walls, driving kids to school, playing superheros and taking care of a little dog that likes to refinish furniture with his teeth. I get to work with fun, creative & artistic photographers and help them understand that numbers can be our friends!

Visit Shannan at her website Accounting for Photographers, and on her Facebook Page today!


Tweet


1 Comment

Photographer Spotlight

Photographer Spotlight: Heather Rous

This week, Pretty welcomes Heather Rous, the artist behind The End Photography! We are so excited to have Heather share her work with us today and hope you enjoy getting to know her better!

Where did your inspiration for photography begin? 
I’ve always been a creative person. From the time I was young, I would create elaborate storylines in my head. I was never the girl whose Barbie’s got married and lived happily ever after. Rather, my dolls would find themselves in complex and imaginative fairytales with quirky characters and detailed plots.

Although I always loved art in any form, my school system only had a limited number of visual art courses. I took advantage of every class that was offered and especially loved my photography and design classes, as limited as they were. Something about holding a camera, exploring the darkroom and creating images just felt right. Because of my limited course options, though, I pushed forward with other of my passions and creative outlet, writing and storytelling.

When I began college, I fell deeply in love with the art and visual communications studies that served as a supplement to my Journalism degree. My freshman year, I took a part-time job at a local portrait studio. Photography became my world as I moved from a seasonal sales associate to a manager to a position know as “Senior Photographer.”

After I completed my Journalism degree in 2010, I left the portrait studio to begin exploring my personal photography endeavors. I’m lucky enough to have an opportunity to combine my love of writing and storytelling with my love of the camera by creating pieces that serve as more than just a photograph, but a glimpse inside of my imagination.

How would you describe your photography style? 
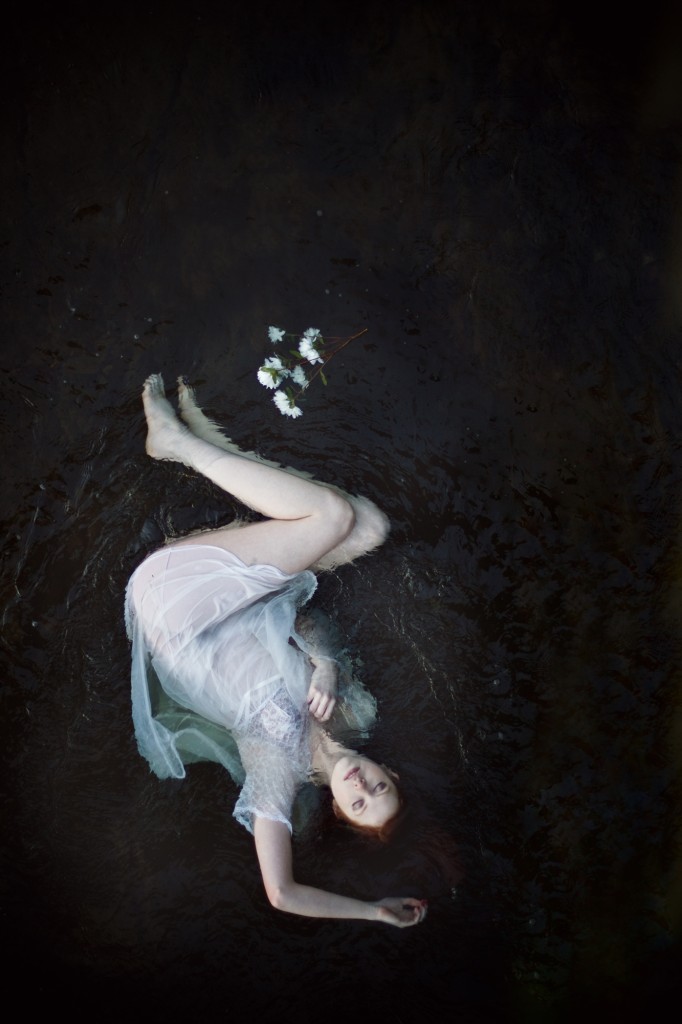
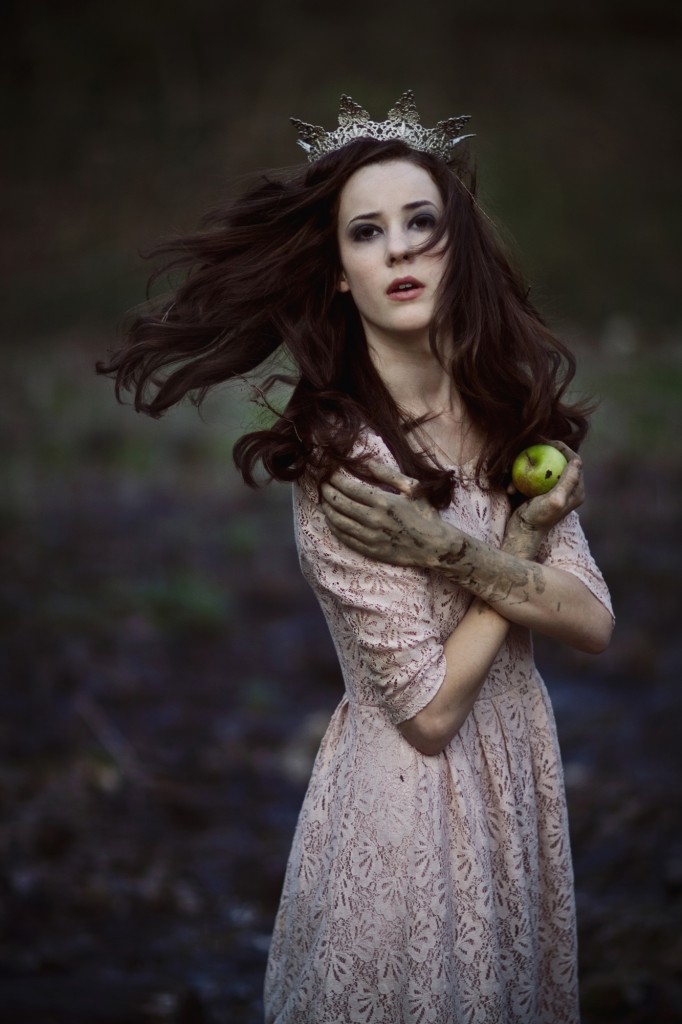
My style is most often described as dark, moody and mysterious. I think of my images, especially my personal works, as a still from a story that sleeps inside my head. In that sense, when people look at my work, they aren’t just viewing a photograph, but a piece of my deepest thoughts and my imagination.

Did you study photography in school or are you self taught?
In school I studied journalism and writing. For my elective courses, I focused on art history rather than art or photography application. I’m such a “hands-on” person that for me, it was more productive to study the history of art to develop an understanding of all artistic mediums rather than to focus on photography alone. Additionally, this gave me an opportunity to focus on writing and storytelling, another key element in my work.

I did receive plenty of exposure to photography during my time working at a local portrait studio. This served as an invaluable experience that taught me about not just photography, but the art of photographing people.

Do you shoot Canon or Nikon, and what is your favorite lens?
I’m a loyal Canon user. I use both a 50mm 1.4 and an 85mm 1.8. I don’t know that I could ever choose a favorite, though, because they both serve such different purposes.

Your images are often dark and moody, what is your inspiration for this imagery?
As I mentioned, I’ve always been a storyteller.  For some reason, my mind has always found it easier to process information by creating a narrative. My inspiration may start from a line in a book or a still from a movie. From there, I tend to paint my own picture and create my own characters. I try to understand these characters on a deep and complex level. Doing so allows me to put all of my emotion into the images that I create and means that they’re truly personal to me. I care deeply about the characters I invent, to that point that I feel almost obligated to share their story.

My personal work does tend to be much more dark and moody, but not because I find myself to be a terribly dark person. I find beauty in the mysteries of life and love to explore the things that frighten me. I feel like it makes me not just a stronger artist, but also a stronger person. There is an undeniable appeal in that which frightens us the most.

If you could shoot on location at any location in the world, where would it be, and what would your subject be?
I would love to visit Ireland! It seems so absolutely perfect with its rich history and stunning landscapes. I once saw Ireland described as holding “mythical beauty,” which seems so perfectly me! With plenty of water, woods and the amazing lunar landscapes, it seems so serene and beautiful. Additionally, I love cool, cloudy weather for shooting. Perhaps it’s biggest appeal, however, is the lack of snakes! I’m horribly afraid of them, which is terrible for my tendency to shoot in the creeks and woods of Kentucky, where snakes are so plentiful!

What is a good lesson you have learned this year in photography or in your business?
The best lesson I’ve learned is to relentlessly follow my passion and refuse to compromise. This year has been a turning point for my work. I’ve come to understand my artist vision and my style. Nothing makes me happier than being behind the camera and bringing my ideas to life. Photography has become my outlet for whatever may be going on in my life. It pulses through my veins and feeds my spirit. I use photography to express all of the emotions and frustrations that I can’t with words. By focusing all of my efforts toward my work, I grow as an artist and an individual. What could be better than chasing that which that nourishes your soul?

If you could encourage a new photographer in one area, what would it be?
I would encourage a new photographer to find what they love to photograph and commit to it! I know that my strength and heart lie in artistic photography, so once I began to focus on that, all of the other pieces started to fall together. It’s so easy to be the “yes” person who will photograph anything, but ultimately that could compromise the integrity of your work. It’s impossible to expect to be an expert on everything. At this point, I take a very limited number of sessions that aren’t artistic or seniors/adults. I know my strength doesn’t lie in families and children, so I’d rather leave that to the people who can focus their efforts on perfecting the genre. It’s been hard to pull away from these sessions, but at the same time, it’s important to my ability to produce quality work that is cohesive with my style.

What do you love most about being a photographer?
I love that it is an outlet for people to understand me as a person. By exploring my work, you’re exploring my heart and my imagination. How lucky am I to have an opportunity to share that with the world?

Where do you see yourself in 5 years?
This is the most impossible question! In five years, I can’t begin to wonder where I’ll end up! I know I’ll have my camera by my side, though, and I can only hope that I’ll still be able to use it as an extension of my imagination. I hope that people will appreciate my work and my vision. I hope that I will be able to help other photographers find their artistic voice. I can only hope that I’ll continue to approach each day with unyielding passion and steadfast excitement for where my work will take me next.

blog_separator

About The End Photography: Heather Rous, the artist behind The End Photography, is a 24 year-old photographer hailing from Central Kentucky.  She launched The End Photography in 2010 and quickly found her home in photographing dramatic, themed shoots. As a natural light, location photographer, Heather’s work is strongly tied to the natural elements of her home state of Kentucky, and she is most often found shooting its abundant streams, rivers and woods (despite her unnatural fear of snakes, who are surely within an arms reach at any given moment during these shoots). Her work is often described as mysterious and moody, with a focus on expressing powerful emotions and exploring her imagination.  Heather is a 2010 graduate from the University of Kentucky, where she studied Journalism and History.

WEBSITE | FACEBOOK


Tweet


4 Comments

Guest Contributor

A Full Day and a Happy Heart

by guest contributor Shalonda Chaddock

You know it’s funny to think back about my life “pre-cheeks girls”, yes I had a full time job, yes I woke up every morning made myself oatmeal and coffee, put on a suit (yes I had to wear a suit everyday AND HEELS). I spent those days doing something oh so very important and oh so very “grown up”. The funny part is, when I think back to those days I don’t really remember too much about how I filled my days, in fact those hazey memories don’t even seem like they were actually my life. The everyday in and outs that have filled my weeks, months and years over the last 5.5 years, since I became a mommy, seem so much more significant, so much more important, so much more about someone else! Each day has been different and brings a new challenge and a new success…each day is a new memory I want to remember forever but will all too soon forget.

If you know anything about me you know over the last year and half I have become very passionate about photographers capturing their own everyday lives, and this is why. You see, your babies are not going to be babies forever. Wow that was kind of harsh wasn’t it, ha?!  But it’s the truth. As mom’s, we are busy, breakfast, swim lessons, lunch, naps, grocery store, laundry (well okay daddy cheeks does ALL of the laundry in our house), but we are just plain ol’ busy.

I’ll admit there are some days I “go through the motions” and head to bed exhausted only to realize I didn’t stop and love my life once that day. It’s okay we all have days like that, right?! But I challenge you to stop, pause for just a moment every day of your incredibly awesome, boring, crazy, chaotic life and breathe it all in.

Being a mommy is the best job anyone can have and being a photographer is the second…because YOU GET TO DOCUMENT IT! Sometimes it simply takes see’ing what you have to truly appreciate it. So the second part of the challenge is to capture one day of YOUR life, of your babies lives, of your family’s life from start to finish.

As you can see while my days aren’t filled with super important corporate meetings anymore, in fact it’s rare I even put mascara on anymore and I cant remember the last time I wore heels, ha, my days are now filled to the brim with MY LIFE. A life I love living.

blog_separator

The face behind Chubby Cheek Photography. Shalonda lives in Houston, TX with the love of her life, aka daddy cheeks, and her two gorgeous girls, cheeks #1 and cheeks #2. Despite her engineering degree from Texas A&M she started Chubby Cheek Photography 4 years ago and hasn’t looked back. Her love for creating and the carefree way children “see” life is truly the heart of her work and inspiration.

Visit her WEBSITE | FACEBOOK | BLOG


Tweet


14 Comments

Guest Contributor Post-Processing

Editing With Textures

by guest contributor Anna Gay

Working with textures is an easy and fun way to edit your photos. Whether you want to dodge and burn, highlight certain elements or simply add more texture to the negative space of your photo, experimenting with textures will add a new dimension to your editing process.

In this tutorial, we will look at several different blending modes and how they affect the overall look of a photo. There are many different ways that textures can be applied, but for simplicity’s sake, in this tutorial we will just look at the tried and true “drag-and-drop” method, rather than getting too in depth with Layer Masks and the like.

First, let’s look at how textures can change the overall exposure and color temperature.

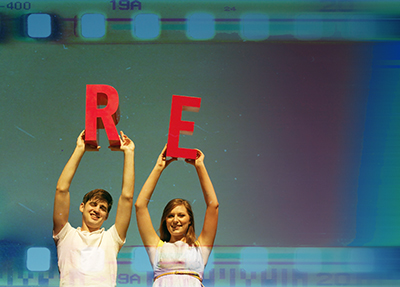
Above is my original photo, straight out of the camera. The photo is probably fine as-is, but I wanted to play up the hazy light, as well as warm up the color balance. On close examination, you can see that there is a lens flare right on their faces (and especially on the woman’s hair), so I wanted to blend the lens flare in that area.

The first texture that I am using is going to warm up the background, as well as add a slight vignette. Use your Move tool to drag and drop the texture onto your original image. You will have your Background (original image) and Layer 1 (your first texture). On your Layers palette, set the Blending Mode to Overlay, and the Opacity to 50%. The percentage of your Opacity will vary from photo to photo, but 50% is a good starting point to see how the texture affects your photo.

In the left-hand toolbar, select the Eraser tool

Right click once on your photo to bring up your brush menu. Select a brush with a soft edge, such as 200 in this case. Leave the Hardness at 0, but increase the Master Diameter to be large enough to erase certain parts of your photo in one click. Here, I set mine at 450.

We want to erase some of the texture on the subjects, but only a very small amount, so set your Brush Mode to a small opacity, somewhere in the neighborhood of 25%.

In this case, I went over both subjects once with my eraser at 25%. I didn’t worry about getting every last bit of the texture – I moved my eraser from their heads to the bottom of the frame in one motion. As you can see, the texture added some warmth to the trees behind them.

Now, I wanted to enhance the hazy backlighting, so I selected a really simple texture without a lot of color variation: just a nice, warm texture.

Drag and drop your next texture onto your previous texture, creating Layer 2. This time, set your Blending Mode to Screen, around 50% Opacity for starters. I felt like 50% wasn’t quite enough for this particular photo, so I increased it to 54%. A small percentage increase can go a long way with textures.

Select your Eraser again, but this time, set the Opacity even lower, in this case, 12%. I wanted to remove as little of the texture as possible, only from their faces, in order to preserve the detail in their hair and facial expressions.

As I mentioned before, the Opacity for your Blending Modes, as well as the Opacity of your Eraser, will vary from photo to photo. Be sure to play around with different opacities, and keep in mind that less is usually more when it comes to erasing, because the idea is often to have the layers blend together seamlessly.

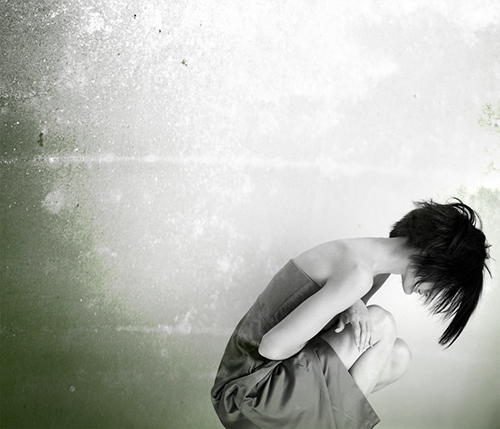
For this photo, we are going to look at how a texture can add interest to negative space, using the same drag-and-drop then erase method as above.

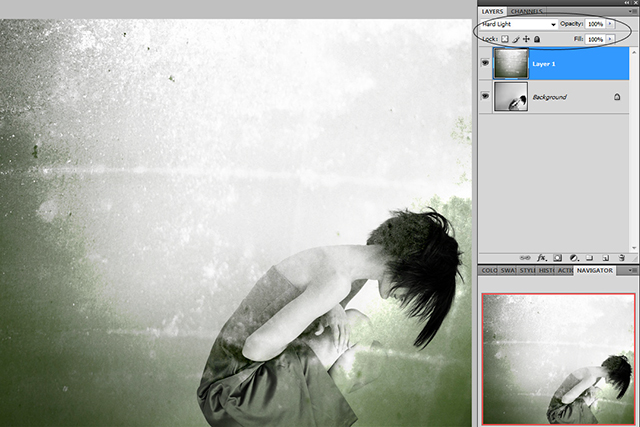
I chose this texture because it had a bright center, but also sort of a grunge vibe to it with all of the different marks.

The Blending Mode is set to Soft Light in this case, which is similar to a mixture between Overlay and Screen, like we used above. I really liked the intensity of the texture on the original photo, so I left the blending mode all the way at 100%.

I felt like the texture on the subject was a bit much, so I selected my Eraser tool at 15% Opacity, and erased part of the texture on the subject, as well as the lower-right corner of the frame.

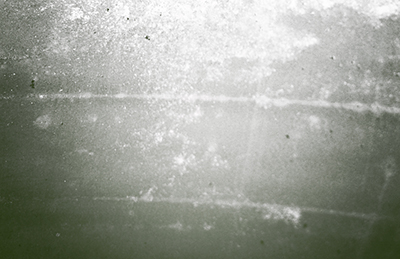
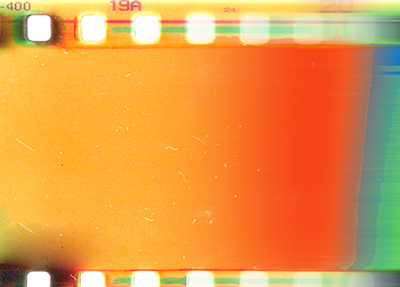
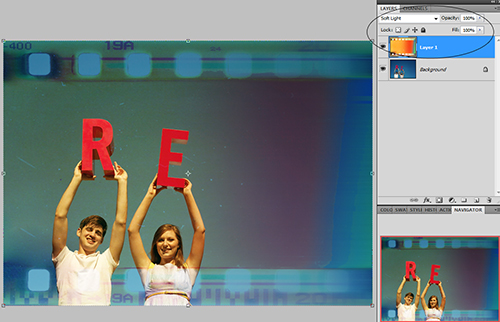
You can also use textures to add a whimsical element to your photos. Some people add bokeh textures, while others add clouds (I am a fan of both, personally)! For this shot, I thought it would be fun to add one of my film textures, to give the photo a retro, slide-film vibe.

This is a scan of a 35mm negative of mine that didn’t turn out, but I loved the colors. Sometimes you find textures in the most unassuming places, so always been on the lookout for textures to add to your library, because you never know when they’ll come in handy.

Drag and drop the texture onto the photo. Sometimes, when you are working with a film negative texture, you will need to use your Eraser to blend portions of the negative that obstruct your subject, but in this case, I felt as though the negative wasn’t too overpowering, so I left the Blending Mode at Soft Light, 100%, and did not erase.

As you can see, the negative not only changed the look of the photo, but it also added warmth to their skintones

These are just a few examples of ways you can use textures, but we’ve really only skimmed the surface. If you are just beginning to experiment with textures, then collect as many of them as you possibly can until you find what works for your photos. Textures can be purchased or downloaded for free online by the thousands, but as I said before, you can also create your own. My texture library is a mixture of my own, as well as ones I have purchased from others, and I use all of them on a regular basis.

blog_separator

About the Author:  Anna Gay is a portrait photographer based in Athens, GA and the author of the dPS ebook The Art of Self-Portraiture. She also designs actions and textures for Photoshop. When she is not shooting or writing, she enjoys spending time with her husband, and their two cats, Elphie and Fat Cat.


Tweet


6 Comments

Guest Contributor

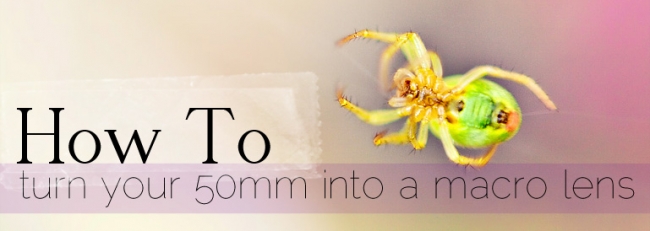
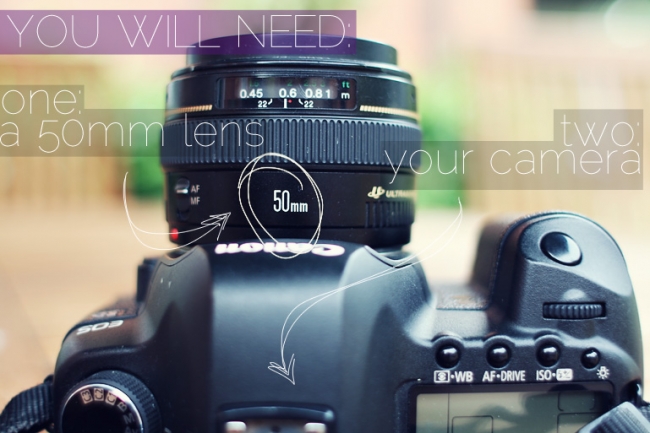
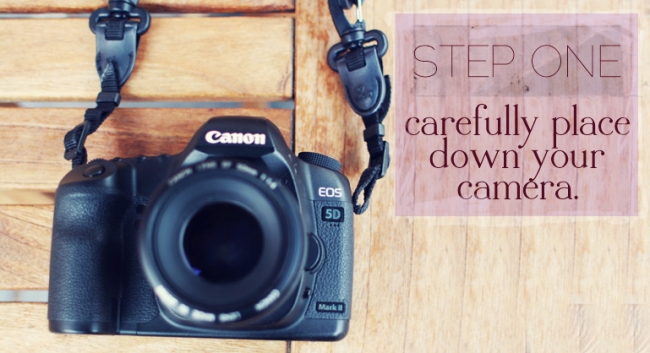
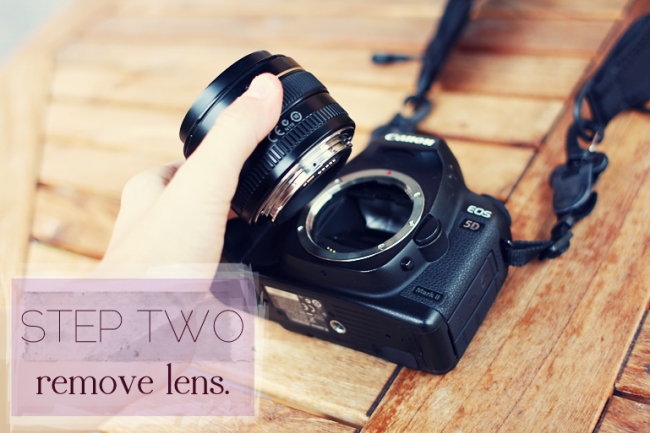
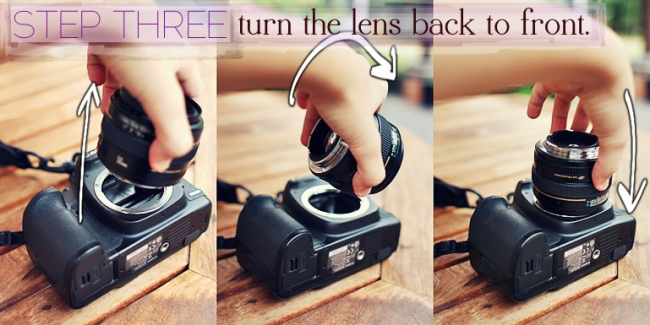
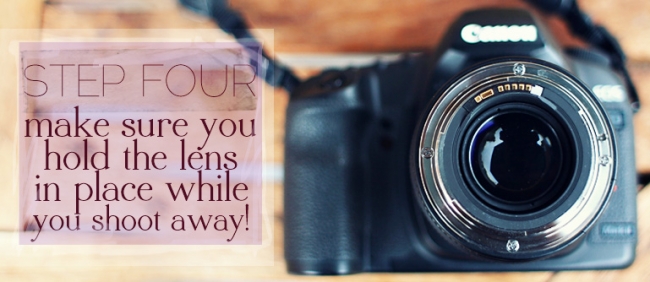
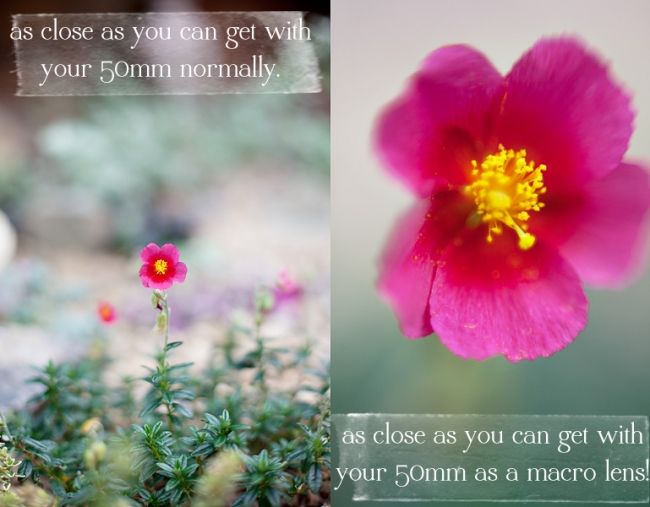
How to Turn Your 50mm into a Macro Lens

by Guest Contributor Alex Beadon

If you don’t have a Macro Lens, but would LOVE to capture those beautiful “Close-up” shots, don’t fret… our guest contributor Alex Beadon of Alex Beadon Photography is here to show you how to turn your 50mm into a macro lens!!  It’s such a fun way to reignite your passion for photography and is a great (and cheap) way to explore a new side of your photography.  The results are always interesting – even when they’re a little bit blurry 🙂


Have fun, rock on, and let me know what you think of this tutorial in the comment section! Have you ever tried this before?  How were the results?  Tell me all about it!

And, don’t forget to enter this months Photo Challenge:  Macro Photography

Tips:

  • Camera must be in full manual mode
  • Lenses that do not have an aperture ring such as Nikon G-series and Canon EF lenses may not work
  • To focus you will need to move the camera or the subject, since the camera is not actually attached, you will not have the use of your internal focusing mechanisms {get in close to your subject until you achieve focus}
  • You can also purchase a reverse ring camera mount adapter for you camera
  • Using a tripod will help your focus

blog_separator

About the Author:  Alex Beadon is a creative portrait photographer, blogger, and creator of The Inspired Store. Her number one mission is to inspire those around her to creatively live an inspired and passionate life. That means doing what you love and loving what you do every step of the way.

Visit Alex at her WEBSITE |FACEBOOK pages today!


Tweet


29 Comments

  • « Previous Page
  • 1
  • …
  • 19
  • 20
  • 21
  • 22
  • 23
  • …
  • 30
  • Next Page »

Popular Categories

You might also like

Love of Lifestyle Photography Workshop by Ashley Spaulding

Love of Lifestyle: The Fundamentals of Lifestyle Photography

The Lightroom Lab: An 8-Week Course to Mastering Lightroom

Pretty Forum for Photographers

Let Them Eat Cake—A Marie Antoinette Inspired Shoot

Tips to Keep Your Images Interesting in Limited Surroundings

Natural Light: The Art of Finding Magical Light

Copyright © 2025 · Divine theme by Restored 316

Copyright © 2025 · Divine Theme on Genesis Framework · WordPress · Log in

×
Never miss a thing!
Sign up for Pretty Forum Newsletters and get all the latest news on our upcoming:
  •  
    ​Workshops
  •  
    Celebrity Mentors
  •  
    Free Downloads 
  •  
    Photo Challenges
  •  
    Vendor Discounts
  •  
    and much more...