• Pretty Forum
  • Pretty Presets
  • Pretty Actions

Pretty Forum

Online Photography | Forum | Workshops | Tips | Tutorials | Classes | Business | Courses | School

  • Home
  • Blog
  • Enter Forum
  • Workshops
  • About
    • Meet the Team
    • FAQ ABOUT JOINING THE PRETTY FORUM
    • WHY JOIN THE PRETTY FORUM
    • Testimonials
    • Privacy Policy
    • Site Terms and Conditions of Use
  • Advertise
  • Contact
  • Join

Photographer Spotlight

Photographer Spotlight: Amanda K Photography

What do you love most about being a photographer?
Oh let me count the ways!!! The ability to capture open and honest emotions. between a couple in love. Revealing to my young high school clients how authentically beautiful they are. The friendships and connections I establish with amazing people.

How would you describe your photography style?
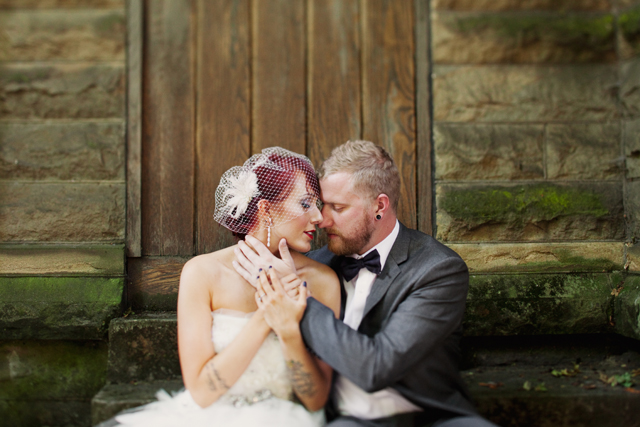
I have always been a soulful and moody shooter…it comes from deep inside me. The camera became a source of healing and expression from the beginning of my photography journey. I experienced a deep and traumatic loss in my life, and my images reflected that. As I have grown and healed, my imagery has evolved into a lighter and ethereal feel. My goal is to evoke an emotion in my clients and viewers when looking at my work.
If you could shoot on location at any location in the world, where would it be?
Italy and Africa…Hands Down.

Did you study photography in school or are you self taught?
I am 100% self taught. I honestly didn’t think I would EVER wrap my head around that scary digital SLR. I read SO many books, studied the Masters, and photographed everything and anyone who would let me. I did take some on-line Photoshop courses through the Academy of Art Institute in San Francisco, Ca. Those were invaluable!How do you use light to your advantage? Do you have a favorite time to have sessions?
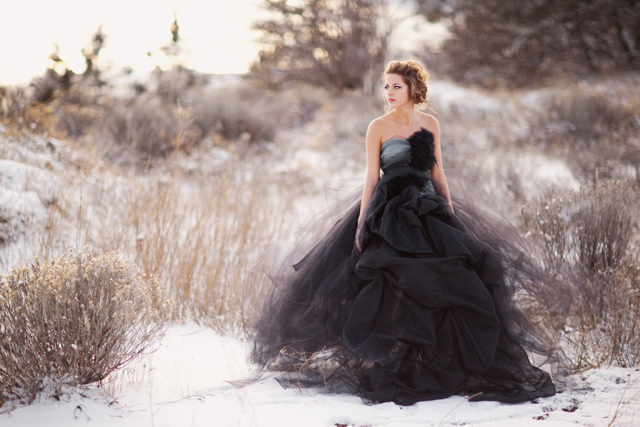
It’s ALL about the light. When I photograph high school seniors and engagements, I schedule the sessions about 1.5 hours before sunset if it’s a clear skies day. When shooting, I am always looking for “pockets of magic light”. When I am forced to shoot indoors, I always shoot next to a large window. Window light is amazing.
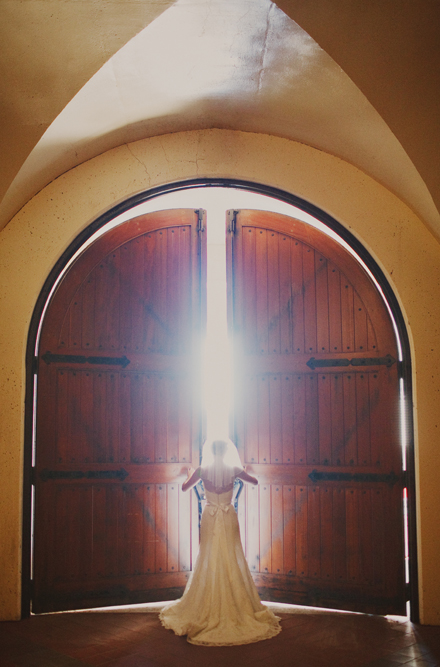
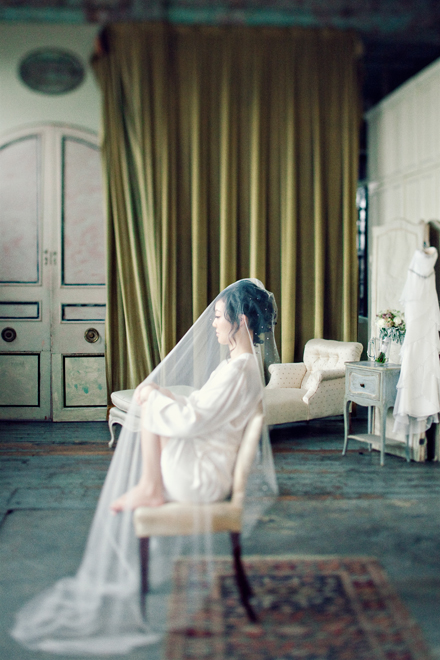

What camera do you shoot with? What is your favorite lens?I shoot with a Canon 5D Mark II. My favorite lenses are the Canon 85mm 1.2L and the 35mm 1.4 L.

What is the best marketing tool that has worked for you?In regards to Wedding Clients, word of mouth is my best “marketing tool.” Connecting with my clients and building a relationship with them is vital. Having my work featured on well known wedding blogs is also very important to getting my name out there. Facebook has been my best marketing tool for High School Senior clients. FREE ADVERTISING!! They LOVE to show off their images!!

How important is it to believe in the product you are selling? And how do you convey that value to your clients?
Ultimately, the product I am selling is myself. I have to be confident in my work, and stay true to myself and what I am passionate about. It’s about that connection, and following through on my promises. I want my clients to remember the experience, not just have pretty pictures. 🙂
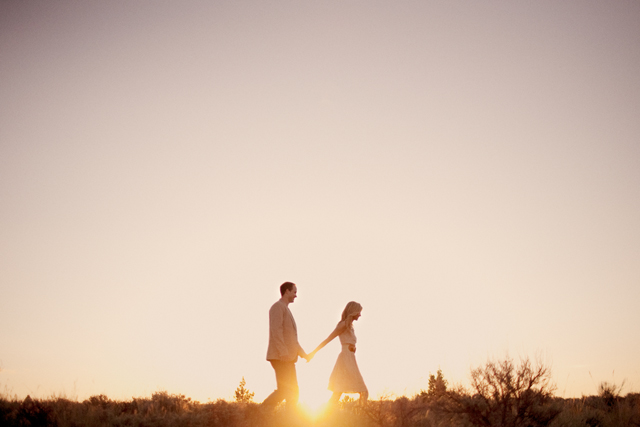
If you have learned one thing in the past year, what was it?Shoot for myself more!! It’s vital for me to stay inspired and fresh, and shooting personal projects provides that fuel I need.

Where do you see yourself and your business in 5 years?I have NO idea. I would LIKE to see myself shooting wedding exclusively with film by that point. That is my personal goal.

blog_separator

I am a wife. I am a mother to 3 amazing human beings. I am a believer in God, and worshipper of Christ. I am an artist. I am a widow. I am a lover of warmth. I am insecure. I am hopeful. I am driven. I am passionate. I am blessed. I am ordinary. I am Amanda K, and it’s not about ME.  Visit my website here and my facebook page here.

Tweet


6 Comments

Business & Marketing Guest Contributor

Inspiration for Photographers: It’s Not All About Shiny Equipment!

by Guest Contributor Spanki Mills

Ready to take the plunge and start your own photography business but overwhelmed with what you should believe? Where you should invest your money? What you should expect? I talk to so many people who are ready to start a business but hear so much information and they are just confused. They have so many of the same questions I did starting out…questions I have forgotten that were so confusing. I had no one to really ask, so I jumped in blindfolded and made a few…or a lot…of mistakes. The old saying “had I only known then what I know now” has rang in my head so many times over the past few years. If I had the chance to tell the new girl in the biz Spanki what the Spanki of today knows…this is what I’d have told her:

Girl it’s not all about the shiny equipment…
Again, I am not saying I know THIS is the way to becoming successful and we all start at different places, this is just what worked for me. First, the biggest misconception I hear time and time again is if you don’t own the most expensive camera on the market, then you have no chance at being a “real” photographer. I disagree! However, I didn’t start with the lowest end camera, I did start out with the Canon 20D. It was the current model that was above the Rebels but still below the big daddy 5D. Not saying that a Rebel or a 5D wouldn’t be great too, that is just where I started.

Think of it like this… Your camera is like your brain and the lens is like your eye. Yes some brains are faster than others (yes, I know, my brain is one of the slower ones) but as long as your eye can see, your brain can register and record what it was told. That being said, I am now a firm believer in the lens over the camera body. NOT to say that the lens has to be expensive, it just has to be quality. The lens I use and LOVE is the 50mm 1.4… yes the $400 lens! So, that brings me to lenses…Again, You do not need to jump right to the L glass to take a sharp image, actually I wasn’t getting a sharp image, so I DID jump to the L glass and spent thousands on multiple L lenses, only to realize I still didn’t get a sharp image. So I decided it MUST have been my camera… and I upgraded to the 50D. Yep, you guessed it, STILL no tack sharp image. Until I took the time to REALLY educate myself on my camera did I get that sharpness that I so desired. In the end it has nothing to do with the camera or the lens. You guessed it… it was ME, and to this day every one of my images you see where taken with the same $400 50mm I first bought and sold the rest.

SOOC Auto. 50mm f/1.4 November 17, 2007

There is no dollar sign on education…
There are few jobs out there that don’t require some sort of education, and photography is no different. I know it sometimes can be a good chunk of change to pay someone to teach you, but this is how I see it… jumping out there before we are ready is like going to a job interview with ratty hair and yesterdays makeup on. You only get one chance to make your first impression. So make sure you are posting images now you want to be remembered for later.

I do believe we all grow and evolve as we shoot, that is perfectly normal. Do I think we all have killer images just starting out? No way, at least I didn’t. But I made sure I knew how to consistently give a quality product. Yes when I first got started it would take me 600 images per session to guarantee myself a gallery for my client with 30 images in it, where as now I may only take 150 images. I still knew, that I knew, they were getting something worth paying for. So make sure before you worry with what colors your brand will be and scouting out studio locations, you have invested a good amount time into your education! Please make sure to research who you are learning from and make sure they are able to teach you what you are needing to learn, don’t just look at a photographer you love and chose them to learn about business, make sure they are succeeding at their business first! Make sure you see some of you in them. No need to learn from a wedding photographer if you aren’t real sure about weddings yet either, stick to the basics of shooting and business first.

Image taken with 50mm f/1.4 September 9, 2008

Do you really want the world to know you have multiple personalities…

Okay so I know there are days I feel free and artsy and want to wear Toms with my boyfriend jeans with the hole in the knee. Then there are days I feel very mod and sleek and want to wear my skinny jeans and silk shirt with my blazer.  And then there are some days I feel soft and romantic and will put on my leggings and a flow-y top with lace and ruffles. But seriously, I can not wake up each morning and pick a little of each mood. I have to narrow it down or people would gawk at the way I was dressed. The same goes for the way we edit. I know it takes a while to grow into who you are as a photographer. There is nothing wrong with that, but maybe try sticking to one or two editing styles so it doesn’t look like 17 different photographers edited your images. Play with your edits and get a feel for what grabs you the most. If you need help with finding who you are in your edits, try stepping back and looking at WHO YOU ARE. For me, my personality is loud, bold, simple. I was a professional painter before I was a photographer so obviously I am not scared of color. I think you can see one of my images and tell just by looking at it what kind of personality I will have. Let your images speak for you.

Sept 2008 / Sept 2010

There has to be a dollar amount worth leaving your family at dinner time for…
Where do I start pricing? Oh if I had seen things then like I do now…First remember when pricing yourself that there is a small window of successful pricing. Most of us starting out do not know what to expect for how much actually goes into running a photography business and we tend to price ourselves too low. The obvious problem with that is… it will catch up with you.  You will need to come up for air sooner or later and you will have to face changing your pricing. The second thing that you could run into is someone looking at your cheap pricing and thinking “that is so cheap, what is wrong with them”. I know, I am guilty as can be on that one… how many times do you go into a store and see the hamburger meat on sale and think “oh that must not be fresh” or see a pair of shoes that look amazing but because of the cheap price tag you automatically assume they will hurt your feet? Cheap isn’t always best!

Recent images, still with my 50mm.

So, that is it… what todays Spanki would have told the new girl Spanki a few years back. I know it is scary, photography is a form of art that leaves us vulnerable and uncovered. It is our souls expressing what we see in others and left on an image. Breaking out there and allowing yourself to be exposed is a big risk. It is a personal journey I took and there were days I wished I hadn’t.  But in the end, finding photography for me has helped me find ME. Photography has created a voice for my heart that I couldn’t hear before. Do it!!  If you are on the fence, jump. You never know what your heart has to say.

blog_separator

My REAL name is Spanki! I will go by just about anything…Stacy, Becky, and Sparky are what I get the most often. (I guess no one really thinks they hear right when I say Spanki).  I am a thirty “something” mother of 4 (if you don’t include my husband who acts 12 most of the time)!  I have 3 boys one 11yr old, twin 10yr olds, and a daughter AKA the “boss” who is 5 (and to think I was told I couldn’t have children) pshhhh!  I am no good at math, or spelling…I tend to make up words. My poor friends and family have learned they have to de-code me! I have no problem laughing at myself! I sing really good when my radio is REALLY loud, I still think I can cheer just as good as the girls who can actually FIT in their uniform, and there is never a dance competition I won’t break it down in!  I am a self taught photographer, who loves photography for the memories it captures. I wish I could be the “artist” that can cry over an image…nope, not me, I am just the one who had always had a camera in hand not wanting to forget a moment in time I knew I’d never get back!
Visit Spanki at her WEBSITE, BLOG, and FACEBOOK page.


Tweet


18 Comments

Photographer Spotlight

Photographer Spotlight: Stephanie Reeder

We are so pleased to welcome Stephanie Reeder to the Blog today!  Take a moment to learn more about Stephanie and visit her website Stephanie Reeder Photography today!   Thank you so much Stephanie for taking the time to share your work with us!
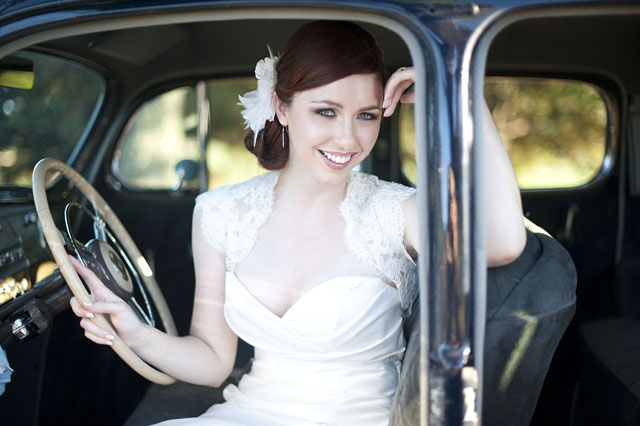
Where did your inspiration for photography begin?
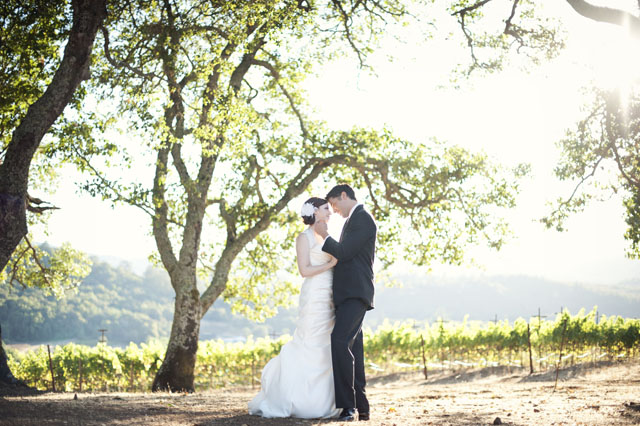
I have always loved photography and could get lost in photography websites for hours admiring the beauty of the art, but it truly didn’t come alive for me until my son was born just over four years ago. As a first time mom, I wanted so badly to capture every moment with my son while he was still young.  As Tara Chisholm once said, “Photography is the beauty of life, captured” and to me it so true to capture those moment you wish to hold onto forever. How would you describe your photography style?
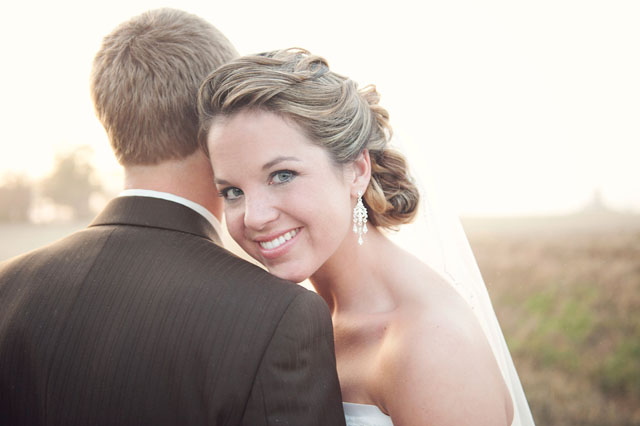
I consider my style to be very natural, fun, and very much in the moment. I truly believe that everyone has a story to tell and I find it my passion to bring their story to life through their emotion and connection between one another. Some of my most favorite images are those where a couple can be captured in a way they never saw themselves before. Did you study photography in school or are you self taught?
To be completely honest, I have never picked up a photography book in my life. I have always been the type of person to learn hands on and figure the ins and outs on my own. Now, that being said, I did take great use of the internet when it came to things I had no clue about. I participated in forums, asking questions when needed, and reading what others were sharing. From there, I learned what I loved and continued to master my style. Do you shoot Canon or Nikon, and what is your favorite lens?

I am all the way a Nikon lover! I currently shoot with the Nikon D700 and I go back and forth between the Nikon 24-70mm 2.8 and the Nikon 50mm 1.4. I love these lenses for two very different reason. On a wedding day, the 24-70mm allows me to have a lot of versatility and the 50mm allows for that dreamy depth of field that I love when capturing emotion. Do you have any tips for photographers on how to find the light?
My husband calls me crazy, but I see light in a much different way now, then when I first started. We’ll be driving down the road and I’ll see that perfect pocket of light and I’ll sometimes wish I could stop, place a subject and shoot for hours. My biggest tip for a photographer is to train your eyes to see the soft light over the harsh direct light. You can often find this under or between the trees, at the corner of a barn, and especially two hours after sunrise or my all time favorite, two hours before sunset…for that dreamy light! The greatest importance in training your eye to see the soft light is that you will not always have the perfect scenario to scout, plan, and master the light before a session. Especially on a wedding day you have to think on your feet and be ready to shoot with the light and surroundings given to you. For me, this trained eye has allowed me to enjoy a wedding day much easier then stressing out over where we’ll be taking photos. What do you feel is the most challenging thing about photographing weddings?
If you were to ask me five years ago if I’d be a wedding photographer, I would have probably laughed nervously and said are you kidding me! The thought of photographing a wedding back then terrified me because it was the one day you could not recreate or reshoot. That being said, the moment I stepped in for a friend to second shoot, I was hooked and never looked back! Weddings are not an easy task, but are truly a beautiful blessing to be a part of. The most challenging thing about photographing a wedding is getting everyone where they need to be when they need to be there. I am a very organized person and prior to a wedding day I sit down with my brides, make a timeline, and express to them how important it is that they communicate to their wedding party where they need to be and at what time. If Uncle Joe shows up ten minutes late for family photos, then that’s ten minutes away from your bridal portraits. As a wedding photographer, you have to be able to take control when control is needed. Even though you’re not the wedding planner, a bride will look to you for answers and it’s important to be there for her when the time is needed. How important is pricing when starting a new business?
Pricing is so important now in my business more then ever. When I first began, I gave away the farm only to be later taken advantage of. I finally had to truly reach down and ask myself how much I saw my self worth and where I wanted to be five years from now. When starting my business, I didn’t see my self worth and would spend hours and hours working to only end up in the negative. This was not fair to me or my families time together. When starting your business, make sure you do your research to see what the cost of business is to do in your area and what goal you foresee yourself making in that year’s time. This will greatly help you to see your self worth and what it takes to run a business financially. How do you sell value to your customer when the price tag may be higher then they expect?

It’s been hard, but along the way I have learned that I am not going to win them all and that’s ok! This may sound frank, but when priced competitively in your market, if a client isn’t able to appreciate the investment into their wedding photos, then it’s not worth the time to try and convince them that they can afford my photography services. Before meeting with a client I always share my pricing with them so that they know if they have room in their budget for my photography services or not. By doing this, I have saved not only my time, but the potential clients time in meeting. By appreciating your self worth, the client will in return respect and appreciate your services being provided. What is one of the best lessons you have learned this year in photography or in your business?

While it may sound cliche, “A jack of all trades is a master at none.” I have learned greatly in this industry that I need to know when to stop and not become overwhelmed. There can be a point where if you take on too much your business will begins to suffer. When first starting out, I did everything in the book children, babies, families, weddings and so on. I began to realize that I wasn’t focusing on what I love to do, because I was trying to just get by. Today, I only focus on photographing weddings and engagements. By doing this, I have first and foremost been able to provide my brides a wonderful experience from start to finish and secondly been able to focus on marketing, social media, and business proposals which in return brings me the business I desire to have. If you could encourage a new photographer in one area, what would it be?
If there was one thing I could tell a new photographer in this industry it would be to BE and Believe in yourself. There have been several times along the way where I have compared myself to others or wonder what I could do differently to fit in a little more. However, the best thing I have done for business is to love myself, my style, and images. Being unique and trying new things are what makes a photographer stand out. Have there been times where I wished I would have thought of that, yes, absolutely, but that’s what I admire about my peers and in return your clients will as well. Think and market your business outside of the box and always remember to let yourself shine no matter what someone else is doing! What do you love most about being a photographer?
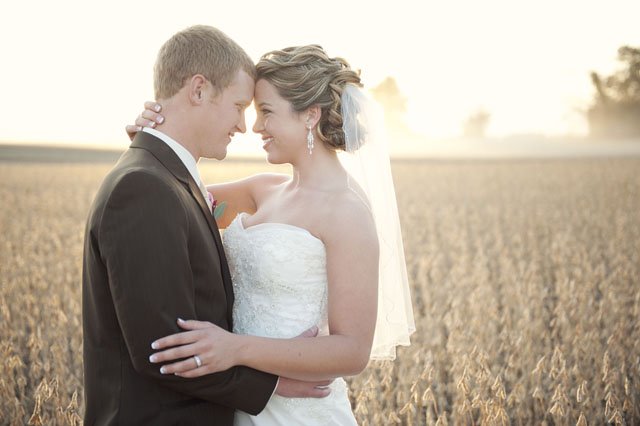
Oh there is SO much I love about being a photographer and working in the wedding industry. My biggest love is working with the most amazing couples and capturing their special day. Through the entire process of meeting them for the first time, to helping them through their planning process, to the final BIG day, is so rewarding. Not only do I have the opportunity to be a part of one of the most beautiful days in a couple’s life, I also get the opportunity to meet new friends and work with amazing people. Where do you see yourself in 5 years?
Five years ago, I didn’t see myself as a professional wedding photographer, so five years from now, I would love to see myself on a platform encouraging those who don’t believe that they can do what they love if they follow their hearts and passion for photography. Really, we can be whoever we want to be as long as we work hard, be strong, and dream BIG!

blog_separator

About Stephanie: I am a mother to one amazing little boy (He is my life!) I am a wife, sister, daughter, and friend I am in love with emotions, light, and all things beautiful I am fun, outgoing, real, and optimistic I dream of the future, but always live in the moment Finally I love who I am and will always be me!

Visit Stephanie at her WEBSITE | BLOG | FACEBOOK

Tweet


2 Comments

Guest Contributor

Clean Edit Challenge #2

by Guest Contributor Amanda Padgett

Hello! I am super thrilled that Pretty has asked me to come back and do another editing tutorial and “challenge” with you!

When I was thinking about what I could talk about or teach, the main thing that came to me was levels. Levels is an amazing adjustment layer that both Photoshop CS# and Photoshop Elements has, and in my opinion, it is seriously under-used. So, today I’m going to be the “Levels Evangelist.”

To teach levels today, I am using a picture I shot of my daughter last fall, when the white balance was not set right, giving me an image that was too pinkish.

You can download this picture at Flickr, if you would like to work along with me during the video (below).

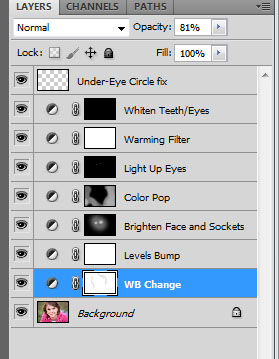
If you remember from my first edit tutorial/challenge, the first few things I fix when I begin the edit process is exposure, contrast and white balance. Today the white balance is glaringly off, so I am going to fix that first! Here are the steps I followed for my edit:

  • White balance fix: Levels adjustment, click the gray dropper and then click around on the whites of the eyes until you find a WB that suits the image. Lower the layer opacity if needed.
  • Contrast bump: Levels adjustment, pulling in the black slider to about 12 and the gray slider to about 1.08.
  • Brighten eye sockets and face: Levels adjustment, pulling the gray slider over to the left to about 1.25 and the black slider to around 7. Then I inverted the mask (control/command + i) and brushed over the eye sockets at about 50% brush opacity and then over the whole face at about 30% brush opacity. Then I lowered the layer opacity to suit.
  • Color pop: Levels adjustment, pulling in the black slider to 19 and the gray slider to .93. Inverted the mask and brushed only over the grass and her shirt.
  • Light-up catch lights: Levels adjustment, pulling in the white slider to around 224, the gray slider to 1.35, and the black slider to 8. Then invert and brush over catch lights and iris of each eye.
  • Warm it up a bit: Warming filter 85, reducing layer opacity to around 50%.
  • Whiten teeth and eyes: Hue/Saturation adjustment, reducing saturation and increasing lightness. Invert and brush over teeth and eyes at different brush opacitites, then lower layer opacity to around 50-60%.
  • Fix under-eye circles: Blank layer, use eye dropper to sample “good” skin around under eye circle, then click on brush and brush the color over the circle. Repeat for other eye and then lower layer opacity to around 40%.

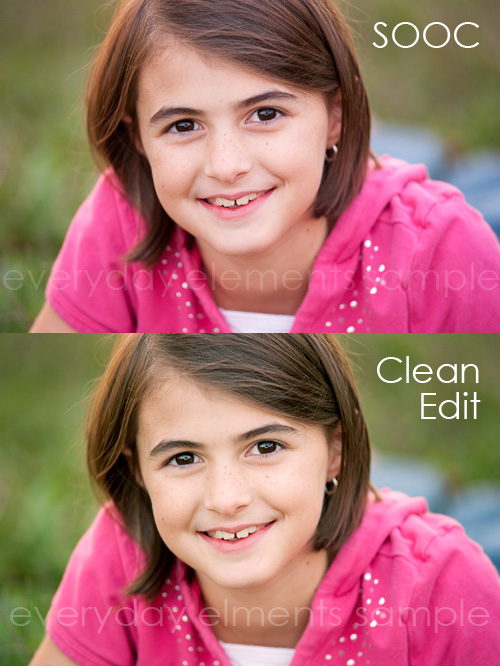
Here is the before and after comparison. I think it is a nice, realistic, clean edit that did not take super long to accomplish. And, it helped show off how awesome Levels is!

Hopefully, the first edit challenge helped you be more familiar with what we did today. If you are a little confused still, watch the video below. I show the whole edit process in both Photoshop CS5 (plays first in video) and in Photoshop Elements 10 (shows second in video). Those reading this blog post in a blog reader or via email, the video will not show up for you. Please click over to the blog and then you will be able to view it.

blog_separator

Hello!  I’m Amanda, a quirky, introverted Mom of four, who is passionate about helping others learn their cameras and editing software. I also currently homeschool my four kids, ages 13 to 6, all whom run away when they see me carrying my camera.

Visit me at my WEBSITE and FACEBOOK page!


Tweet


11 Comments

Guest Contributor

Five Tips to Make Your Blog Rock

by Guest Contributor Laura Winslow

Choose a design that you love
Just like a home, you want to make your blog a place that you enjoy being. If you enjoy being there, so will your readers. Some resources that make it easy as pie to create an uber-fab blog are {Blog Sugar} Kits from Dear Miss Modern, and add-on designs if you have a wordpress ProPhoto blog. Choose a design and design elements that make you happy, that speak to you and that are reflective of who you are (not who you think you should be).

Write in a way that shows your readers who you are
I love to laugh and probably need a “smiley face anonymous” group as I am a complete abuser of the little dudes, but that’s just ME. 🙂 Hey, I like smiley faces, I like using them and I would much rather use too many smiling icons than to ever be interpreted incorrectly online or via email. Are you more direct and less casual? Then show it! Ultimately, your best clients are those that really see and feel your vision, and there is no better way to ensure that they do than to be yourself. Let them feel like they know you before they even pick up the phone. One of my favorite blogs that I feel is the perfect example of this is the sweet Kristen of Brand Camp. Read it. Feel it. Laugh and learn. Kristen also has SO many wonderful products that help you with everything from writing a bio to creating interesting blog content.

Choose topics that interest you and that are relevant to your readers
Creating a regular blog feature–whether it be weekly or monthly–helps to ensure quality content for your blog, helps you to stay on track and keeps readers coming back for more. Have you tried weekly blog columns in the past and had them flop? No fear, lovelies! Know that sometimes you will fail, it is all just part of the path to awesomeness. I have had a myriad of ideas for blog posts–some are received with a standing ovation, others simply fizzle out. I don’t take it to heart and this only serves to motivate my creative brain to think up the next new idea. I have a wildly popular weekly blog feature titled Wall Art Wednesdays. I religiously posted fun wall display ideas to this column for well over a year before it actually took off like wildfire. Yep, a YEAR. Now, each Wednesday brings 10,000 or more loyal visitors to my blog. I am a photographer, so naturally those that follow me (and of particular importance to me, my clients) are interested in how to use their photographs to decorate their home. I find it fun to seek new ideas and inspirational walls to share with others.

When appropriate, make sure to spread the love to those that you find amazing
Link, link, link baby! Did you post photographs of your daughter enjoying an ice cream cone at that cool new spot? Share the name and website for all to enjoy! Did you use a new template for your recent mini sessions? Share with your fellow photogs! Think people will be interested to know where you got that rad mirror peeking out of your photo? Share the shopping love! We are a community of photographers, bloggers, mothers, fathers, families and commerce–what does it hurt to give others a little exposure? In my experience, even if you gain nothing (which should be your expectation), anything that does come of it is just awesome gravy, baby. 🙂 (Had to add a little smiling love)

Promote your blog and its content
There are SO many free and easy ways to grow your blog and your audience. Each time I publish a new blog post, the link automatically is posted to my personal Facebook page, my Facebook business page and to my Twitter account. I can also then promote it by writing a little catchy blurb and linking again. I also have a link to my blog, my Facebook and Twitter accounts in my email, and by using Wisestamp, I can also have an excerpt of my most recent blog post automatically added to my signature. Voila! Easy, peasy! A title pulls them in from all over! Email marketing sites like Madmimi and MailChimp allow you to post an email sign up on your blog to grow subscribers. You can then use those subscribers to give them relevant and fun updates on some of your more pertinent blog posts.

Above all, enjoy the journey–don’t take yourself or your blog too seriously. It should be a fun place to go, to share and to use as a creative outlet. Make it your sweet little haven and others will come and feel right at home. 🙂

 Print your own 8×10 {blog it} poster HERE + stay inspired!

xoxo,
laura

blog_separator

About the Author:  Laura is an on-location photographer in the Phoenix area with a modern yet classic style. She loves her clients, traveling and chasing after her two little sweeties, Jackson and Addison. With Starbucks in hand, she loves to dream of both her next vacation and her next fun project. Laura’s work has been featured in Babytalk magazine, Celebrate magazine, on HGTV.com and as the featured photographer in ads for MpixPRO in Professional Photographer, Rangefinder and Digital Photo Pro.

Visit Laura at her WEBSITE | BLOG | FACEBOOK pages today!


Tweet


9 Comments

Guest Contributor

It’s Not You, It’s Me {Managing Your Client’s Expectations}

by Guest Contributor Elizabeth Halford

Have you ever had a client claim that they don’t like their photos because they aren’t like the ones on your website? Or had a wedding client confused about why her photos are in B&W? Had any complaints at all? Unfortunately, it might be your fault. But not in the way they’re trying to make you believe. You may simply have not maintained their expectations.

Expectation management. It’s the single most important element of your business communication because if you don’t get it right, you’ll probably give up. Like I wanted to before I realized that it was me, not them. But fear not – you can manage your clients’ expectations with a few simple steps:

First Impressions – Expectation management begins before you even know they exist. When someone clicks through to your website, this is your only chance at a good first impression. And of course, it’s in tip-top shape with the best of the best of your work. And hopefully by the point you’ve launched yourself as a photographer who is now available for hire, you know who you are and what you want to be offering to your clients. If you don’t want to do maternity sessions, don’t show them on your website. If you love exploring a certain genre personally but aren’t ready to integrate it into your business, don’t show the work. Because if you do, you’re saying: “…and I could do this for you, too!”

Consistency – I’ve said before on my blog that you shouldn’t get into the business until you can consistently produce the same caliber of work over and over again. This means that you’re not just showing a few lucky shots you got on a shooting spree, but work which you are confident that you can reproduce for your new client so they don’t wonder if it was even you who took the photos they fell in love with in the first place.

Brand – Your images are the product you’re selling. And just like any company producing products, they need to maintain your brand identity with integrity. For example, you can pretty much expect that when you walk into the Apple store, you’ll walk out with something smooth, white, fast and sexy {ok…I’m a fangirl}. Wouldn’t you be like “…what on earth?” if you walked into the shiny, bright store to find a bulky, black, matte computer smack-dab in the middle of that store? I feel like that when I view a photographer’s portfolio and I see something like this:

  • Image 1: soft
  • Image 2: etherial
  • Image 3: dreamy
  • Image 4: super moody urban grunge
  • Image 5: soft
  •  Image 6: dreamy

That sharp, grungy urban image throws the whole thing off. It’s clearly not part of the identity of that business. So this is where it’s so important to maintain vision about what your brand’s image is actually projecting and knowing what kind of photographer you are.

One way around this if you strongly identify with two different styles is to be very calculated about sending the right message to your clients. For instance, having the main page of your website be a choice between entering your urban portraiture and vintage lush websites. Or two different portfolios. Or two different branches of your business altogether with different websites, different marketing materials, different business cards, all meant to be drawing different clientele.

This post is about how I personally balance image consistency and creativity without sacrificing one or the other.

Editing – Going along with the above, your editing should remain consistent so your clients can picture their pictures and know exactly what they’re going to get if they hire you. And the editing should remain consistent throughout the post production process of each session individually. Don’t do some photos punchy and others soft. This will cut right through the storytelling power of viewing the images together and the capabilities the clients have for displaying them together.

When people pay for a session, they’re buying a product that doesn’t even exist yet. They’re buying faith in you and their faith will be stronger if they can look at your website, know exactly what you provide and what it will look like for their own session.

The most important question – When you get that first contact with a client, have a few important questions ready for them. The most important to me is asking “so what image(s) made you want to call me?” Then right off the bat, I know what they will love for their own session and they won’t be surprised with the results. More about that here.

Money – There’s no worry about a client getting sticker shock at their viewing session. Because my website clearly states the starting price of both a la carte prints and collections. This weeds out people who don’t want to pay at least that and gives them a starting point in their mind of what they’re looking at spending.

Booking – When they book a session, I explain how everything goes, how long it will be, whether I plan on posing or not, what the location is like and when they will see their photos.

So, you see, it’s all about communication. Communicating in words, yes, but also in imagery, brand integrity, customer service. It’s all about telling your client exactly what they’re going to get and giving it to them exactly.

{Further Reading}

Maintaining Artistic Expectations

What’s in my Wedding Contract

Managing Client Expectations – Weddings

Managing Money Expectations

blog_separator

About the Author: Elizabeth Halford is a professional photographer and blogger. She gives real photography advice in real.plain.english. Visit her on Facebook and join a community of photographers just like you!
 

Tweet


3 Comments

Guest Contributor

Food Photography: Finding the Pretty and Delicious

by Guest Contributor Leigh Anne

I am not a professional photographer. I am a cook and I am a blogger thus I take pictures of food. I have taken a photography class and learning to shoot in manual has been the best thing I ever did for my improving my photography skills. But most of what I have learned has been through trial and error and reading great blogs like Rock the Shot!

The first question I am always asked is what kind of camera do I use. I shoot with a Nikon D90 and use either my 50mm1.8 or my 17-55mm 2.8.

When people ask me about my food photography and how I get such pretty pictures my number one tip is use natural light.

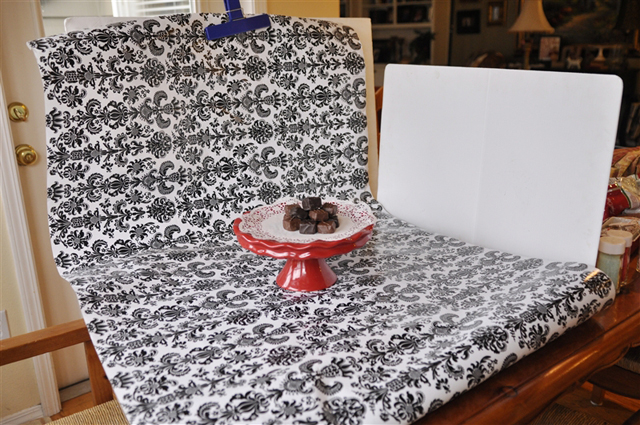
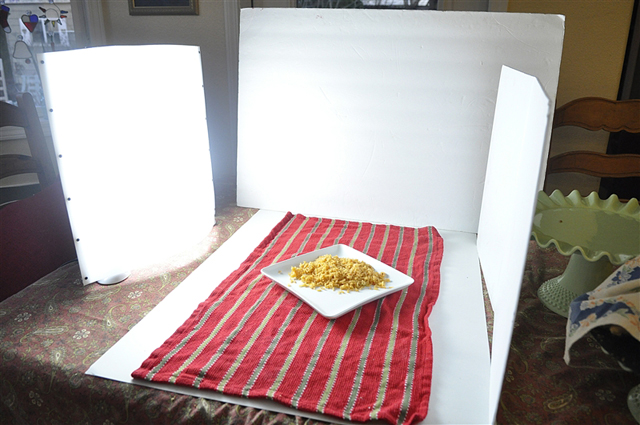
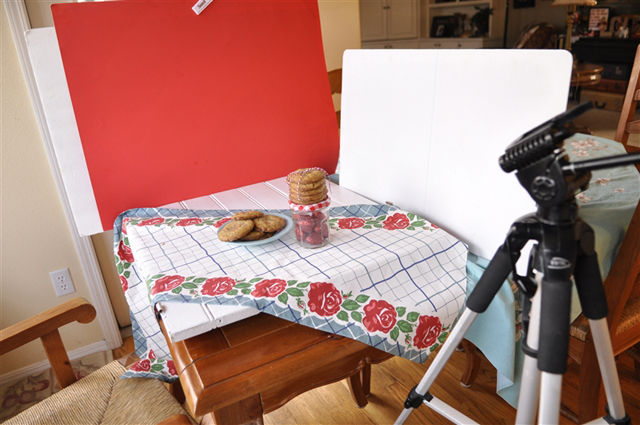
My kitchen has a nice little area with some beautiful northern light. This is where I do most of my picture taking – right on top of my table. I have a real professional set up.

My backdrop is a white foam core board from the Dollar store and that is an old cupboard door I found at the dump! Sometimes I use another piece of foam core board on the table instead of the cupboard door. I also use another piece of foam core board as a reflector. Like I said, I am not a professional! But it works.

This is my basic backdrop which I can then change up with different colors and materials. I have a collection of different color poster boards that I use a chip clip to attach to the board.

Here’s what the actual photo looked like.

You’d never know it was taken on top of my kitchen table!  I also have a collection of wrapping paper that makes a great backdrop too.

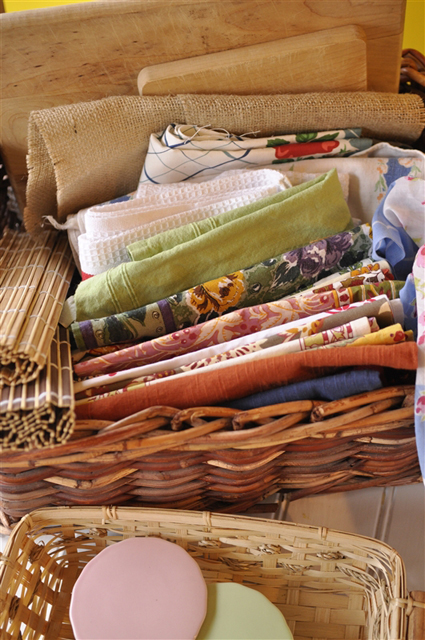
I like variety so I have accrued quite a collection of fabrics, papers and serving pieces that I use for my photos.

I am also lucky enough to have a small office off my family room with a closet and counter where I can store all the stuff. There is a lot of stuff! Fabric napkins make a great photo prop and are just the right size. I also like to vary texture so old wooden cutting boards, burlap, bamboo all work great too.

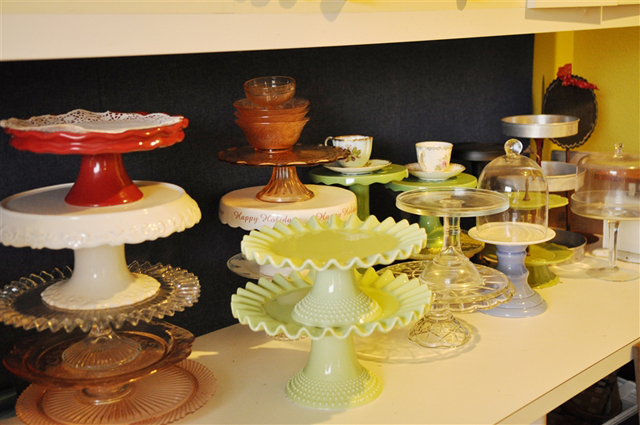
Sorry for the bad photo… I have a slight addiction to cake stands.

Using natural light can sometimes be a challenge for a food blogger, especially in the Northwest where I live. In the Fall and Winter and sometimes in the Spring and Summer natural light can be limited. We have lots of cloud covered, rainy, gray days here in Oregon! I blog about the food my family actually eats, what we are having for dinner. So a lot of my photos are taken at dinner time. In the winter when the days are short and it’s dark outside by 4:00 p.m. it’s hard to take a good photo!

Fortunately I discovered the Lowel EGO light which helps on those dark and dreary days. It is certainly not as good as natural light but it’s better than my regular kitchen lighting!

Here’s a photo taken with the light. Not bad but natural is better!

The other tool that is helpful in low light situations of course is a tripod. I am a little slow to the game and just recently started using one and it has helped tremendously when I have to use a lower shutter speed because of the lack of light. My pictures are much crisper.

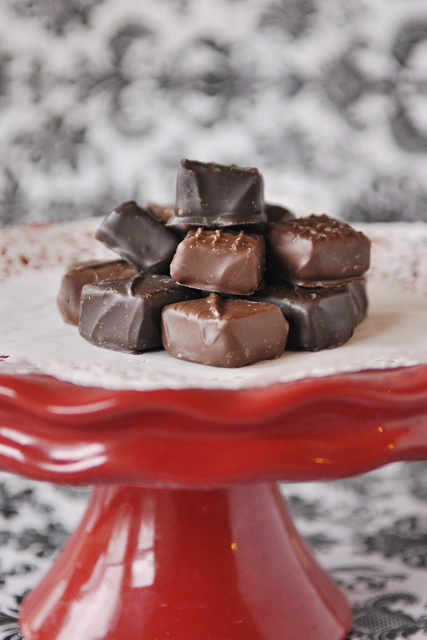
Thanks to Rock the Shot for letting me share today! If you are interested in any of the recipes for the food you just saw I’d love for you to come over and visit me at Your Homebased Mom! The taquito recipe is here. The chocolates were a gift, sorry no recipe and the cookie recipe is here.

This year I’m focusing on Being Grateful and sharing a photo each day on my Facebook Page of something I’m grateful for – I’d love for you to follow along.

blog_separator

Hi! I’m Leigh Anne, mom of four, recent empty nester and wife who loves family, food, entertaining and fun. I love sharing my journey of finding the pretty and delicious in life at Your Homebased Mom and taking pictures of all those pretty and delicious things.  I have learned that the pretty and delicious is always there – sometimes we just have to look a bit harder for it than other times.

 

Tweet


17 Comments

Guest Contributor

4 Simple Steps to Change Your Life

by Guest Contributor Aby Garvey 

What is it you want for 2012? Each of us has goals, hopes, dreams, or wishes, and regardless of what you call them, these thoughts represent your desire for a better life.  But does it seem like too often, your grand plans for the New Year are all but a fleeting memory by January? This year try a new approach. Take out four sheets of paper and follow this four step process to begin making real change in your life.

1. Celebrate Your Successes 

On the first sheet of paper, write down your accomplishments. What do you like about yourself? What makes you proud of yourself? This isn’t the time to be humble, so let loose and give yourself the credit you deserve!

2. Dare to Dream 

As crazy as this may sound, many of us have forgotten how to dream! This exercise will help you remember how much fun it is to dream. Using your second piece of paper, write down five to ten changes you’d like to make in your life. Would you like to be in better shape? Quit smoking? Change careers? Improve your financial situation? Start a new business?

3. Wave Your Magic Wand 

Now, take out your imaginary magic wand, and wave it over your list of dreams. If only one of these dreams was guaranteed to magically come true, which one would you choose? Write this dream down on a third sheet of paper as a goal. As you write down your goal, make sure it is:

  • Personal. Use ‘I’ and ‘me’ statements, and make sure this dream only pertains to you.
  • Present tense. Write your dream as if you have already accomplished it.
  • Descriptive. Use adjectives that describe the benefits of achieving your goal. Use words that make your goal irresistible!
  • Time sensitive. Set a deadline for achieving your goal.

Here’s an example:  “It is March 31, 2012. My business is profitable and well-run because my office is organized and efficient.”

4. Take Action Now!

On your fourth piece of paper, write down three action steps you will take today. You don’t need to have all the steps figured out before you begin taking action. Every small step forward makes the next step even easier to see. (And every step forward creates momentum, too!) Remember, this:  action creates change! So don’t worry about finding the perfect step to take, just take one step forward today. Then…

Do It Again 

Once your initial three action items are completed, pull out your goal again and write down three more tasks that will move you a step closer to your goal. Repeat this step until you have successfully reached your goal.

By focusing on just one goal, and working toward it three steps at a time, you will be well on your way to achieving your goal by the end of the week! Just think where you’ll be at the end of January…you’ll be seeing real progress toward your goal, instead of facing a fleeting memory of what could have been.

blog_separator

Aby Garvey is the founder and co-owner of simplify 101. Her passion is helping people create real and lasting change in their lives by getting more organized. Aby believes organizing is a fun and enjoyable process, which is why she developed a whole new way to get organized—simplify 101’s online workshops. By making the process creative and fun, simplify 101’s online workshops teach students how to implement organizing and time management solutions that really work, putting an end to disorder and the stress that comes along with it.  Connect with simplify 101 on the web, blog, facebook, or twitter.


Tweet


6 Comments

Guest Contributor

How to Create an Action in Photoshop

by Guest Contributor Anna Gay

If you are new to Photoshop, you may find yourself repeating the same steps over and over again, because you like the effect that certain adjustments have on your photos. By now, you have probably heard about Photoshop “actions,” which are basically just a series of steps that, by pressing one button, will be applied to your photo – very similar to a Lightroom preset. You can easily create your own actions in Photoshop to simplify your workflow!

Keep in mind that actions cannot be written in Elements, unfortunately, they can only be written in Photoshop CS. However, actions can be written in CS that can be used in Elements, so if you want to download pre-made actions online, be sure that you download the actions that are specifically for Elements.

For now, let’s look at how to create an action in CS.

First, make sure your Actions palette is open by going to your top toolbar and selecting Window, Actions, and a check mark will appear next to the word Actions. You should have a palette similar to the above photo open on the right side of your screen.

Click on the folder icon, Create New Set

You will then see this box, at which point you can rename your folder if you want for easy identification, especially if you have a lot of actions stored in Photoshop.

With your new set selected, click the Create New Action icon, circled above.

Again, you will have the opportunity to name each action within the set. Now, click Record. From this point forward, Photoshop will record everything you do.

The best thing you can do when you are writing actions is to work with Adjustment Layers. So, every time you want to apply an effect to your photo, select Layer, New Adjustment Layer, and then the type of adjustment you want to make. That way, when you are finished recording your action, all of your layers will remain visible, and when you use the action in the future, you’ll be able to tweak each layer, depending on what works for the photo. If your action works on one photo, chances are it may not work exactly the same on the next, but with the layers remaining open, you can make small adjustments to each layer, if need be. When you are through writing your action, press the Stop button, circled above.

Finally, when you want to play your action, simply click the arrow next to the set you have created for your actions, and then select the action you wish to play. Then, press the Play button, and your action will repeat every step that you have recorded!

blog_separator

Anna Gay is a portrait photographer based in Athens, GA and the author of the dPS ebook The Art of Self-Portraiture. She also designs actions and textures for Photoshop. When she is not shooting or writing, she enjoys spending time with her fiancee, and their two cats, Elphie and Fat Cat.
 

Tweet


7 Comments

Business & Marketing Guest Contributor

Accidental Marketing Success!!

by Guest Contributor Kelly Jo Mitchell

It’s that time of year…the time when we all look at our successes and failures from 2011 and decide what we did right and what we need to improve on. I would love to say that my BEST marketing choice of 2011 was a deliberate ingenious idea, but the truth is, it resulted from under-pricing and overbooking my sessions! After booking more senior sessions than I ever imagined, it became apparent that I could not manage to sit down with every client in a timely fashion for their in-person proofing appointment. Our high school has a November 1st yearbook deadline (ridiculous, I know!), so cramming all those seniors in between July and October is quite a feat! I determined that I had to shoot and edit for 4 months straight and find a way to preview their sessions as soon as possible and hold off on scheduling many of the in-house ordering sessions until after the big yearbook deadline. An online gallery is so BLAH, so I took the tool that evoked the most emotion in my in-person proofing appointments and found a way to use it in the place that my seniors (and many of their moms!) frequent the most…FACEBOOK. What is this magical tool, you ask? Probably the easiest one in my photographers toolbox…ANIMOTO!

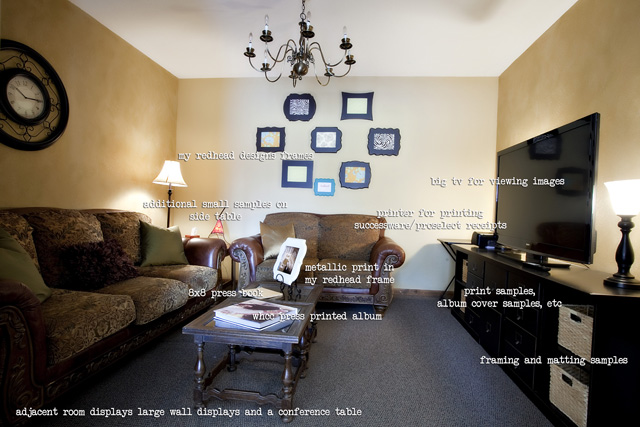
I have a beautiful studio in a great old historic home on Main Street in our charming tourist town. I have set up a comfy, cozy room to view images on a big-screen TV to warm lamp light, lots of samples in sight, a little Colbie Caillat playing in the background and a soothing vanilla scent in the air. I LOVE it…and so do my clients. But, it wasn’t doing me much good when I realized that I had such a huge demand for my senior portrait sessions that the only way to fit them all in was to book solid for 4 months straight. Considering that I have a husband and 5 kids, booking solid for me is Mon-Fri from 10-3. And that means editing til the wee hours after tucking my family into bed while consuming insane amounts of diet coke! I had to find a way to allow my clients to view their images within a reasonable amount of time that would have the same WOW factor as the first impression they get when they settle into my sales room. The tool that always evoked the most emotion in these sessions was the Animoto videos. Now to figure out how to use it effectively without losing the oomph!

Here’s how it goes… I do the typical sneak peeks a few days after each client’s session. It gets them excited and allows them to start using my images on their facebook page. Before it loses it’s excitement with family and friends, I work away at editing their session and getting it ready for proofing. I simultaneously upload the images to an online proofing gallery and my Animoto account. When both are ready to view, I post the Animoto video to my facebook business page and watch the hype begin. When I feel that it has had a chance to go a little bit viral, I send a message to my client with their on-line gallery password and let them know that they are welcome to order ala-carte online. However, I have specialty packages available for ordering exclusively when they come in for an in-house viewing appointment. The promise of saving on their print order is typically enough to encourage them to come in and sit down with me when my schedule opens up for viewing appointments, but it allows those clients who simply want a couple of 8×10’s and a few wallets to place their order themselves without the need for another appointment. This allows me to focus my time on the clients who are interested in purchasing collections rather than just a few gift prints.

So, while I can say that watching the emotional response to my Animoto videos in a sales session is a priceless experience, watching them go viral on Facebook and fuel the growthof my business is even more rewarding! The marketing value of social media is WAY more valuable than making a few quick bucks off of the sale of a DVD…even though I often still do! And stories like the one I heard from a mom last week as we sat down to place her order are heard on a daily basis. As we watched the video of her daughter’s session at the start of her in-house viewing appointment, she told me how she and her daughter saw the video pop up on facebook at 1:00 in the morning (not uncommon practice for us mom-togs! lol!) and climbed in her bed to watch it together. She said they got so excited that her husband wondered what on earth was going on and she was brought to tears by the authenticity of the images set to music. The next day at work she risked getting in trouble accessing Facebook from her office computer to show the video to the crowd of women gathered around her desk. The button at the end of the video sends them straight to my website where they can view my work and become a fan of my Fcebook page…building my business while I sit back and watch from my desk.

As I sit here and analyze 2011, I have come to a few valuable conclusions. Yes, I overbooked my seniors. Yes, I will raise my prices in 2012. Yes, I will strive to schedule an in-house viewing appointment with each and every client next year. Yes, I will make every effort to learn from my growing pains and take charge of my business in 2012. But my accidental Animoto Facebook Marketing Plan is one happy accident that I will NOT change in the coming year! In fact, I encourage you to learn from my mistakes too and give it a shot!

blog_separator

About the Author:  Kelly Jo Mitchell, CPP and 2012 CPP Liaison, has been married 15 years and is mom to 5 kids ages 7-12. Her studio, Dreamcatcher Road Photography, is located in the small tourist town of Hayward in the Northwoods of Wisconsin. She specializes in studio and location portraits with a strong emphasis on the senior portrait market.

Visit Kelly Jo at her WEBSITE and FACEBOOK PAGE today!


Tweet


8 Comments

  • « Previous Page
  • 1
  • …
  • 23
  • 24
  • 25
  • 26
  • 27
  • …
  • 30
  • Next Page »

Popular Categories

You might also like

Love of Lifestyle Photography Workshop by Ashley Spaulding

Love of Lifestyle: The Fundamentals of Lifestyle Photography

The Lightroom Lab: An 8-Week Course to Mastering Lightroom

Pretty Forum for Photographers

Let Them Eat Cake—A Marie Antoinette Inspired Shoot

Tips to Keep Your Images Interesting in Limited Surroundings

Natural Light: The Art of Finding Magical Light

Copyright © 2025 · Divine theme by Restored 316

Copyright © 2025 · Divine Theme on Genesis Framework · WordPress · Log in

×
Never miss a thing!
Sign up for Pretty Forum Newsletters and get all the latest news on our upcoming:
  •  
    ​Workshops
  •  
    Celebrity Mentors
  •  
    Free Downloads 
  •  
    Photo Challenges
  •  
    Vendor Discounts
  •  
    and much more...