• Pretty Forum
  • Pretty Presets
  • Pretty Actions

Pretty Forum

Online Photography | Forum | Workshops | Tips | Tutorials | Classes | Business | Courses | School

  • Home
  • Blog
  • Enter Forum
  • Workshops
  • About
    • Meet the Team
    • FAQ ABOUT JOINING THE PRETTY FORUM
    • WHY JOIN THE PRETTY FORUM
    • Testimonials
    • Privacy Policy
    • Site Terms and Conditions of Use
  • Advertise
  • Contact
  • Join

Guest Contributor Post-Processing

Clean Edit Tutorial and Challenge

by Guest Contributor Amanda Padgett

Hello fellow photography enthusiasts!! I am very excited to be at Pretty today, sharing with you some simple and easy ways to give your image a quick “clean” edit in Photoshop Elements/Photoshop CS5. Keeping editing simple will keep the fun in it, which will give you more time for shooting!

Now, before I start with the edit tutorial, I want to encourage you to get the best possible picture “IN” camera.  What does that entail?

  • Good focus
  • Good exposure
  • Good white balance
  • Good composition

Editing can make a good picture great but seldom can it make a terrible picture into a good one. Start with a great picture and your editing will be quick and painless!
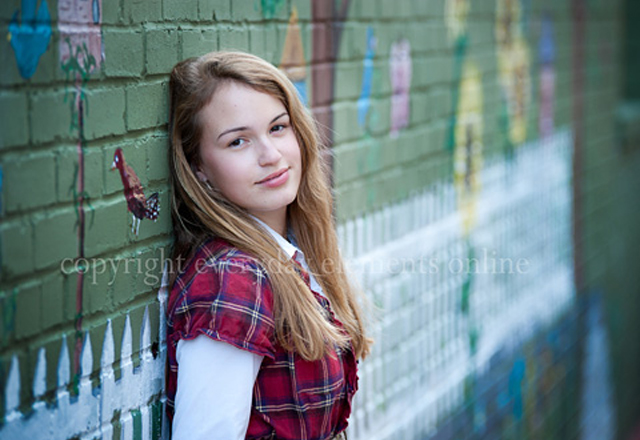
The image we will be working on today is one that has all of the things I listed above except good white balance, but we will fix that. However, even though it is a pretty good image coming straight from the camera, we can do a few things to make it more polished and “clean” it up a bit.

Anytime I start editing an image, whether in Lightroom, Photoshop Elements or Photoshop CS5, I almost always do the following steps:

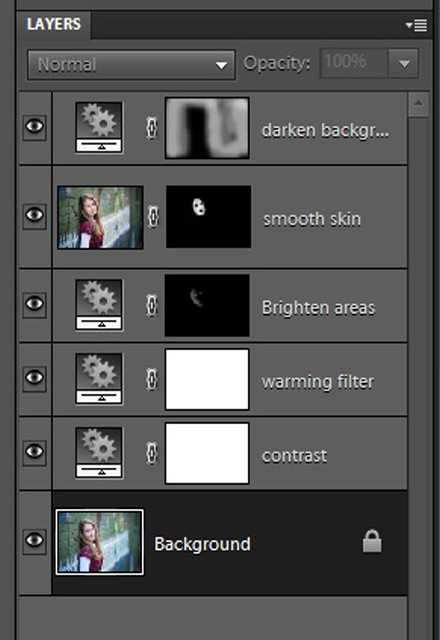
  • Exposure & contrast fix – I use Levels (or Curves in CS5) for this tweak
  • White balance tweak – Levels is the best for this, using the gray eye dropper, but you can also use a photo filter (as I do in the video)
  • Brighten/darken areas – for this, a Brightness/Contrast adjustment layer set to Screen blend mode to brighten, or set to Multiply blend mode to darken. Invert the layer (ctrl/cmmd + i) and brush over areas in need of brightening/darkening.
  • Smooth skin – create a pixel stamp (ctrl/cmmd + alt/option + shift + e), then do a blur layer of your choosing, I go between a Median filter or Surface Blur, as I use in the video. Add a mask and invert (ctrl/cmmd + i) and brush only over skin.
  • Darken background – one way to do this is a Levels layer, moving the black and gray sliders to the right, then invert and brush only over background.

Here are those same edits, as they would look in your Layers palette:
After making these quick changes, I flatten, sharpen (use the sharpening action of your choice, or sharpen as you see fit – I like the High Pass filter for sharpening).
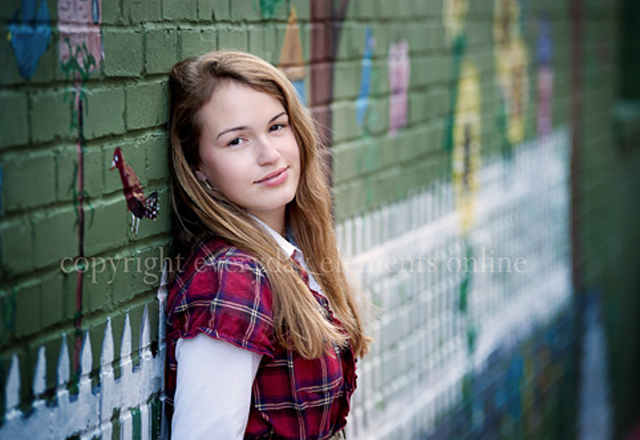
For a side by side comparison of what five quick steps can do:

These steps may seem way to vague if you are new to editing, so below is a video showing these exact steps in PSE and in CS5 (comes last in video).

Now, because practice is the best way to learn and improve, if you like you can download the picture I used in this tutorial and do the steps on your own, following the video, doing each step as I do it. In January, I will begin a weekly work-along tutorial just like this, so please feel free to come visit me at Everyday Elements.  

blog_separator

Hello!  I’m Amanda, a quirky, introverted Mom of four, who is passionate about helping others learn their cameras and editing software. I also currently homeschool my four kids, ages 13 to 6, all whom run away when they see me carrying my camera.

Visit me at my WEBSITE and FACEBOOK page!


Tweet


18 Comments

Guest Contributor

Surefire Ways a Blog, and Blogging For Others, Can Increase Your Business

by Guest Contributor Anna Gay

If you have even remotely explored the idea of having a photography business, I am sure by now you have realized that as a photographer, you have to wear a lot of different hats. From photographer, to project manager, marketing director, accounting manager and for some clients, personal therapist, you have a lot on your plate! If you do not already have the ‘Photography Blogger” feather in your cap, you may want to explore this exciting and fascinating realm, here’s why:

  • Having a blog, even if it is separate from your website, is a great way of showcasing your work, and also reaching a different audience than you would if you had a stand-alone website. People who read blogs have a tendency to comment on blogs, and also Tweet, Share, Re-pin and Stumble, which will eventually drive more traffic to your blog, exposing your work to a new audience of potential clients.
  • Photo-blogging gives you the opportunity to share your experiences, and for potential clients to get a feel for how you interact on a personal level. Sure, a photo gallery on your website is great and serves its own unique purpose, but having a space where you can post your best 5-10 photos from a shoot and then explain what you were going for with the shoot, and why it was a great experience, can really make an impression on people because yes, the images do speak for themselves, but a few words on why YOU enjoyed the experience is a perfect way of engaging potential clients.
  • It is safe to say that the majority of us are self-taught photographers, which is part of the beauty of photography, and thankfully we have the internet as a tool for learning! Sharing your tips and tricks on your blog is a wonderful way of building a rapport with other photographers, who will, most likely, return the favor by sharing their tips with you. We all have unique experiences and knowledge, so you can share what is important to you – whether it’s editing, gear reviews, vendors that you like, etc.

With the idea of collaboration and sharing in mind, consider guest-blogging for other photography blogs. One of my favorite things to do, and this is something I never considered doing regularly until I tried it, and realized how fun it is: guest-blogging! Through guest-blogging, you will have your work exposed to a whole new audience, and meet others who are in the photography field. In most cases, if there is a blog you enjoy following, you can email them and ask them for an opportunity to write, and most likely, they will take you up on it! When considering a topic to guest-blog about, work with what you know, just like you would on your own blog. Are you a child-photographer extraordinaire? Then look for blogs that cater to family portraiture. Are you a lighting guru? Then explore guest-blogging for sites that are geared towards lighting and the technical aspect of photography. Also, be sure to ask the editors of the blog you are approaching if there is anything in particular they would want their viewers to see, because the editors may have suggestions for you, and writing about something new is always a great way of learning and doing your own research.

As with any worthwhile endeavor, keep in mind that a thriving photography blog, or even a job as a guest-blogger, doesn’t happen overnight. It does take time to build content on your blog, but regular and varied updates will make the process faster and extremely fun.

blog_separator

Anna Gay is a portrait photographer based in Athens, GA and the author of the dPS ebook The Art of Self-Portraiture. She also designs actions and textures for Photoshop. When she is not shooting or writing, she enjoys spending time with her fiancee, and their two cats, Elphie and Fat Cat.


Tweet


5 Comments

Guest Contributor

How to Make Tax Time Painless this Year (and Earn an A+ from Your Accountant!)

by Guest Contributor Shannan Painter

Does anyone like tax season? That may be up for debate. You don’t have to anticipate tax season like you look forward to Christmas, but there are a few ways to make it less dreadful!

Organize your personal paperwork
Start a folder and label it “2011 Taxes”.  Throughout January, you will begin to receive tax-related documents such as W2s from your employer, 1098 mortgage interest statements, 1099 interest & dividends earned, etc. (Envelopes should be marked with “Important: Tax Information Enclosed”. ) Each time you receive a piece of mail, put it in your designated folder. All documents must be mailed by January 31st, so you should have what you need together by the beginning of February. Your accountant can supply you with a “tax organizer” that contains exhaustive checklists to make sure you have every document you may need.

Organize your business paperwork
Your accountant wants to see year-end totals. If you don’t have this together already, it will cost you a pretty penny to have your accountant add it up for you. In addition to your income and expenses totals, gather together dates large assets were purchased (cameras, lenses, computers and other equipment) mileage logs, home office square footage and any health insurance premiums you paid as a self-employed person.

Schedule an appointment early
Don’t wait until the last minute when your accountant is swamped with returns.  You will receive the best time and attention if you don’t procrastinate.

Respond quickly
If your accountant needs additional information from you, make it a priority to get it to them as fast as possible.

Understand Accountants are human
We can’t read your mind, and as much as we try to remember details about your personal life, it is your job to get information to us. Do a thorough job of filling out your tax organizer so we can maximize your deductions.

Finally, if you find a CPA who is encouraging you to do something dishonest, RUN THE OTHER WAY. Tax fraud is serious business, and is NOT something you want to get tangled up in. A good accountant will find all available deductions and credits, but will never suggest you do something shady.

If you decide to do your taxes on your own, read carefully through each step of the tax preparation program. You may be surprised that it doesn’t cost much more to hire a professional, and it may provide the peace of mind you just might find is worth every penny. Keep your eye out for coupons during January coming from CPAs looking to expand their client base.

Need help organizing your business finances still? Check out our SNAPSHOT spreadsheet.

Just started your business?  Our BUSINESS 101: Setting Up Shop self-study guide will help you walk through all the steps you need to get your business off on the right foot.

Confused about what is or isn’t deductible for your business? Our brand new Deductions Guide will help walk you through the most commonly misunderstand business deductions.

blog_separator

About the Author: I graduated Magna Cum Laude with an Accounting Degree from the University of Montana. Instead of pursuing a career in public accounting and being stuck behind a desk for 70 hours a week, I turned down jobs at big accounting firms to pursue a different love. I chose instead to work from home where I live with my husband, two boys and a puppy named Growler. I live a glamorous, exciting life working from my living room in my pajamas, cleaning crayon off the walls, driving kids to school, playing superheros and taking care of a little dog that likes to refinish furniture with his teeth. I get to work with fun, creative & artistic photographers and help them understand that numbers can be our friends!

Visit Shannan at her website Accounting for Photographers, and on her Facebook Page today!


Tweet


Leave a Comment

Business & Marketing

10 Great Gift Ideas for Photographers

Don’t know what to get your FAVE photographer this holiday season?  Well, we’re here to help!  We’ve put together a fantastic list of 10 Great Gift Ideas for Photographers.  These fun and unique gift ideas are perfect for any photography enthusiast. 

1.  The Brand New Kindle Fire!  One of the most affordable tablets out there with all of features you need for only $199.  Over 18 million movies, tv shows, apps music and more.  I just LOVE this new kindle, it fits right in the palm of your hand, and has a beautiful display.  Full details can be found HERE

2. The Canon EF 50mm f/1.8 II Camera Lens is a great deal for around $100.  If you’re looking for sharper images and love background bokeh, start here.  This is the perfect gift for a friend!  If you’re looking for the 1.4, it’s about $200 more and a great buy.  If you are a Nikon user, check out the Nikon 50mm f/1.8G AF-S NIKKOR Lens. 

3. Spyder 3 Express is a fantastic tool for photographers!   We get a lot of questions about how to calibrate monitors and this is a wonderful way to do it. Product Description:  The Datacolor Spyder 3 Express adjusts the color on your monitor so your photos appear more accurately. Easy-to-use right out of the box, this award winning proven technology helps you calibrate your display.  The Spyder 3 Express is an revolutionary simple monitor color correction tool that automatically adjusts the color of your monitor so what you’re seeing is more true. It is designed for Photo Enthusiasts, Advanced Amateurs, Passionate Photographers and DSLR users of all kinds.

4. If you’re not using Lightroom 3, you are really missing out!  We cannot recommend this program highly enough.  This is an indispensible workflow tool that will help you organize and edit your images quickly and easily.  If you’re a teacher or student be sure to check out the Student and Teacher Edition for a steal of a deal!

5.  Another great editing program we highly recommend is Adobe Photoshop Elements 10.   This is a powerful editing program, and a much more affordable alternative to Photoshop CS5.

6.  Learn all about using on camera flash from lighting expert Neil Van Niekirk’s On-Camera Flash Techniques for Digital Wedding and Portrait Photography.  If you’re tired of getting that “flashy” look when using your speedlight on camera, this is definitely the book for you!!  And be sure to check out Neil’s newest book Off Camera Flash for Digital Photographers.

7. Kelly Moore bags are a FABULOUS way to carry your camera gear in style!  Who wouldn’t love a bag like this for Christmas?  Kelly Moore bags come in a wide range of styles and include bags for both men and women!

8. If you’re like me, you never have enough storage space.  The Western Digital WD 2TB Desktop External Drive gives you a LOT of storage space for backing up your family photos or client sessions.  I have several of these Western Digital Drives.   They are fast, quiet, and very reliable!

9.  Express your creativity with the Lensbaby composer for Canon or Nikon.   Product Description:  All Lensbaby™ selective focus SLR camera lenses provide photographers with a new way to control depth of field by bringing one area of a photo into sharpest focus with that Sweet Spot surrounded by graduated blur. By bending the Lensbaby lens, the photographer moves the sharp area around the photo for customized creative effects!

10. The Bamboo Capture Pen Tablet by Wacom is the ideal tool for editing photos!  Product Description:  Bamboo Capture is a small format pen and touch tablet specifically designed for the digital photo enthusiast. The pressure sensitive pen gives you precise control for your digital photo editing creativity. Four ExpressKeys give you quick shortcuts to your most frequently used commands. Included in the box is a full version of Photoshop Elements and Nik Color Filters to help you get started quickly. Use the pen combined with Multi-finger touch gestures to work efficiently and with precise control.

LEGAL STUFF: This promotion is in NO WAY sponsored, endorsed or administered by, or associated with Facebook.  All of these gift ideas are items we recommend and some are affiliates to our company.  

Tweet


7 Comments

Guest Contributor

6 Tips for Taking a Self-Portrait

by Guest Contributor Anna Gay

Self-portraiture has been a form of self-expression for thousands of years. All of the great masters of painting and classical art dabbled in self-portraiture not only to express their feelings, but also to practice their craft. With this in mind, let’s think about how we as photographers can use self-portraiture to hone our skills: become more familiar with our camera’s functions and settings, get new ideas for posing, props and locations, experiment with lighting, try new techniques in our post-processing, and the list could go on and on! If you are new to self-portraiture, here are a few tips to help get you started:

1. If you have a camera, or even a camera phone, obviously, you can take a self-portrait! However, there are a few pieces of equipment that will make your life much easier: a tripod, remote, and if you don’t have a remote, a ten second timer. If you have a remote, you will probably have very little trouble focusing your shot. With a ten second timer, the task is a bit more tricky, but still doable! If you are using a wide aperture and want to create a shallow depth of field, have something in the photo where you will be positioned (a chair, a broom, etc) that will give you something to focus on before you press the timer. Otherwise, there is a good chance you will be out of focus once you arrange yourself in the shot.

2. Unless you are a lighting guru, consider keeping your lighting set-up as simple as possible, especially if you are just beginning to explore self-portraiture. I am sure a lot of you out there know your stuff when it comes to off-camera lighting, but if not, then natural lighting is all you’ll need for a self-portrait. A nice window and a small reflector can go a really long way!

3. Find a location where you a comfortable shooting. Part of the beauty of self-portraiture is that it reveals what is unique about you, so being in a location where you are comfortable will help you relax and have fun.

4. With this same idea in mind, utilize props that have meaning to you. Maybe you like to paint – try taking a self-portrait while painting. Or, if you love working on your garden, snap a few self-portraits of yourself outside. If you are new to self-portraiture, keeping your setting simple and personal will make the experience enjoyable and relaxing.

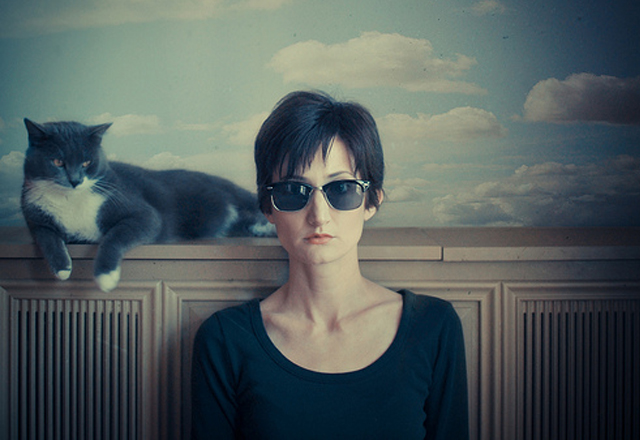
5. Incorporate your family, friends or even your pets! We tend to think of self-portraits as being just us in a shot, but if you took the photo, and you are in it, it is still a self-portrait, regardless of who else is in it. Having your family involved can make self-portraiture a really fun exercise, and the same goes for pets. When I am having a bad day, I know that I can sit in front of my camera with my cats, fire the shutter, and be in an instantly better mood. Just like any form of photography or art, self-portraiture is an expression of self, and we all know that self-expression can lead to a stress-free state of mind.

6. Use this opportunity to play around with new techniques in your post-processing! With self-portraiture, you have the luxury of concentrating on developing your technique and taking risks, so try something you would not normally do if you were editing for a client. Let loose, and have fun!

blog_separator

Anna Gay is a portrait photographer based in Athens, GA and the author of the dPS ebook The Art of Self-Portraiture. She also designs actions and textures for Photoshop. When she is not shooting or writing, she enjoys spending time with her fiancee, and their two cats, Elphie and Fat Cat.


Tweet


2 Comments

Business & Marketing Guest Contributor

Developing a Process for Your Editorial Submissions

 by Guest Contributor Lara White

If you want to see your weddings published in magazines and blogs, the first step is actually submitting. It sounds very simple. If I ask you – when did you last submit a wedding and how frequently do you submit? We may find the answer to why you aren’t being published-because you aren’t submitting regularly.

Follow a Process
Are you following a regular process of submitting your weddings photographs for editorial consideration? Do you have a system in place that streamlines your submission process so it’s a regular part of your marketing mix? If you answered no, read on to find out how to simplify the process of organizing your submissions.

As a part of your regular marketing routine, you should submit weddings to magazines and blogs quite frequently. We generally do this quarterly and we don’t miss a quarter. You can also do this after each wedding, depending on what works best for your schedule. This kind of routine effort pays off and we have featured weddings in blogs and magazines almost every month. In addition to featured weddings, we get lots of additional coverage by having one image featured in a segment on a specific topic, such as cakes, hair ornaments, etc. That’s where things really start to add up fast.

To start your editorial submissions plan, gather a list of wedding magazines, blogs and local newspapers with annual wedding features. You can find contact information in the mastheads or on the website. You want to set up a spreadsheet to keep track of contact details, submission deadlines and the preferred process.

Developing a Good Contact List
You should include as many magazines, wedding blogs, and newspapers as possible in the list. There is no need to pick your favorites. By submitting to local and lesser-known publications, your chances of success increase due to lower competition. Many local magazines and newspapers feature an annual wedding issue. There are also a number of trade magazines related to the wedding industry. There are blogs for every wedding niche under the sun, so develop a good list.

By submitting to a wide variety of blog and magazines, not only are you increasing your chances, you are also expanding your reach. We’ve had images featured in a French lifestyle magazine, a wedding magazine in China, a British cake magazine, and a library architecture magazine to name a few of the more interesting ones. By having work published in a wide variety of magazines, our coverage is international and our reputation as a great studio is further enhanced. Clients see our work in all sorts of unexpected places, and it makes us look like super stars. It’s actually quite easy to achieve once you get a submission system in place.

Organizing the Images
You have to spend some time initially to get the contact list started, but once you have the list, your submissions process becomes considerably easier. Frequent submissions will greatly increase the odds that your images will be selected. If you don’t try, you certainly won’t be published. I recommend building wedding submissions into a regular part of your marketing mix.

First, make sure you have permission from the couple to submit. We have this build into our contract, so if they have any issues about it, we note that in their files. When we are ready to put together submissions, we go through all the weddings, and select anywhere from 50-100 or so images. The selection of images for a magazine is very different from images you would select for a bride. It’s not about the portraits, it’s about the details. Select about 75% details, and then fill in the rest with assorted ceremony and reception highlights, portraits, images that convey a sense of fun, etc. You should follow the submission guidelines to a T, but this usually includes printing out large thumbnails of the selections and burning everything to a labeled disk.

Most of our weddings do get submitted somewhere, and if you are looking to maximize your coverage, I recommend the same. You just never know what blogs or magazines are going to be looking for. In addition, with so many specialty magazines and blogs out there, it’s easy to find a potential match.

Keeping Track of Everything
To stay well organized, you’ll need another spreadsheet indicating what has been submitted where (so no images get published twice), and which submissions are being considered as well as confirmed editorial coverage. This allows you to ensure that a magazine has exclusivity on a real weddings feature.

Sometimes you don’t hear back from the magazines at all, and yet your work may still be published. On more than one occasion, I have browsed through a magazine, only to discover our images published without any contact or notification-not real weddings features, but single shots. Many times, magazine editors are in a hurry to grab something and meet their printing deadlines. By checking new magazines yourself, you are able to keep track of where your work is being featured so you can get all the publicity benefits.

Most magazines will notify you that your work will or might be published, but after this notification, you might not hear from them again. You may miss that feature if you don’t keep track of your submissions, especially if the magazine does not hit the shelves for nine months. I always have a list of ‘Expected Editorial’ handy so that I can browse the magazines when I am in a bookstore.

Want to learn more tips and tricks for getting published?  Download the free ebook Get Published:  A Guide for Wedding Photographers where you’ll find more than 50 pages filled with detailed instruction on creating quality magazine images, planning your approach to the wedding day, submission guidelines, how to capture details and advice from the editors.

Let me know what questions you have in the comments below, and good luck with your submissions!

blog_separator

Lara White is a wedding photographer based in San Francisco, CA. Formerly a fundraiser and CEO of a non-profit, she is deeply passionate about business and marketing. She is the founder of the website PhotoMint, a site dedicated to providing marketing and business strategies for working photographers.


Tweet


7 Comments

Guest Contributor

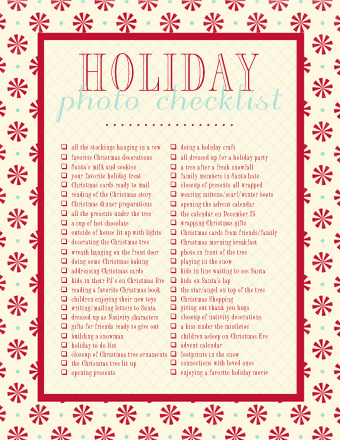
Holiday Photo Checklist Download

by Guest Contributor Rebecca Cooper

Rebecca is a professional photographer, amazing writer and the talented woman who created this fun download for you. Be sure to share this with your friends and print out the checklist for the upcoming Holiday season.  Enjoy and let the fun begin!

When you’re done with this Holiday list be sure to check out her website for more beautiful checklists. Rebecca has more free downloads for Fall, Spring, Summer, Back To School and Everyday Photos. All of these checklists are a great way to grow as a photographer and capture memories you may otherwise forget to document. Click on the “Add To Cart” button below to start your free download!


Holiday Photo Checklist – Free Printable Download

Add to CartView Cart

blog_separator

Hi! My name is Rebecca Cooper, I’m a 33 year old wife and mother of four ranging in ages from 21 months – 9 years. I like to keep things simple. I like to take pictures. I like to find beauty in the everyday. I write a blog called Simple as That where I enjoy sharing my passion for photography, simple crafting ideas and my thoughts on life and motherhood.  I also host a weekly photo link party called Simple Things Sunday.


Tweet


Leave a Comment

Photographer Spotlight

Photographer Spotlight: Ryan Southwell

The Good Life from Ryan Southwell on Vimeo.

We are so thrilled to welcome Ryan Southwell, an AMAZING filmmaker, to the blog today! His films are beautiful, inspirational, and filled with raw emotion. Take a moment to learn more about Ryan and view some of his fantastic work.

When did you decide to you wanted to create these amazing films?
This is the biggest mystery of my life. I grew up making home videos and movies as a kid just for fun and I had a camcorder through college which was a priority, but I wish I saw these signs earlier on. The technology just wasn’t there and who knew you could make a living on it? Besides, every wedding video made up until 2001 was pretty bad, no… really bad. Nobody would ever take you seriously if you said you were a wedding videographer. It started as a friendly favor to shoot a wedding and the photographer liked it and referred me from there. I had spent my early years in the business finding my style and finally ended up where I am today, but there was one major game changer that broke me out of the mold from the kissy-kissy romantic slow motion videos to what I have now… the Canon 5DMKII. It opened every single door to awesome filmmaking. All of a sudden I had access to F1.4, bokeh, and lenses. I had to rethink my style, angles, new techniques, and most importantly my technique in working with people. I knew it was going to be a big game-changer for me.

Each video is so unique.  How do you personalize each session?
Locations and people. I do my best to not shoot in the same place twice, although it does happen at times. The problem is that if you do, you will most likely do the exact same thing you did with a previous client making you a cookie-cutter photographer/videographer. Besides, I love to explore and find new places. The other half of this answer is people. Everybody is different. Trying to make them all do the same thing for the shot I want doesn’t really work. Usually, I can get a feel for the couple in the first 10 minutes of the session which helps me know how to direct them to just be themselves. Staging shots never comes out as real, so I’ll tell them what I want to happen and let them do it how they would normally do it. I may offer some guidance for those who are shy at first, but after I have broken the ice with them and got them comfortable with me and the camera the magic can begin.

What do you love most about your job?
Working with photographers.  Ha!  Joke, but I do love making relationships with most of them and having a good time, not making wars. The one thing, though, I look forward to after every shoot is coming back to my studio and laying down the audio track and matching “the moment” of the song with my footage. Most songs have it, and this is probably why I am not a photographer. There is magic when you choreograph the right shots with the right music at the right time, and if you can do that, no matter who the viewer is, they’re going to get goose bumps, cry, laugh, or gasp out loud. Music is a big part of it. It brings out all the fun, all the emotion…everything. I just have to get the shot and make it worthy.

What are some of the obstacles of your job?
It depends on if it’s a live event or a lifestyle shoot. The biggest obstacle is always time. Live events can have uncooperative planners, DJs, small rooms, no lighting. Let’s take a scenario of a toast at a wedding (hate to bring up weddings again but they are always unpredictable, right?) I have to make sure I’m tapped in to the direct audio feed, get my off-camera lighting set up (hoping they don’t walk around all over the place), and be there recording from the first word to the last. I always envy photographers who can just jump in half way through the speech, snap a few shots and be done with it. I can’t tell you how many times the coordinator has given us the okay to go eat and while in another room suddenly we hear the DJ announcing the first toast in the background. Ugh.

Each video seems to be located in a magnificent location.  How do you find these locations?
You just got to be willing to go the distance, whether it’s getting on a plane or hiking a mountain with 92 lbs of gear. Sometimes I will find a place while on a Sunday drive, other times the client will suggest a spot or two so I always ask them for suggestions. I did a recent shoot in the middle of a round-about in a big city but was able to shoot it with angles where it looked like a park in Wyoming. So I never discount the little places and finding a way to make it work no matter where you are. For better or worse, my brain is wired to look for spots everywhere I go. If I see a place that looks cool I will drop a pin on my iPhone maps and email it to myself and put it in my special folder. Something easy I can do from my car on the road.

After all the locations you’ve been to, what is your favorite spot and what made it so amazing?
June Lake, California. I will probably change that answer next year after some destination shoots I have booked, but June Lake was right up my alley. Outdoors, pine trees, huge waterfalls, cozy fires, stars… aaaahhh. I love to be out enjoying life with beautiful nature. It also opened doors to exploring new possibilities for shots you could never get anywhere else. I built a zip line for my 5DMkII and sent it flying through the trees. I’ll have to do that one again sometime.

How important are details while filming?
Trick question. Very important and not important at all. Some clients will specifically request that there are a lot of details of “things” they want shot. I’m happy to oblige. They make for some good b-roll, or filler shots which every film needs. But there are other types of details that are more important. It’s all about the people. Having a shot of an expensive napkin ring and table setting is one thing, but having a locked tight shot of a groom’s face at the start of the ceremony in that brief moment when he sees his wife-to-be for the first time and his lips purse and his jaw begins to quiver… that is a detail that is priceless. Or when the couple gets in the zone and doesn’t realize you are there (thank you 200mm) and she whispers “I’m so happy” to her fiancé as she looks in his eyes… those are magical moments that people will remember and pull at your heart strings.

Each video I have watched is so professional.  I forget that there is even a video camera following them. How do you create such a comfortable relationship between you and your clients?
Have fun and don’t be a stiff. First shot of the day is always an easy one. It’s an ice-breaker. I also talk to them like a person and not a client and try to get them to tell their story to me. I try to find out who in their relationship is the outgoing one and use that as a cue for how I direct them on a shoot. I also don’t say “gorgeous” after every shot or dish out a plethora of insincere compliments all day long. I say it when I mean it, but everyone is so different and has beautiful features so it’s not hard to do. One of my favorite things to do toward the end of a shoot is to whip out my handy dandy iPhone and start playing their song they selected. I’ll put it in his pocket or hide it in a bush and then try to disappear somewhere (with 2 camears) and let them have a moment to themselves. Of course I’m filming it, but I tell them I don’t want any talking for the first 2 minutes, just listen to the music, look at each other and think deep about the future or when they met. You’d be amazed at the types of expressions and feelings that are portrayed in those moments. It can be magical.

Where do you see yourself and your business in 5 years?
I will most likely still be here in southern California and I imagine business will be even better than it is now. As long as I can keep learning new skills, buying better gear, and stay creative I’ll be happy. Then I can afford to work some normal hours. 🙂

If you could encourage other photographers and business owners in one area, what would it be?
Keep it real. Nothing beats a real smile, a real laugh, or a real tear. We will always be able to buy new toys, but what matters most is finding a way to capture the goodness and joy in being human.

Anything else you would like to share or inspire other artists and business owners with?
Please email me or join my fan page. I love to hear feedback from people.

blog_separator

About Ryan:  Ryan Southwell is a filmmaker living in Southern California with a beautiful wife and five children. He became an early adopter of filming on DSLR cameras and has greatly influenced trends in event and personal filmmaking across the country and overseas.  You can view more of Ryan’s work here Photographer Promo, New Hybrid, Short Documentary, Wedding Teaser and Engagement.
Tweet


5 Comments

Guest Contributor

Photographing Schools

by Guest Contributor Elizabeth Halford

School photography can be a wonderful endeavor for photographers. Once you get your system down, it can be a high income-to-work ratio. Maybe even as financially rewarding as a whole day spent shooting a wedding!  And with a fraction of the work!

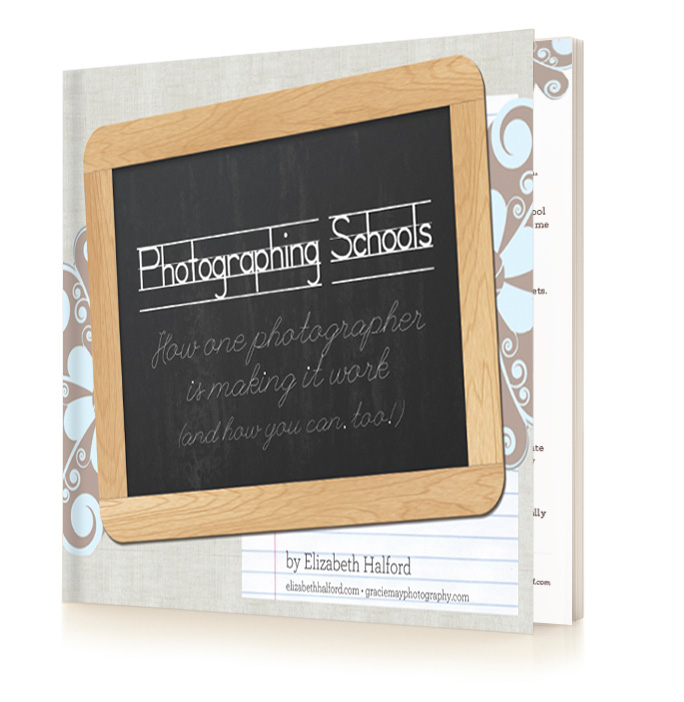
Now, I know most of you readers are probably in America. And I know that there are some big boy monopoly school photography companies cramping your style. But I’ve just come out with an eBook telling you all about school photography from my point of view and I even include some really solid ideas for how you can make it happen even in the face of these Everest sized companies.

So definitely check out my eBook. But today, I just want to entertain you with the story about the first school I ever did. Feel free to have a laugh at my expense!

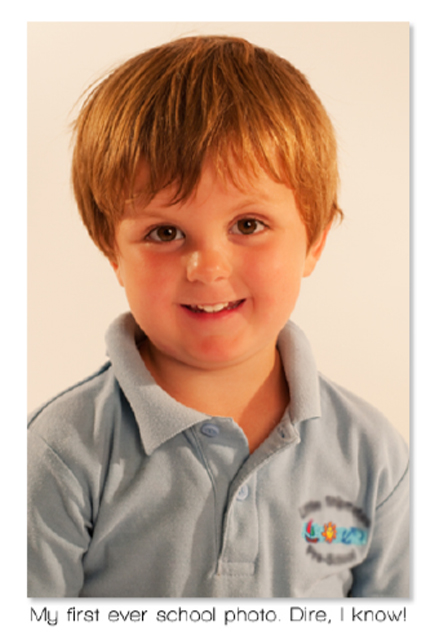
I have the good fortune of having a friend who ran the pre-school my son attended. And this is where it all started. I told her that I was borrowing a friend’s studio photography equipment and would like to come in and take photos of the kids for their parents. Little did I know what a gigantic undertaking this would be but let me tell you…there is absolutely 100% no better education than trying. Even if you fail. Those lessons will be permanently burned into your memory which, in my experience, has made me really solid in my current practices. I know exactly why I do everything I do and I have a negative experience to back up almost every smart business move I now make. And of course, I can sit here and tell you what not to do which will give you a leg up in your business.

I arranged two whole days to come in and photograph the kids. Day 1 was spent with the whole 4-light white seamless studio set up which I borrowed from a friend {yep, the above photo is one of the results}. There was no organization – I took children as they came and showed interest and I did a mini session with each child. Day 2 was spent photographing candid shots of the kids at school while learning and playing. I also did group photos which gave me ulcers. Group photos are not for 3 year olds and photographers with zero experience!

I didn’t yet know about professional printing companies which also means that I didn’t know how to produce school photo packets. The deal I was offering was the disk of images from both days (studio & candid) with a print release for £30 ($50). And you’re going to laugh when you hear what I did next…

I spent over £100 and three solid days…

• Sorting the children into their own folders in my computer

• …and then burning a disk with their images

• …which all had a custom printed disk label and case

• They were slipped into an envelope with a proof sheet of thumbnails printed on 8×10 photographic paper so they could know what was on the disk.

• I then went into my Photobox account and created a separate password protected album

for each child so non-tech-savvy parents could print straight from the provided URL.

• I wrote an individual letter for each parent about the joys of photographing their child

• …and then set all of this up in front of the school to personally sell to the parents on the designated day

I’m laughing out loud as I recount all of the lengths that I went to before even selling one single image. And are you ready to hear what happened next?

I got all dressed up and proudly presented the disks to the parents outside school one morning which were all nicely laid out in alphabetical order.

And then I got reamed up one side and down the other.

One parent literally said that she ‘hated’ the photos because of what her son was wearing {even though there was advanced notice that it was school pictures day}. Another parent said that she had a camera, too, and could take the same pictures. I smiled and nodded,”oh that’s great! You should do that.” She then proceeded to tell me that she was willing to pay £20 for the disk, but not £30. Another mom said, “why would I want a photo of my son sticking out his tongue?” And so much more. I sold two disks, took a gigantic loss, cried and ate my weight in ice cream and learned more than any photography degree could have ever taught me.

Lessons I learned:

• I spent two entire school days chasing kids and convincing them to let me take their

picture. Lesson: work as a team with the teachers to make it an organized event.

• I ended up with about 600 shots to sort and edit. Lesson: it’s not a full photo shoot.

Spend less time on each child.

• I spent way too much time and money producing a product ahead of time. Lesson: I

needed to find a printer who did school packs and not try to re-invent the wheel doing

something trendy.

End result:

• Number of children photographed: 57

• Sales: 2 disks (a 3.5% takeup)

This is just one experience taken out of my 23 page eBook which includes so much more information, not only about how NOT to do it but how, through great trial and error, I figured out how to do it successfully. And now you can, too.

blog_separator

About the Author: Elizabeth Halford is a professional photographer and blogger. She gives real photography advice in real.plain.english. Visit her on Facebook and join a community of photographers just like you!


Tweet


5 Comments

Guest Contributor

How to Tackle Children’s Photography

by guest contributor Allie Ledger

When you think back to the days when you were little, and what you wore or how your hair was styled that day didn’t matter.  When you weren’t trying to impress anybody, and the last thing you cared about was the left over pizza you had for dinner on your face!

When I started out specializing in children’s photography, I was always learning new tricks and secrets! Every shoot I would take in a little more and observe a little deeper. Let’s face it, all you mama photog’s out there or anyone struggling with capturing children love to bribe the kid’s with candy or rewards! I know cause I am guilty as charged. It’s funny to me when you hear a mom over your shoulder saying just smile and we can get ice cream after pictures.  I’ve learned some tricks for not having to bribe kidsm, and pushing them to “smile just one more time and we’ll be done”.

I think what really draws me to capturing children is their carefree spirits. They don’t care if they look “perfect or skinny” in front of the lens!  They are who they are and it shines through in their pictures!

Here are some secrets and tips I’ve found to help me capture children.  Ways to make it fun and easy, and the results, I think, will show in your final images!

Never force a child to do something they don’t want or are not comfortable with
When you tell a child to sit down over here and they are just not having it, the last thing you want to do is force it.  That’s when the child can get cranky, or frustrated and the parents start yelling at the children to listen.  The only place that will get you is tears, and some pouty faces!

Never say cheese. EVER!
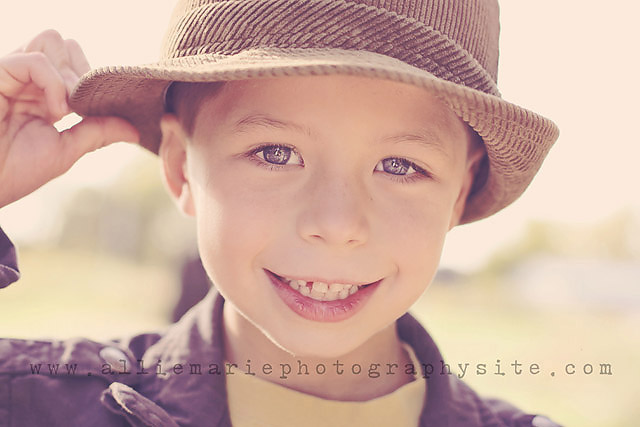
When you tell a child to smile, especially under the age or 5 it’s usually not a pretty face! You can do a couple things to help you out with that. When I capture children I usally love the soft, natural, not smiling pictures the best. The response I get from the parents about those pictures is usually something like this!! ” Wow you actually captured my child how I see their face everyday.”  I usually ask the kid to smile for me first so I can see what I have to work with.  I can then go from there. I usally just get down on their level and talk to them, without my camera in their face.  Slowly from there I keep talking or listening to their stories and start snapping.  I’ll ask them to look this way or that way. This is when they are the most relaxed and I can get that sweet face captured perfectly!  As the kids are talking and I’m snapping away asking them to do things, we’ll keeping the conversation going I will usually try to say something funny! Get them to laugh and then BAM you get a non-forced smile that doesn’t look cheesy! Simple as that.

Keep it interesting
Let’s face it, kids love to be entertained!  Bringing props can be a big help sometimes!  I usually keep them hidden at first!  Once the kid is warmed up in front of the camera I usually will bring them out!  Sometime’s it will keep their excitement, especially if you keep telling them how cool it is! Kids always think something is cool if they hear someone else say how cool it is as well!!! You have to be careful though not to focus too much on the prop! You need to keep your focus on the child and not have a distracting prop!

Take small breaks
Kids can get overworked sometimes and they either get cranky or bored. If you take a couple minutes here and there to let them get their energy back up, you will get better results!  Either time for a quick juice box, or a quick game of tag (if there are other siblings)!!  Letting them still have fun while taking pictures makes them love getting their picture taken even more!

Show them how to pose
Children can get confused easily when you tell them to put their arm on that fence or sit over there. Children are visual and showing them yourself will make it a lot easier for them to understand!

Getting their eyes focused on your lens
I usually use tricks on younger kids such as, do you see the bug inside my camera.  I usually can get their eyes nice and big and locked into the lens for those breathtaking closeups!  You can also try things like the little animals you can put on your lens to keep their focus.  Those are best for younger children!

Be aware of the lighting
I always use natural light when taking pictures! I never use flash, ever!  My personal taste is soft and light! When you add flash especially on a newborn you get harsh lighting. I try to either get by a big window or sliding glass door.  Same with photographing children outdoors!  Be aware of the sun and your surroundings!  I love backlight and try to book the session for about 2-2.5 hours before sunset!  Thats when you get those gorgeous golden hues and lovely lighting!  Also be aware of catchlights!  That will make their eyes extra sparkly and pop them that much more!

Don’t forget about wardobe
A lot of times parents don’t know exactly what will look great photographed. A little time preparing outfits with your clients can make a huge difference in the outcome!  With children, I love to mix and match things you normally wouldn’t think of. Like pairing a cute vintage dress and hat with rubber boots! Layering is also a great thing to do!  Mix and match layered outfits always end up in super cute results!

Final touches in post processing
I use two programs when it comes to post processing. First I load my pictures into Lightroom. I will tweek some things and this is where I soften the skin! After the pictures is prepped I bring it in to Photoshop!  This is where your artistic ability can shine through! I usually sharpen the picture first!  Then I add my actions. I love using Florabella actions!  I usually use the dodge tool on the eyes just a touch to brighten them up!  Also if you captured any catchlights they will pop a bit more by using the dodge tool as well!

Bringing it all together
Hopefully these tips and tricks will help you bring it all together! Children grow up way too fast and capturing the little details will help freeze those moments in time!

blog_separator

About me: My name is Allie Ledger (soon to be Allie Boss).  I’m 21 years old and engaged to the love of my life. I am currently planning my own vintage wedding in a big wooden barn! I love to make crafts and go antique shopping!  I went to school for cosmetology and somehow ended up in the photography field! I am a self taught photographer specializing in children and senior girls in the Grand Rapids, Mi area.  I would love to make it big in this crazy photography world someday, but for now just taking it a picture at a time and enjoying life.
Visit Allie at her WEBSITE | BLOG | FACEBOOK PAGE


Tweet


23 Comments

  • « Previous Page
  • 1
  • …
  • 24
  • 25
  • 26
  • 27
  • 28
  • …
  • 30
  • Next Page »

Popular Categories

You might also like

Love of Lifestyle Photography Workshop by Ashley Spaulding

Love of Lifestyle: The Fundamentals of Lifestyle Photography

The Lightroom Lab: An 8-Week Course to Mastering Lightroom

Pretty Forum for Photographers

Let Them Eat Cake—A Marie Antoinette Inspired Shoot

Tips to Keep Your Images Interesting in Limited Surroundings

Natural Light: The Art of Finding Magical Light

Copyright © 2025 · Divine theme by Restored 316

Copyright © 2025 · Divine Theme on Genesis Framework · WordPress · Log in

×
Never miss a thing!
Sign up for Pretty Forum Newsletters and get all the latest news on our upcoming:
  •  
    ​Workshops
  •  
    Celebrity Mentors
  •  
    Free Downloads 
  •  
    Photo Challenges
  •  
    Vendor Discounts
  •  
    and much more...