• Pretty Forum
  • Pretty Presets
  • Pretty Actions

Pretty Forum

Online Photography | Forum | Workshops | Tips | Tutorials | Classes | Business | Courses | School

  • Home
  • Blog
  • Enter Forum
  • Workshops
  • About
    • Meet the Team
    • FAQ ABOUT JOINING THE PRETTY FORUM
    • WHY JOIN THE PRETTY FORUM
    • Testimonials
    • Privacy Policy
    • Site Terms and Conditions of Use
  • Advertise
  • Contact
  • Join

Business & Marketing Guest Contributor

Using Client Heirlooms as Props

by Guest Contributor Sandy Summers Russell

Photographers are born story tellers. We want our images to pull on emotions in a way that goes beyond a simple snap shot. We want our pictures to have meaning.

Like many of you, I shoot all of my portrait sessions on location. Often, if it’s at a client’s home, I’ve never been there before. Sure, I bring many of my own props, but truthfully, my little station wagon only has so much room. Besides, using the same props over and over again gets old. So what’s my solution? I use what I find when I get there. Not only does it add variety to my work, but a client’s own pieces add infinitely more significance to the picture than any prop I could bring.

So how do you walk into a location cold, find what you need to create a meaningful image, and use it in a creative and fresh way?

1) Do your homework. Talk with your client before the session date to discuss the details of the shoot. Besides the typical what to wear and what to expect at the session spiel, ask them if there are any items that have a particular sentiment to them. It could be a simple hand-knit baby blanket, a parent’s childhood toy, or a cradle that’s been passed down for generations in the family.

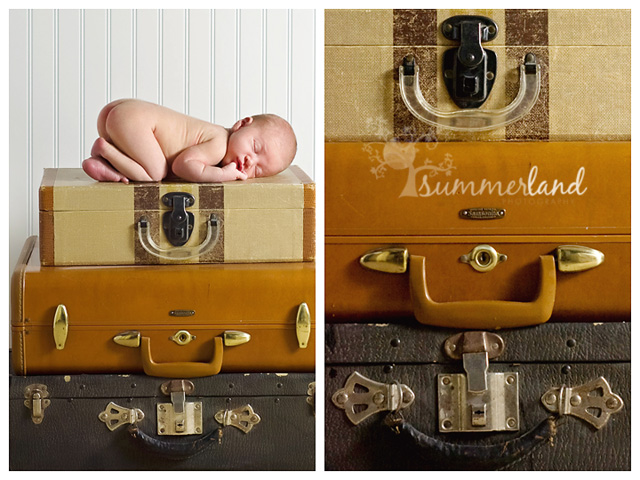
2) Ask for a tour. When you get to the client’s home, ask them to show you around. You never know what you might discover. I found this stack of vintage luggage in the client’s guest bedroom. It was perfect for posing their newborn baby boy on.
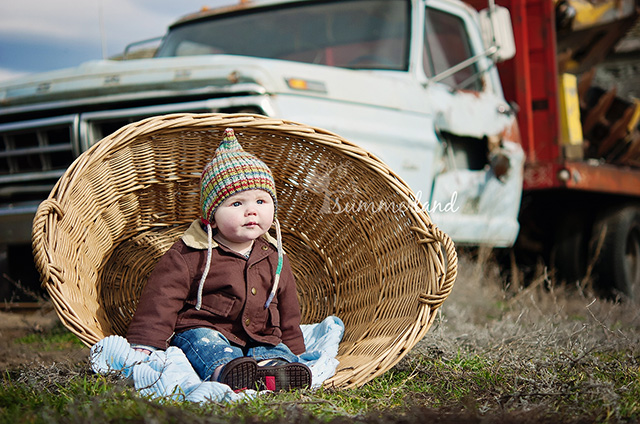
3) Find an interesting way to use it. This basket was first used for laundry by the baby’s great, great grandmother. It was later turned into a bassinet, and the boy’s mom slept in it herself as a baby. Photographed as a bassinet, it would have eclipsed the tiny newborn, but turn it on its side, and now it frames the baby beautifully. Plus, with the blanket spilling out, it kind of looks like the laundry basket it once was.

4) Don’t be afraid to use the same piece at a later time. Parents love pictures that show how much their baby has grown. Six months later, the little boy is sitting all by himself, and he now nearly fills the basket that once dwarfed him.
5) Get the story behind the family piece, so you know what details to capture. This trunk belonged to the baby’s great grandfather from when he was in the U.S. Coast Guard, and his name is printed on the front. The baby is the first great grandson to be born, so not only will he be passing on the family’s last name, but he also shares a middle name with his great grandfather and grandfather.
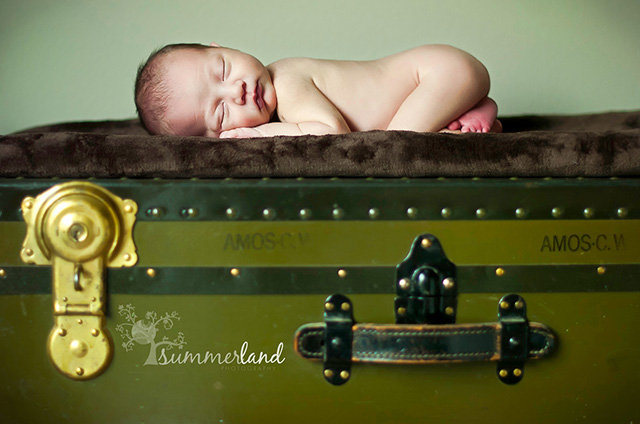
6) Keep it simple. If the prop you’re using has beautiful flowing lines, or interesting patterns and textures, don’t add anything that distracts you from appreciating these details. This antique chair is gorgeous all on its own. It doesn’t need any embellishment.

7) Use the location to reveal different layers of the story. This little boy’s dad is taking over the vineyard that has been in their family for generations. They recently pulled out table grapes to make room for wine grapes. The land hasn’t been this bare in decades, and at this moment, probably looks much like it did when the family first started farming here. Combine that with the grandmother’s vintage suitcases and a little boy who may carry on the family’s farming tradition, and you have a picture that represents both the past and the future.

8) Make the background unique to the client. The parents of this little newborn are avid readers and book collectors. The entire wall as you first enter the house is covered in book shelves. The light streaming in from the front door there was beautiful, so I added a reflector to bounce light back at the baby and chose one of their antique chairs that allowed you to see the books behind it. The final result is a sweet little picture of their baby book worm.

9) Safety first. As soon as I saw the grandmother’s wash basin and stand, I knew I had to use it for a photo. But no matter how stunning the final image can be, make sure you only use the prop if it can be done safely. In the case of this baby girl, I didn’t place her in the basin until she was deeply asleep. Plus, I had two baby spotters on either side of her. If you have to, have someone keep a hand on the child, and edit out their hand later.

10) Create history. A photography instructor of mine in college was fond of saying that you need three things to make an exceptional photo: lighting, composition, and emotion. Missing one of those might give you a nice photo, but if you want to have an extraordinary photo, you need them all. Using an heirloom that has sentimental value to your client automatically means you have the emotional part covered. The lighting and composition are up to you, so let your inner story teller free, and create an image for them that will be passed along to future generations; just like the piece that inspired you.

blog_separator

About the Author: Sandy Summers Russell is a former metro newspaper photojournalist who fell in love with a small-town farm boy. She married him, moved to the middle of nowhere, became a mom, and started Summerland Photography in exactly that order. Now, instead of shooting breaking news, professional sporting events, and heartrending human interest features, she photographs brand new babies, fleet-footed toddlers, and jubilant weddings.

Visit Sandy at her WEBSITE, BLOG, and FACEBOOK PAGE

Photo taken by:  Molly VanWagner

Tweet


16 Comments

Guest Contributor Post-Processing

How to Create an Action in Photoshop

by Guest Contributor Angie Sandy

Photoshop is a tool of the trade. If you are a photographer you spend time in Photoshop on a daily basis. One of the keys to faster post processing and template editing is knowing how to create an action. You know, those little timesavers with just a click of the mouse can save you so much time over the course of the day. If you are like me anything that can save you a few minutes is worth learning!

How to create an action in Photoshop

We all use them, whether they are purchased actions or steps that we always take when we are working with an image. Turn those everyday steps into an action and reclaim a few minutes in your day. For example create an action to automatically resize your images and sharpen them for your blog. I am going to show you just how to do that in my video tutorial! Before you can start you need to know what the maximum width is for your blog images. Usually it is 900 pixels wide OR less. Begin with an image you have ready to post to your blog, my example will use our Grace photo card template. You can watch me work in the video below and I will also outline the steps for you here.

How to create an action in Photoshop from Angie Sandy on Vimeo.

  1. Open the image you want to use to create an action.
  2. Go to the action menu select the little arrow pointing down and select new action.
  3. Name your action and if you would like to assign it a function key you can do that here. Hit the record button
  4. Begin processing the image. In my example this is where I went to the layer menu and selected flatten.
  5. Next I went to the image menu and choose the image size of 650 pixels wide.
  6. Finally I went to the filters menu. I choose sharpen and selected unsharp mask. The amounts I used were 100% and radius .5
  7. Move over to the action menu and hit stop the recording.
  8. Now you have a complete action to flatten, resize and sharpen your image.

blog_separator

Come visit our facebook page!  We’ve added a free birth announcement template for instant download.

Angie Sandy is the owner and graphic designer behind Photo Card Boutique. Living in Loveland, Colorado she relishes in her life as a wife, mother of three, laundry lady, personal cook and all around American girl. Together with her husband and girls they raise a small herd of cattle and enjoy their 4H lamb projects. In her spare time she does her best to practice a budding love of photography and feed a hopeless Starbucks addiction.
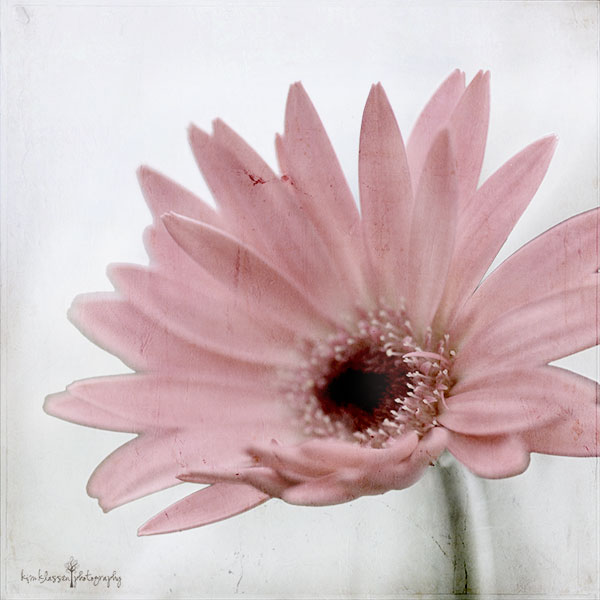
Photo Card Boutique is the creative outlet for this one time web designer turned freelance graphic designer. She loves connecting with others in the photography industry, feel free to add her as a friend. You can also get to know her through the Photo Card Boutique Facebook page and on her blog.


Tweet


4 Comments

Guest Contributor Post-Processing

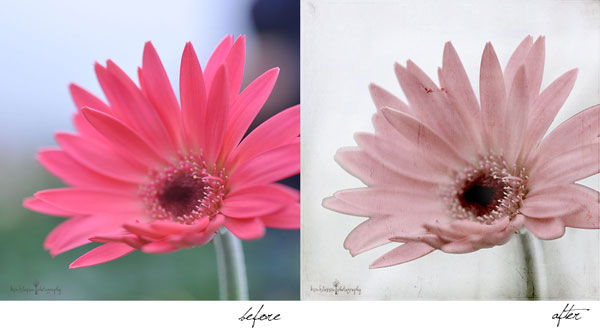
Kim Klassen: Textured Daisy Tutorial

Today I put together a little video tutorial for you all.  I hope it inspires you to open up photoshop and experiment a little with some textures on your own images.

You can download a low-res copy of the textures I used in the video HERE.  Both textures are part of my recently released Studio Collection.

blog_separator

Kim is an artist turned crazy passionate photographer, living in a tiny Canadian town with her family and sweet love Ben, their Goldendoodle doggy. She’s crazy about her life… basking in the quiet solitude of her studio as she creates daily. Until recently her creative passion was painting. Then one day after a life changing event, her quiet little Nikon called to her. She will never forget their first true connection; a simple trip to the trail with camera in hand….wow…what a rush. Kim now combines her art and photography, creating painted textures for photo enhancement. It’s a perfect combination of digital and ‘get messy’ creativity. She shares her photography tips, tricks and techniques on her site, Kim Klassen Café.


Tweet


7 Comments

Guest Contributor

Photoshop Retouching – A Touchy Subject

by Guest Contributor Elizabeth Halford

With the ability to liquify 20 lbs off in Photoshop, shine up eyes to oblivion and make skin more perfect than Barbie, sometimes capturing the image in your camera is just a tiny fraction of the work that can actually go into producing a magazine-esque portrait.

Before I knew anything about photography, my husband and I had our yearly photo sessions with a popular studio photographer in our city. He covered my pregnancies and our growing family year after year. I have a little birth mark on my lip. It’s kind of like a little bump you get when your purse your lips. When we got our first images back, I was so oblivious to the process of photography and editing that I thought I looked amazing and didn’t ever consider the fact that it was done in Photoshop. I just figured that I actually looked that good or that he just had a really good camera. Until I noticed that my birth mark was gone. I don’t mind my birth mark. It’s part of my face, not a temporary intruder like a zit or a bruise. But no one had asked me if I wanted it removed.

In the end, I didn’t mind enough to say anything, but it’s the example I think about when a reader posed me with the question that inspired this post: are our clients prepared for their transformation?
I know that not all photographers go for a hyper real, super edited look but even the most simple of adjustments can either thrill or annoy your client. Here are a few examples of my retouching techniques:

  • I once had a rather large bride whose dress pushed everything…well…up. I think you call it ‘back cleavage’. But since it was on her back and she wouldn’t have been particularly aware of it’s presence, I took care of it in Photoshop. I didn’t intend on being unrealistic. I didn’t take weight off, but I did smooth out a couple of rolls which she may not have known were even there.
  • Acne is pretty much always an ok thing to remove. If it’s not a permanent fixture – part of someone’s style or identity – I always assume it’s ok to remove it. This includes bruises, zits, acne scars…
  • A staple of many photography businesses is the newborn session and often, this includes the new parents. I don’t know about you mums, but after having a baby, I’m always blissfully unaware of the actual state of my figure. Somehow, I think I’ve become skinny again overnight and it’s not until months later I look back and say what was I thinking?! In light of this, I’ve always found that I can give a little (keyword little) help to a new mummy’s post-partum figure without her even noticing.
  • I almost always do a bit of touching under the eyes. Whether you’re a man or a woman, dark circles and bags are rarely a welcome part of your face. Even on children, they can be a huge distraction but tread lightly with editing children. I happen to know that for my son and some other kids, springtime photos will show darker under the eyes from allergies. But I don’t go all the way. I do the eyes before any other editing by duplicating the layer, applying a quick removal using the patch tool and then lowering the opacity of the layer by half. This means that half of the under eye area still shows through, but it’s just not as puffy or dark.
  • Now, who made the rule that men are more attractive as they age? If you have that guy’s address, let me know. I rarely fix signs of aging in men. Using the above tip, I will sometimes soften the look of wrinkles or 5 o’clock shadow, but I don’t make his face look flawless.
  • My favorite tool for retouching skin in Photoshop is from Totally Rad and it’s called ‘Pro Retouch’ you can just paint pores pretty! And when I was an Elements only type’a gal, I used MCP’s Magic Skin actions. Also, the adjustment brush in Lightroom is a pretty rockin tool for softening skin.

If I’ve said it once, I’ve said it a hundred times: expectation management is the numero uno most important thing to establish for resulting in happy clients. If they can clearly tell what you do and what they can expect by looking at your portfolio and website, then they won’t be surprised with the results of their session (as long as you haven’t deviated from your usual style). Obviously, they won’t know that you’ve removed imperfections from someone’s face, but they will probably notice that everyone looks pretty darn good through your camera. You might even be so brave as to add a little B&A somewhere on your website (like the FAQ section) to show people how fab you can make them look if they hire you!

Now, there are a million-and-one things you can talk to a client about in your pre-session consults. Location, wardrobe, style. And if you want to add another item to that list, you could talk about their feelings towards retouching. However, be careful…because like I mentioned in a post on dPS last week, you might want to carefully reconsider bringing up the word ‘Photoshop’. The instant you do, folks will light up with the possibilities of a Kim Kardashian-esque transformation and before you know it, you have a gigantic list of things they’d like you to take care of in your magic computer. Instead, talk to them about their body image. Ask them what they love about themselves and what they don’t love (but don’t make promises about fixing them). If this doesn’t come up naturally in conversation, it might happen during the session somehow and if it never does, don’t worry. Just follow your instincts.

I find it particularly helpful to pay close attention to your clients’ reactions during the viewing session. If they look confused, twist their face with distaste or mention that they don’t look like themselves, you can tell them that you did some light retouching and let them know that it can be re-worked in the prints that they actually want to purchase if they weren’t happy with their transformation.
We’re so lucky to be living in this technological age. We have every tool imaginable at our disposal for producing flawless, amazing and life-changing imagery. Sometimes, it’s best to leave things raw and real, sometimes you can go to town making a client look flawless. Test the waters and see what happens and remember…there’s always ctrl+z to fall back on!

blog_separator

About the Author: Elizabeth Halford is a professional photographer and blogger in Hampshire, England. She owns Glacier Cake Photography and a blog for photographers. Elizabeth is a second generation home educator and is, regrettably, quite addicted to Facebook.


Tweet


7 Comments

Business & Marketing Guest Contributor

Outsourcing

As small business owners, we wear a lot of hats. When we start out we are the creator, the CEO, the accountant, the sales manager, the staff, the receptionist….everything. But it doesn’t make sense to keep things this way! There is no way that our companies can grow the way we dream by trying to do everything ourselves. There is no need to be embarrassed if you need to ask for help. Everyone gets to the point that they can’t do it all and you are so much stronger if you can accept that fact before you get too overwhelmed!

But how do you find someone to help? And when you do find someone to help you out, what do you have them do? When you find that person to help, how do you justify the expense?

Once the decision has been made to seek assistance, before you try and find that person or company to help you, you’ll need to figure out what they can do. The easiest way to discover this is to make a list. I’m a huge fan of lists. Writing things down has always been a great way for me to process things and it becomes real if it’s written down. Your goal with this exercise is to separate out every single part of the business you do currently. I want you to write down EVERYTHING. Just like when making a budget where you account for every penny, I want you to account for ever minute of your business. If it is too overwhelming to just sit down and do it, try keeping a log throughout the day of everything you do. It can be as specific or detailed as you need it to be, but make sure everything you do is outlined. Once you’ve made that list and discovered every step, you’ll be ready to figure out which pieces you need to do, which ones you like to do, the parts that you can’t do and those that you hate to do. Chances are, there is someone in the world that loves doing what you hate.

You can also take into account the non-business related items you do. It’s very rare that anyone likes cleaning house (I say rare, because my Mother-in-Law loves cleaning) so why not get that task outsourced to someone else? Having a weekly housekeeper come in and do the deep cleaning can give a huge chunk of time back on your plate.

Now, I know what you’re thinking. “Only rich people hire housekeepers. How can I afford it?” Well, this is where a different mindset can really help. If you add up the amount of time it takes you to clean your house, to really get that deep down cleaning done throughout the week (making sure to account for the moments of “I should go scrub the toilets”) and then think about suddenly having that many hours added to your work week. What could you get done with 3 or 4 extra hours in a day? If you play your cards right, you can utilize those extra hours to more than pay for themselves. You can suddenly have time to have one or two more sessions. Or finally set up doing In-Person Ordering sessions (which will easily add money into your business).

Finding someone to help out in your company can be more difficult than getting someone to clean your house. This is your baby. You’ve built it and seen it grow but sometimes, it needs a boost. An injection of someone else with skills that you don’t have can make an overwhelming difference to your business. And since you’ve gone through and made a list of things you hate, you have a more localized search for someone to help you out.

It can be scary to take that first step after accepting that you need help. You are busy and chances are you are thinking you aren’t in a financial position to hire someone else. But getting someone to help you out will free up time for you to do the things that only you can do. If you are the creative mind, you can’t outsource that creativity. By taking tasks off of your list though, you’ll be able to put more time into growing your business, thereby bringing in more money which in turn will allow you to discover more ways to get more time for your side of things. You can’t add more than 24 hours in a day, but you can portion out those hours differently.

For the past year and a half, I’ve been helping photographers grow their business by taking things off their plate and guiding them in marketing choices. Sometimes, all I need to do is listen. Do you need someone to listen to you?

I offer a free consultation with all inquiries. My goal is to make you happier with your business which in turn will make you more profitable. Contact me to see about outsourcing part of your life. You won’t regret it!

blog_separator

About the Author:  Kathy is a wife and mother as well as a photographer. She’s been helping photographers with their businesses since 2010 and loves being able to help people all over the world.  She enjoys reading fantasy books and spending mornings snuggled with her 2 year old little girl and husband. Every moment is precious and, by golly, she will enjoy them all!

Visit Kathy at her WEBSITE and on her FACEBOOK PAGE

Tweet


6 Comments

Business & Marketing Guest Contributor

Rock Your Biz: Accounting for Photographers

by Guest Contributor Shannan Painter

Accounting for photographers was founded based on the concept that photographers are, by nature, creative, right-brain-dominated individuals.  Photographers are incredibly gifted at making portraits into a work of art, but would rather clean the bathroom, get a root canal and sit at the DMV before dealing with the accounting and tax portions of running a business.

As much as we wish this part of our business would just do itself (just like we wish we could wave a magic wand & have the laundry done).  It is important to understand this aspect, and have a method for keeping track of income and expenses.  There are a lot of choices in accounting software that are available, but most are quite complicated, expensive, and require some basic understanding of accounting. At the end of the year, you – as a business owner – simply need to know how much revenue you generated and what you spent money on that qualifies as a business tax deduction.

One of my first suggestions would be to go out and buy an accordion file with at least 12 dividers. Make a tab for each month, and file away copies of invoices you give to clients along with receipts for anything you spent money on that was business-related. Once a month, you can pull out the receipts and enter them into something like my SNAPSHOT spreadsheet.  This spreadsheet is designed specifically for photographers. With this spreadsheet you will have a better understanding of where your money is going in one organized place.  I also include tips for tax treatment of business use of home, large purchases and vehicle use.

If you haven’t done so already, it is important to open a bank account dedicated solely to your business. The less your personal & business finances mix, the better!

blog_separator

About the Author: I graduated Magna Cum Laude with an Accounting Degree from the University of Montana. Instead of pursuing a career in public accounting and being stuck behind a desk for 70 hours a week, I turned down jobs at big accounting firms to pursue a different love. I chose instead to work from home where I live with my husband, two boys and a puppy named Growler. I live a glamorous, exciting life working from my living room in my pajamas, cleaning crayon off the walls, driving kids to school, playing superheros and taking care of a little dog that likes to refinish furniture with his teeth. I get to work with fun, creative & artistic photographers and help them understand that numbers can be our friends!

Visit Shannan at her website Accounting for Photographers and on her Facebook Page

Tweet


1 Comment

Guest Contributor Post-Processing

Rocking Post-Processing Skills

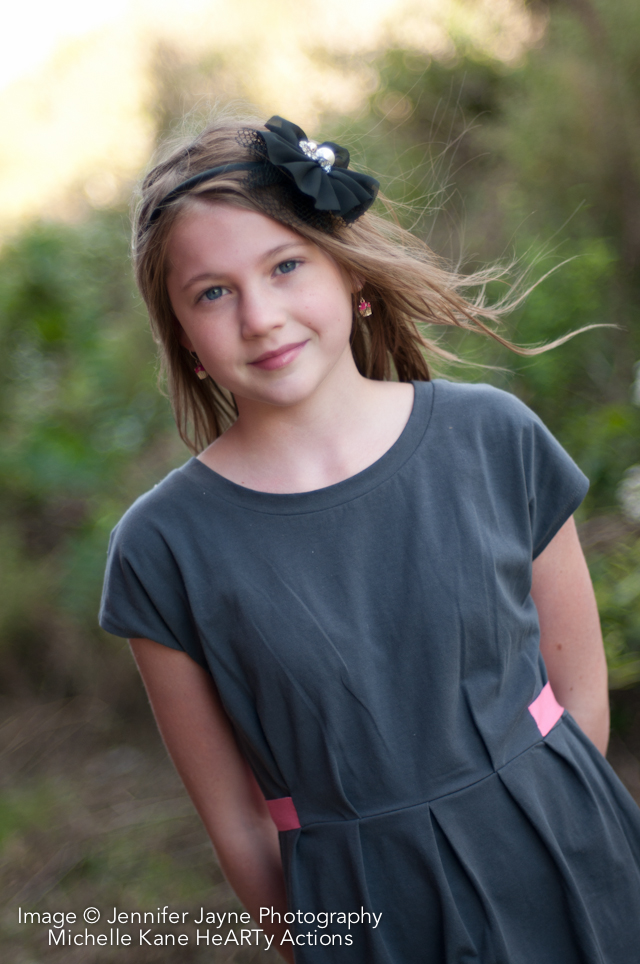
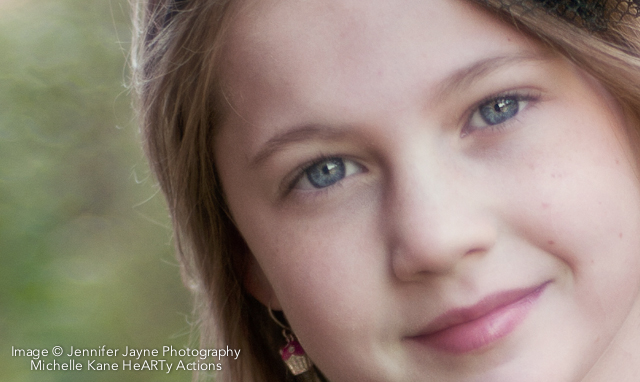
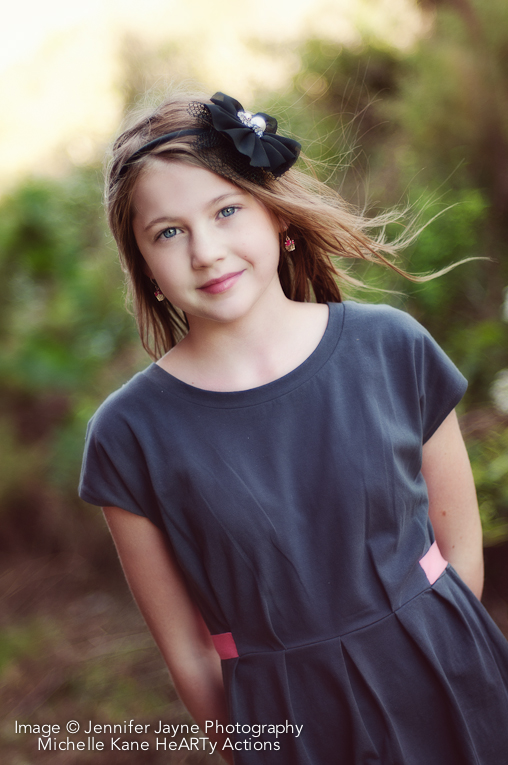
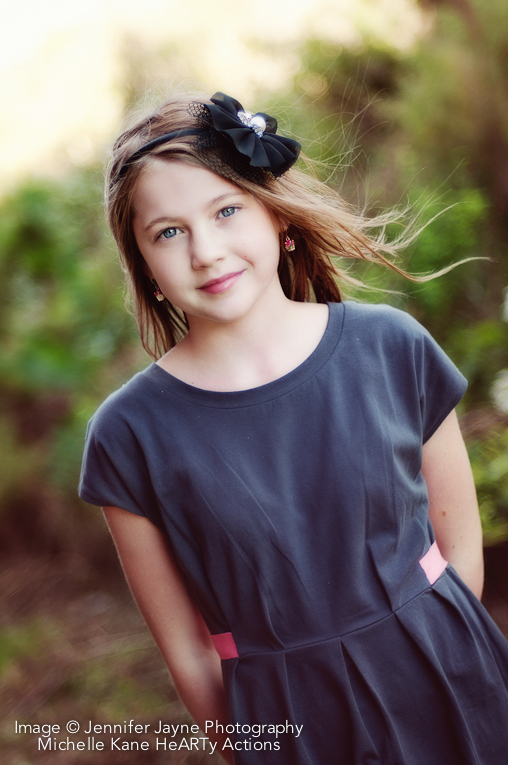
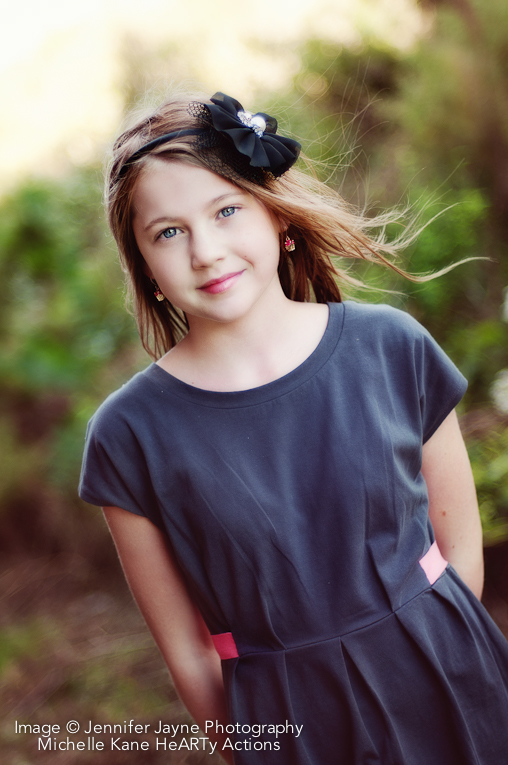
Today we are so honored to welcome Michelle Kane to the Blog.  Michelle has generously offered to walk us step by step through her post processing of an image – her “Blueprint” as you will.  Special thanks to Michelle for sharing her Rockin’ post-processing skills with us!

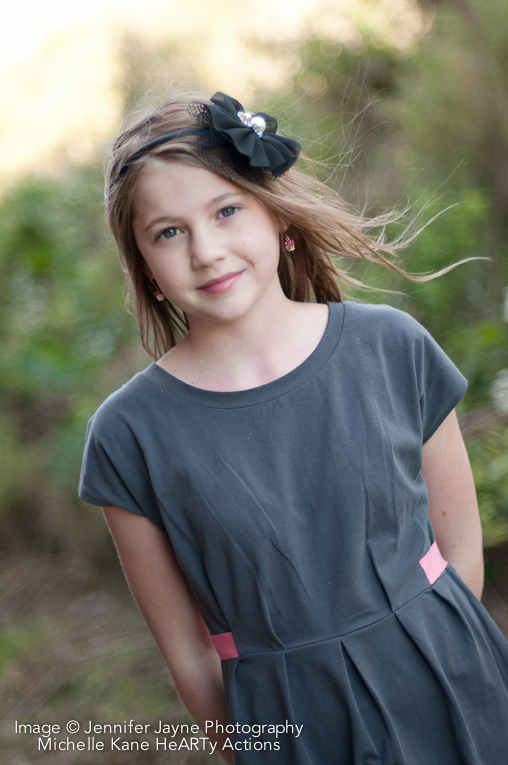
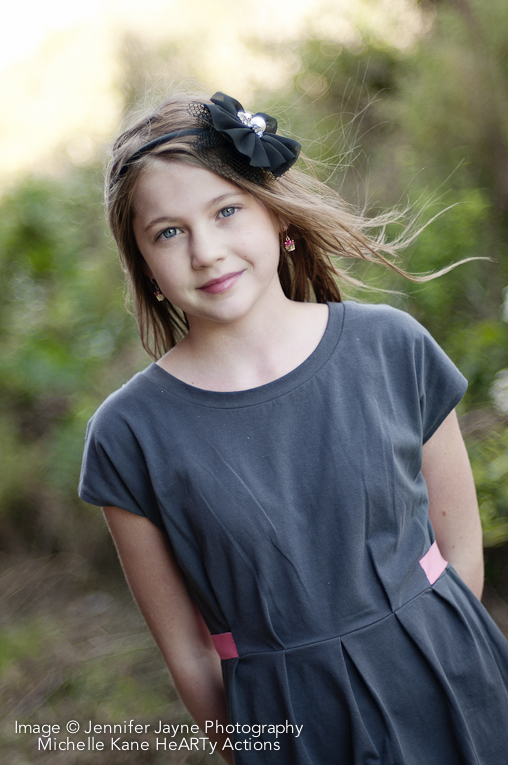
As always, I would normally start any edit in Lightroom to adjust exposure, white balance and make sure my blacks aren’t too dark. However, for those non-RAW editor users, I edited this image completely in Photoshop. The SOOC image is slightly underexposed and the pink tones in the skin need to be addressed first thing. If editing in LR, I would have increased the exposure and possibly the fill light, changed the camera calibration to neutral to help neutralize the pink tones, adjusted the temp and tint sliders for an even, pleasing skin tone and possibly lowered the vibrancy just a few points to again, help reduce the pink from her skin.

Edit in PS:

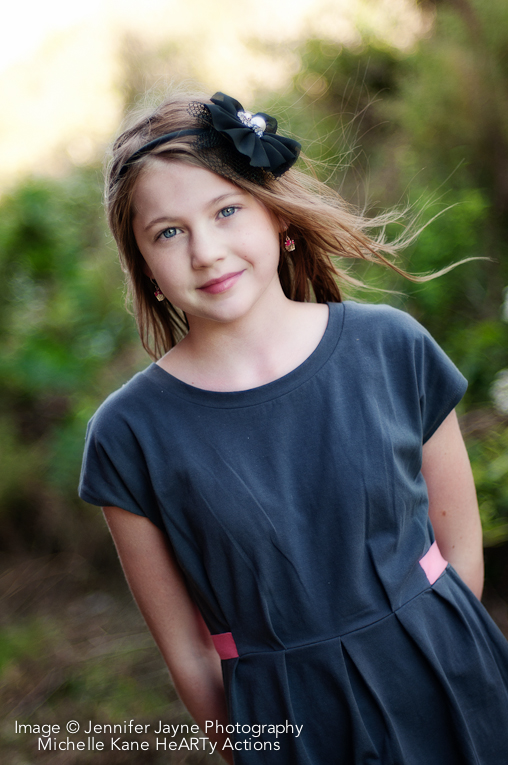
This image was shot by Jennifer Jayne Photography.

1. Light All Over at 30% to raise the overall exposure. Because on the right side of the image, her face was already lighter, I masked a little of the Light All Over off too keep it from getting too bright and to even out the brightness from left to right.
2. Anti-Lobster Skin (CS2 version) to reduce the pink on the left side of her face and arm. The CS2 Anti-Lobster action doesn’t brighten like the CS3-CS5 version does, so I ran both to get the proper amount of pink reduction and brightening and masked it on her face and her left arm. (camera left)
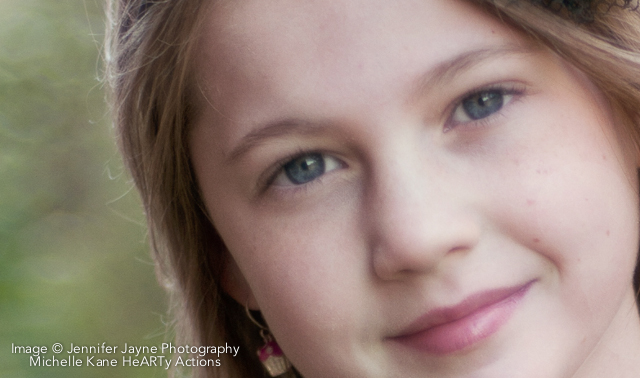
3. Glisten- masked onto her irises to brighten and sharpen. Her eyes were really soft and Glisten helped to create a sense of sharpness that popped her eyes in a good way, not an alien way. I do not whiten the whites of eyes. It’s usually garish. Bright sharp eyes = illusion of the entire image being sharper.
4. Sparkle- masked onto just the catchlights to further enhance the sense of clarity.
5. Bland to Brilliant 80% – This is my go-to action for all over contrast, brightening and clarity. She looks a little pasty at this point, but Posh will fix that.
6. Posh 70%. Posh is one of the actions from the Rich Set that must absolutely be masked off most of the skin and areas that become too dark and lose detail. Losing details in the darks is a real no-no with me and I ALWAYS mask it off with a real soft, low opacity brush in areas that become black or lose the detail in the shadows. In this case, it was primarily masked off the left side from hair to dress and her hair accessory to maintain detail.
7. Warm Air 50%. Gave an overall gentle pinkish softness to the image.
8. Flawless Face, masked onto most of the image, background and clothing too. I avoid eyes and hair and any place I need to keep crisp details. I love how this action not only softens and smooths skin, but reduces noise and makes bokeh even creamier.
9. Light Optimizer 24% to brighten entire image without losing contrast.
10. Ignite 70% inverted the layer mask to black and painted in effect on just a few key places to enhance the rim light on her hair, pop her eyes a bit more, and her lips.
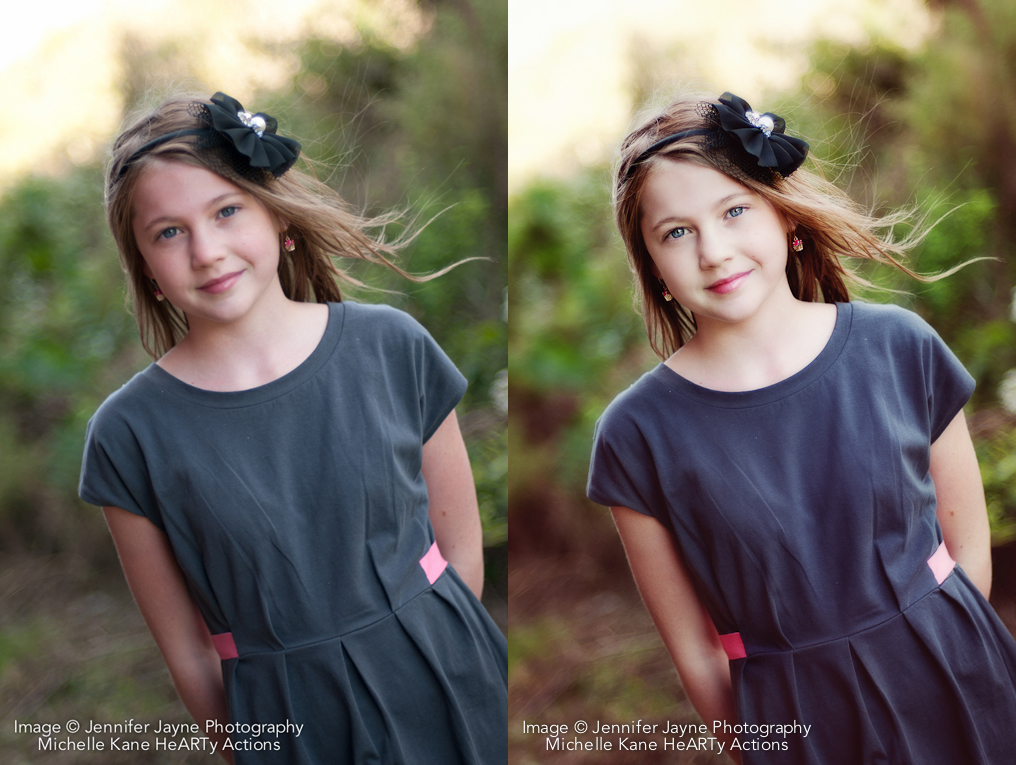
BEFORE-AFTER
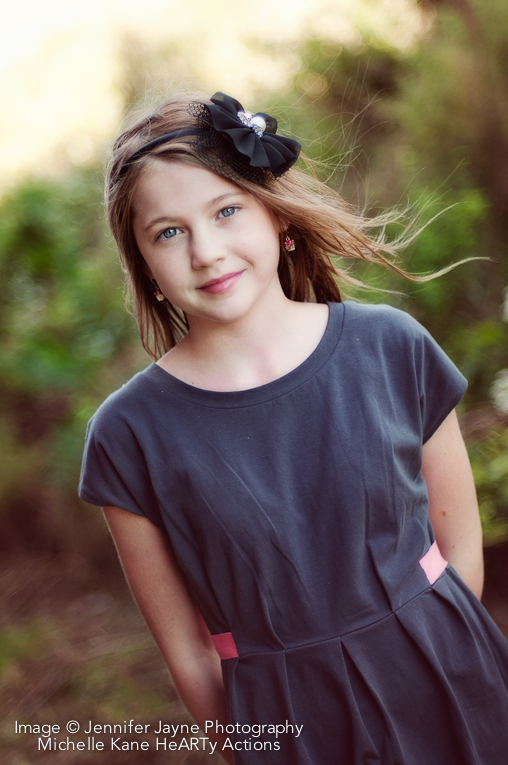
These 10 steps gave me a clean, simple and pretty image. I always start with a clean edit like this, then add in tones to either the entire image or just masked onto certain areas of an image to transform the feel. Toning is where you can really customize an image and give it a very artistic, personalized feel. Here are a few that I experimented with. Combining tones is an excellent way to keep things fresh and come up with combinations that no one else is doing. It’s all about personal taste.


a- Autumn Sunrise 30%
b- Brown Sugar 80%
c- Autumn Sunrise 30% and Brown Sugar 80% (my personal favorite of the toned images)
d- Bloom 15 % and Honeysuckle 21%
e- Bloom 15% + Brown Sugar 80% + Raspberry Lemonade 30%
f- Bloom 15% + Cosmic Ray 46% + Sweet Maple 10%
g- Cosmic Ray 63% + Raspberry Lemonade 30%

blog_separator

About the Author:  Michelle Kane resides in Wyoming with her husband and two vibrant children. She is the developer of the incredibly versatile Michelle Kane HeARTy actions, which includes the Creative HeART & HeART & Soul collections. Offering one-on-one photo editing mentoring, she works with photographers from around the globe, helping them fine tune their creative editing and post production workflow.

Visit Michelle at her website Michelle Kane Photography

Tweet


16 Comments

Business & Marketing Guest Contributor

“Why Vector?”

by Guest Contributor Kim Drury of Madilu Designs

Let’s say you’ve decided to have a logo designed and not sure where to start. You check around and ask rates, availability and obviously look at a designer’s style and portfolio. What are other good questions for your potential designer? How about file format?

It’s not terribly exciting dinner table conversation, but the difference between vector and raster is very important when it comes to your logo. When it comes down to it, you want a logo that can fit on your thumbnail or be resized to a billboard. Even if you think a billboard is overkill, you want it to be crisp when it’s used as studio signage, vehicle decals and more.

Vector files will allow you to have a logo that is crisp and clean no matter what the size. Take off your creative hat for a sec and let’s get technical. Vector graphics are actually based on mathematical formulas. Think paths, points plotted and formulas. For the most part, vector graphics are created with software such as Adobe Illustrator. Common file extensions are .ai and .eps. If you don’t have or use Illustrator, your designer can place the vector file in a Photoshop file for you and still maintain vector quality. You won’t be able to edit directly in Photoshop, but you’ll have this as a source file to give to your vendors as needed.

Raster graphics are basically pixels arranged in rows and columns. The more pixels in an inch, the clearer the graphic will be. Start stretching and you start to lose quality. If your logo is provided in raster format, you are going to be limited by the size. There are some instances where you might need to use this particular format. It’s best to discuss with your designer so they can provide the best quality for the application.

That’s it in a nutshell! If you’re looking around for a designer and aren’t really sure what all to ask, definitely keep in mind vector and raster!

Check out some of the AMAZING logos Kim has created for her clients:

blog_separator

About the Author: Kim of MadiLu Designs specializes in custom marketing materials for photographers.  She has 15 years experience in the design and printing industry, and has been self employed for the past five years.  Kim is a mom two boys and two girls.  A few of her favorite things…  sunshine, hot chocolate, running and helping others.

Visit her website at Madilu Designs.


Tweet


10 Comments

Photographer Spotlight

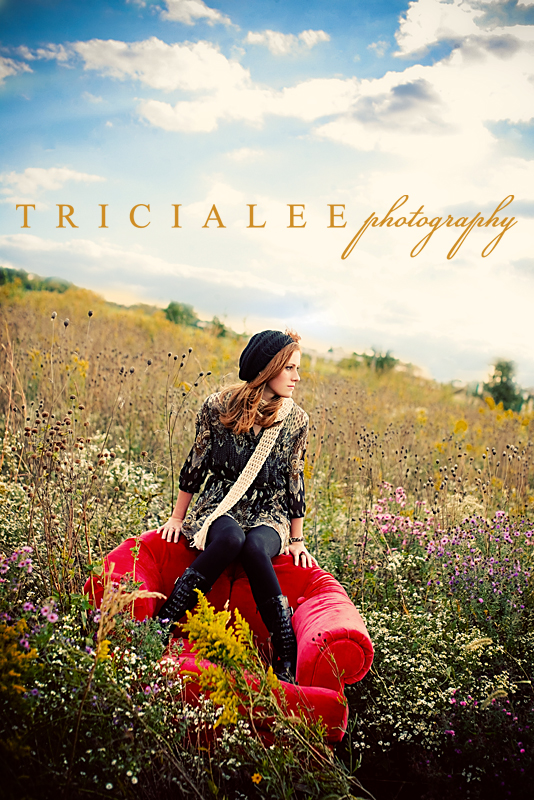
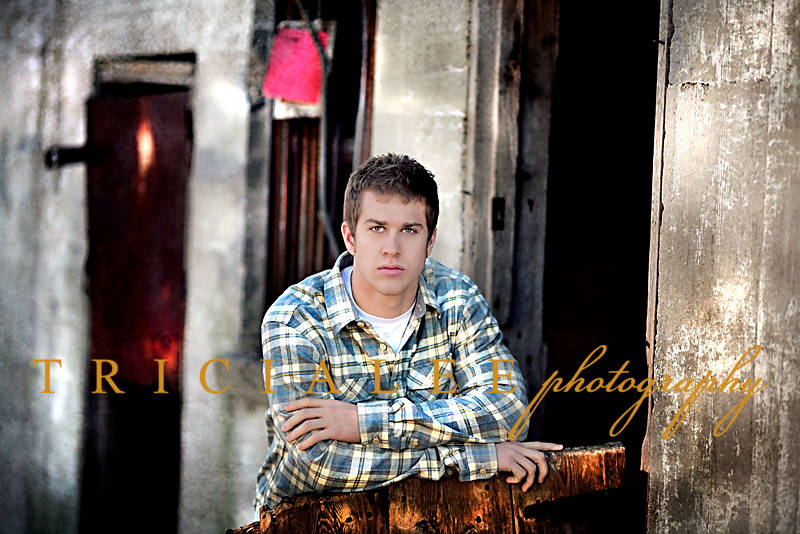
Photographer Spotlight: Tricia Lee Photography

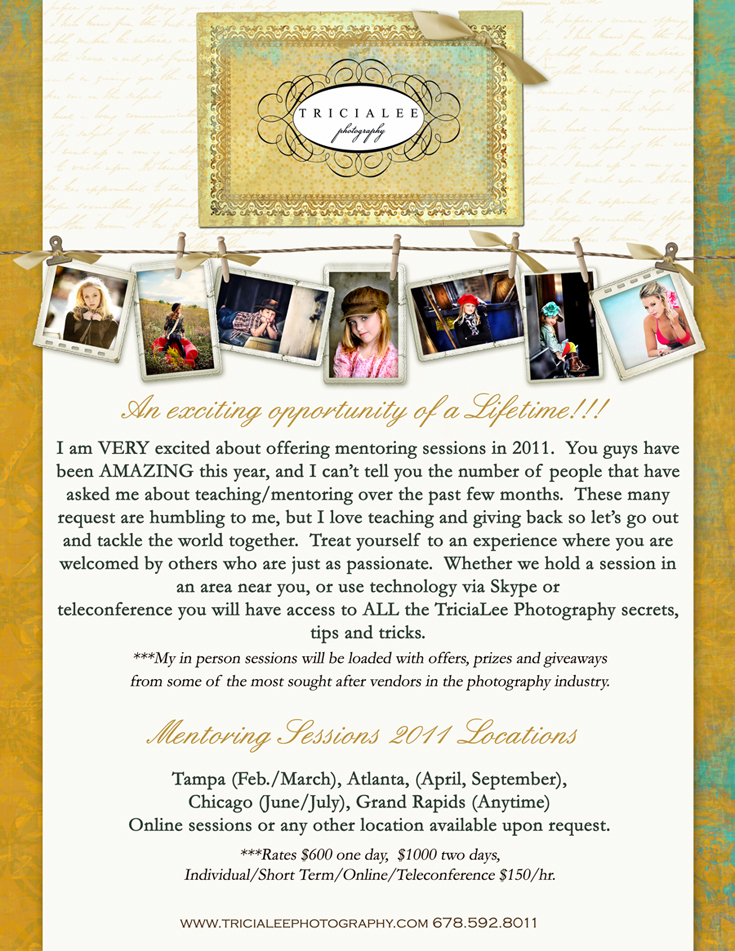
It is such a treat to introduce you to someone I call a dear friend, Tricia Lee.   Tricia has been an inspiration to so many through her beautiful work and love for photography.  It came has no surprise that Tricia had requests for mentoring.  In fact, this year she started traveling around the United States holding amazing workshops for photographers.   Her workshops have been a success and she has yet to visit Orlando, Chicago, Grand Rapids and Atlanta.  Take a moment to meet the photographer behind these beautiful photos and be sure to follow her work on facebook and on her website.  Thank you Tricia for this interview!

What do you love most about being a photographer?

I was completely drawn to photography long before I even knew that it was my REAL life calling.  After taking some time to think about this question, I believe that my love for it really stems from relationships.  My relationships with my clients, their relationships with each other and capturing those moments that will freeze those relationships in time forever are what keep me inspired every day.

What has owning a photography business taught you?

There is NO question that it has taught me to control the chaos.  The real challenge is controlling my business and not letting it control me.  Stay true to who you are.  Let your own style shine and your personality come through and you will attract a clientele that is simply perfect for you and you for them.  It is so cliché, but there is so much truth to this statement “if you dream it…it can happen”.  Always set goals!

How do you market your business to potential clients?

I LOVE my clients.  It is genuine and in no way FAKE!!!  The majority of them become my personal friends and family.  The relationship that we form with each other allows them to love me back in the form of REFERRALS!!!  Word of mouth marketing is the ONLY type of marketing that I have ever done.  Having said that, there is a whole world out there now thanks to social media and my use of that has been PRICELESS!!!

What is your favorite non-photography related website?

AMAZON!!!  I love reading.  Reading for pleasure helps me escape busy days and take me to a completely different world.

Favorite photo prop?

What ever makes you comfortable in front of my camera…my ALL TIME FAVORITE prop is YOU BEING YOU!!!  Although, I must admit that I am a COMPLETE fashion lover.  There is no doubt that clothes, shoes and textures (style) can make or break a shoot.

What is your favorite lens?

OH MY GOODNESS!!!  I feel like such a cheat because I love SO MANY of my lenses with all of my heart, but for very different reasons.  If I had to pick a FAVORITE, I really do LOVE my 135 f/2L the mostest.  I don’t want to make any of my other lenses jealous, but this lens tends to fit my style the best today.  However, let it be noted that this could all be subject to change tomorrow.

What do you enjoy photographing the most?

Relationships, Love, Laughter, Light and ANYTHING that will cause my clients to tear up and cherish a memory that couldn’t have been captured any other way.

Who inspires you (doesn’t have to be a photographer)?

This one is simple…MY SON!  There are no words to describe the love that a mother has for her children, and like most mothers the real blessing in my life is having the privilege of calling myself “a mother”.  From that love and my observations of the man that he has become, I draw inspiration.

If you could shoot on location at any location in the world, where would it be?

I am a 100% location photographer.  Because of that I love the challenge of scouting new locations and being creative on the spot.  It is one of my personal goals to always try and give my clients something unique even though their neighbor or their friend may also be my client.  Because of that the world is my studio and I am always up for the challenge…so BRING IT!!!

If you could tell aspiring photographers one thing, what would it be?

Always value your work and learn to say no.  Just because you work for yourself, don’t allow people to take advantage of you.  Your work is so incredibly valuable and important.  Believe it, and ALWAYS be passionate about what you are doing!

What inspired you to create your own workshop?

This is an interesting question actually.  So many photographers are self-taught with very little formal training and therefore, I believe they are hungry to spend time with others that they admire or relate to in some way.  When I was approached by several people about “how” I accomplished this or that with my images or business, it became clear to me that I certainly don’t know everything nor do I do everything the correct way, but I enjoy what I do and love sharing it with others.  There were many mentors in my life that were willing to share with me and that had a huge impact on my art.  It’s a simple tribute to them to turn around and do the same thing for someone else.

As a photographer, where have you traveled for workshops?

I love to see different locations and meet new people.  It challenges me to grow and not get caught in a creative rut.  This year, I have been to California, and Florida and will be going to Dallas, New Port Beach, Orlando, Minneapolis, Chicago, Grand Rapids and Atlanta.

What can photographers expect to take away from your workshop?

I hope first and foremost they walk away INSPIRED.  Inspired to develop and continue to grow their own strengths and styles.  That they find a strong balance in their business between their artistic initiative and strong client relationships.

What is your most common questions from photographers?

Most of the time I connect with other photographers because they saw one of my images and want to know how it was created.  One of the reasons that I started mentoring is because I want to be someone that people can relate to and feel close enough to that I can be completely transparent about these and any other questions they may have about my business.

In the future, do you see yourself offering your workshops outside of the United States?

Obviously, we all grow as photographers through workshops, reading, shooting often and networking with other photographers.  However, I would love to personally challenge myself and my comfort zones by traveling outside of the US with my camera, and creating art every day and YES, I would LOVE to offer sharing myself through mentoring while I’m there.

blog_separator

Tricia is a non-traditional photographic storyteller, with a talent for conveying visually the passion and emotions of people. Tricia delights in creating an experience for her clients that is unique to them…and that generates a one-of-a-kind end product. And, most importantly, to know her is to know that her son is a blessing that she thanks God for everyday. It is the love that she has felt as a mother that inspires her to shoot every session from her heart.

Want to learn more about Tricia Lee Photography?
Website
Facebook
Workshops


Tweet


7 Comments

Business & Marketing Guest Contributor

RIP • Death of the Sneak Peek Part 2 [the Solution!]

by Guest Contributor Elizabeth Halford

I hope you didn’t lose sleep wondering what the answer to last week’s post was! Last week, I posted about The Death of the online gallery and sneak peeks. And today, I give you the good news! What other option is there?

In-person proofing sessions

The in-person proofing session is the anti-gallery and these are the reasons I think they work better:

  • As they are viewing their photos, ooohing and aaaahing over each new one that pops up, there’s no mistaking that they LOVED their photos. When everything is through email, you don’t know their reaction as they were looking through their photos. It hurts you feelings because you have no idea what they were thinking when they saw them and it makes it easier for them to not buy because it’s not like they made a big deal in front of you. Some of my most surprising no-buy sessions have left  me baffled and asking “did they even LIKE them?” I have no idea why these sessions ended the way they did when I count them among my best work. So, yeah…being there to see them fall in love is a definite perk to the proofing session. For both you and them.
  • Because we’ve murdered the proofing gallery, this is their one and only opportunity to see those heart-melting photos. And if they want to own them? Well, they’ll have to buy.
  • You (or your sales person) will actually be in their home, viewing their living space and they don’t even know yet how much they will value your opinion and help in how to display their most loved shots. People might not realise just how stunning a giant canvas would look over their sofa but which sofa? The one that can be seen through the front window or the one only they can see? They might not know it, but they NEED you help!
  • …in addition, you wouldn’t want them to buy a giant canvas from their white seamless studio session and then put it on their stark white wall. People don’t always think about this stuff.

How to do one

So how do you actually DO an in-person viewing/proofing session?

  • I like to do this exactly one week after the session. The memory is still fresh and exciting and they’ve waited just long enough to be excited but not so long that now they’re ticked off. The viewing session is scheduled at the same time as scheduling the photo session. No surprises!
  • Make sure you aren’t overloaded with too many images. Seriously…try to narrow a whole session down to 20-30 max or you will be there all night.
  • Create a beautiful slideshow with iMovie, iPhoto or Lightroom. Resist the temptation to use music. It’s cheesy and distracting.
  • Get the show ready to go on your laptop before you leave your place. Then when it’s time, you can just open and press play.
  • If you do enough business to warrant it (or you just darn well deserve one!), buy something glossy and oooh-la-la like an iPad so they can hold their images in their very own hands. But then they have to hand them back to you and thus creates the sense of urgency to actually purchase the images if they want to have them in their possession forever. I’ve also found that the iPad almost always impresses the dad which is great.
  • For image selection and narrowing down, you can open up the session in Lightroom and have the clients rate their photos. You could have them flag the faves with a ‘p’ for pick. Then, out of those you can help them compile their order.

What about asking for the money?

Let me get an ‘amen’ if asking for the money is the hardest part of what we do? At what point do you hand over a list of prices? What do you say if they gasp?

  • Let them view their gallery and pick their faves. Start asking “so where do you think you might like to display (this one) and (that one)?” Then when they ask about frames vs canvas you can casually start talking about money.
  • NEVER APOLOGISE FOR YOUR PRICES. Never. EVER. I never ‘do a deal’. Sometimes, I will add a gift at the end but never because I was asked for it. Just because you don’t own a store where the prices are set in stone (even thought they’re just little stickers) doesn’t mean you need to haggle.
  • If someone complains about price, I will then mention my 50/50 plan. 50% on ordering, 50% on collection which can be up to a month later if desired. Then you can move on with “well let’s just put together what you really want and see where we go from there.”
  • I know this all seems like a really in-your-face way of making the sale. But it doesn’t have to be. I don’t appreciate a hard-sell and I can smell one a million miles away. This is why, if a couple wants to discuss their options in private or you just can’t seem to get a decision, you can have your business card ready with a URL to a 24 HOUR ONLY online gallery. Suggest that they continue to view after you’ve gone so they don’t lose track of time. Let them know that if they want their gallery extended, it will cost $____ per 24 hours.
  • On the subject of money, don’t make the session about taking their money. Emphasise that the photos are art featuring their family and not merely paper & ink and try to make the cost a sidenote. It might help you to read what I said to this client who complained about my prices.
  • Overall, talking about money should be easy if you have some prices on your website. In my prices list and in my initial booking email, all clients know that prints start at £30 and collections start at £350. If they hired you, they’re already willing to pay at least that.

What if you just can’t bring yourself to do it?

This is the category I fall into. First, I don’t have the time. Second, I neither want to sell my own art nor am I particularly good at sales. And I hate talking about money. And when you’re not good at something, pay someone who is. Do you have a mommy friend who was an amazing sales person before retiring to be full time in the world’s hardest line of work? Do you have a friend who really believes in you and always sends you love for you most recent work? Why not her? The next best thing to myself is someone else who really believes in me. When you find someone willing to take your iPad around town for cups of tea and home decor talk, pay her a normal hourly wage and add a generous commission on top. The personal touch will add SO much to your sales potential that you won’t even notice the commission.

In conclusion…

The proof is in the pudding. My online proofing and ordering galleries were selling under £100. If they even ordered, that is. And my first in home ordering session surprised me with a whopping 600% increase. And so did the next. And the next. Try it – you’ll never go back!

blog_separator

About the Author:  Elizabeth Halford is a professional photographer and blogger in Hampshire, England. She owns Glacier Cake Photography and a blog for photographers. Elizabeth is a second generation home educator and is, regrettably, quite addicted to Facebook.

Tweet


17 Comments

  • « Previous Page
  • 1
  • …
  • 27
  • 28
  • 29
  • 30
  • Next Page »

Popular Categories

You might also like

Love of Lifestyle Photography Workshop by Ashley Spaulding

Love of Lifestyle: The Fundamentals of Lifestyle Photography

The Lightroom Lab: An 8-Week Course to Mastering Lightroom

Pretty Forum for Photographers

Let Them Eat Cake—A Marie Antoinette Inspired Shoot

Tips to Keep Your Images Interesting in Limited Surroundings

Natural Light: The Art of Finding Magical Light

Copyright © 2025 · Divine theme by Restored 316

Copyright © 2025 · Divine Theme on Genesis Framework · WordPress · Log in

×
Never miss a thing!
Sign up for Pretty Forum Newsletters and get all the latest news on our upcoming:
  •  
    ​Workshops
  •  
    Celebrity Mentors
  •  
    Free Downloads 
  •  
    Photo Challenges
  •  
    Vendor Discounts
  •  
    and much more...