• Pretty Forum
  • Pretty Presets
  • Pretty Actions

Pretty Forum

Online Photography | Forum | Workshops | Tips | Tutorials | Classes | Business | Courses | School

  • Home
  • Blog
  • Enter Forum
  • Workshops
  • About
    • Meet the Team
    • FAQ ABOUT JOINING THE PRETTY FORUM
    • WHY JOIN THE PRETTY FORUM
    • Testimonials
    • Privacy Policy
    • Site Terms and Conditions of Use
  • Advertise
  • Contact
  • Join

Guest Contributor

Think – Imagine – Snap! Get it Right in the Camera!

by Guest Contributor Anna Bilowus

Do you ever just start pressing the shutter button because you feel the moment is right?  Your subjects are having fun, laughing or smiling; so, you have to capture it!  Then you view the photographs on the computer and there is a leg cropped off at the knee; pole coming out of the top of someone’s head; and their skin is green! I am guilty!  In my first year of learning manual exposure there were a lot of elements to juggle when trying to capture the “perfect” photograph. I finally realized I needed to slow down to think and imagine before I snap.

There are a few reasons that it is important to get your photo right in camera.  First, because it is less work at the computer.  Second, it preserves the quality of your photos. Last, the photo may not be salvageable.

First, you need to THINK about the technical elements.

Shutter Speed. Start with 1/125 for sitting subjects. If they are on the move definitely start with 1/250.   For those subjects that are really on the move consider continuous shooting mode.  This is also a great way to capture a series.

Aperture. How many people are you photographing?  The more people the smaller you want your aperture.  Unless, I am attempting to get creative I start with  f/2.8 for 1-2 people.  How close will you be to your subject? Again, you may want to decrease the size of your aperture if you are getting really close to ensure everything is in focus.  Is there distracting objects in the background?  If the background is distracting and you can’t relocate enlarge your aperture, create some beautiful bokeh.

ISO. Keep as low as you can without compromising your photo.  Noise can be fixed.

White Balance.  Select the correct white balance.  This makes a big difference in your color and it can help reduce noise.

Automatic Focus Mode.  If you haven’t already, consider changing your automatic focus mode to Al Servo.  Al Servo will help track your moving subject.
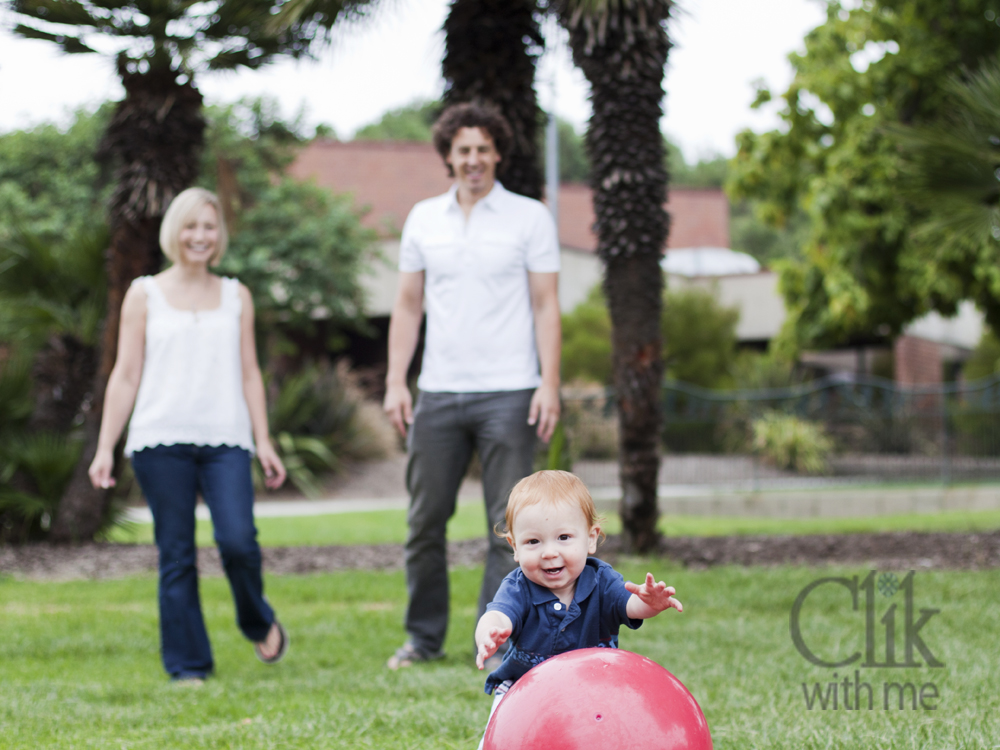
Second, IMAGINE your photographs before you snap.

This is where you get to be creative.  Your creative talent is what sets you apart as a unique talent.  So, imagine the perfect light and perfect location for you to compose your photographs.

Lighting. Watch out for harsh shadows.   The sun provides beautiful light, but at the wrong time of day it can create harsh shadows that are very hard to fix.  Early morning and late afternoon are the best times to take pictures in the sun.  If that time of day is not convenient look for open shade (you and your subject are in the shade) is a great solution when the sun is high and bright.   You can get amazing catch light in the eyes too if you have your subject facing the light source.

Composition.  Always compose before your snap.  You can’t fix a missing foot.  You can’t avoid cropping your photograph when your horizon is crooked.  Try to avoid distractions like a tree branch sticking out of your subject’s head.  You don’t want too much going on in your photograph (too many people or distracting objects in the background).  If the location can not be changed, try opening up your aperture to blur out the distractions or get in close. However, when getting in close try to avoid cropping off parts of the body.  You want to avoid cropping at the joints.

Composition is just as important as exposure.  This is what draws the eye to your photograph.  Have a plan before you start!  Exercise your mind by practicing the tips in the this fantastic article – 10 Tips for mastering composition.

In conclusion, if you force yourself to THINK and IMAGINE before you SNAP you will spend less time at the computer and more time creating beautiful photographs.

blog_separator

I have always had a desire to be creative but could never sit still long enough to sew, paint, draw or glue. I think photography is the perfect creative outlet for me. I am learning something new everyday by capturing the beauty of life.  Learn more from Anna on her website Clik With Me.


Tweet


3 Comments

Photographer Spotlight

Photographer Spotlight: Alli Peck

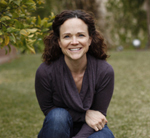
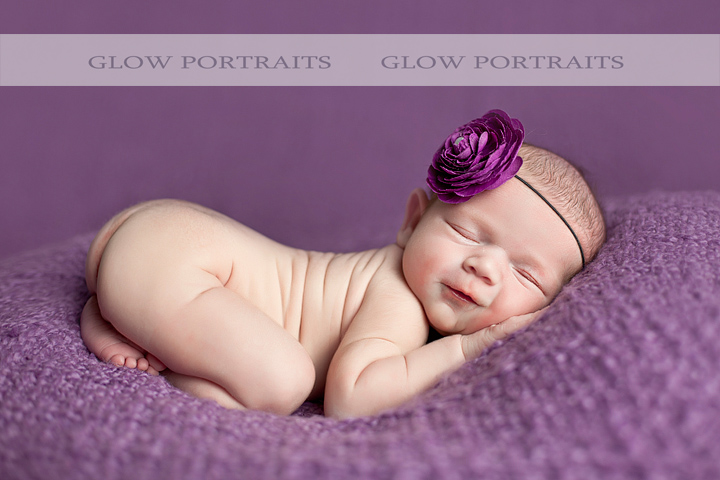
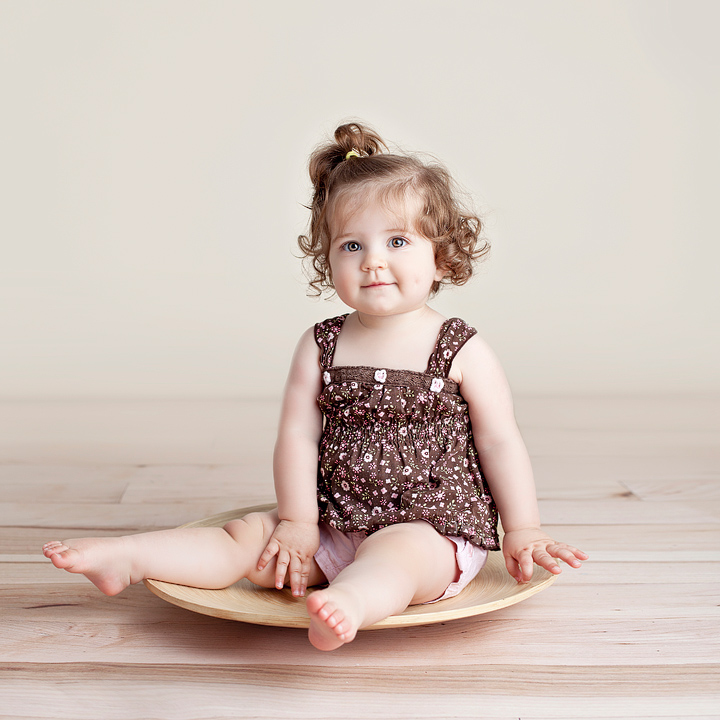
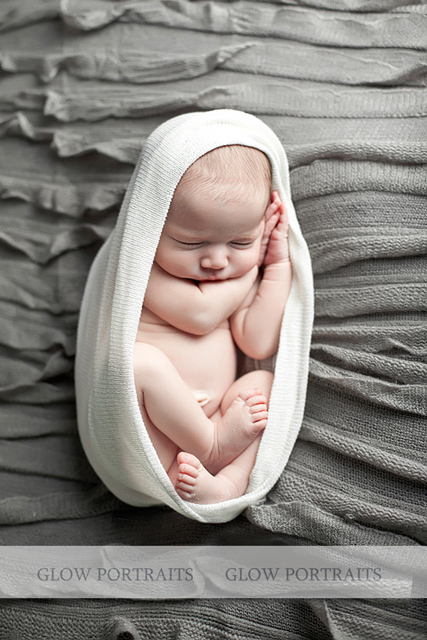
We are so pleased to welcome Alli Peck of Glow Portaits to Pretty today!   Her images are full of beautiful color and light.  Take a moment to learn more about Alli and visit her website Glow Portraits today!   Thank you so much Alli for taking the time to share your work with us!

How did you get started as a photographer and what inspired you to start your business?
When I became a mother and started to take a gazillion pictures of my own children I realized that other parents would enjoy images of their child that they wouldn’t be able to capture themselves.

How did you know you wanted to specialize in maternity/newborns?
There is simply nothing better than snuggling a sweet new baby! I have utmost patience with newborns and spending a few hours with them makes my day 🙂 Pregnancy was a time where I felt secure and beautiful in my body and I enjoy capturing how beautiful all women are during this miraculous time.

What camera do you shoot with, and what are your two favorite lenses?
I use the Canon Mark II with the 50mm 1.4 on the body about 90% of the time, although I use the 35mm 1.4L for certain situations as well.

What is your typical setup for photographing newborns indoors (props, backdrops, etc.)? Do you use natural light or studio lights?
Typically I shoot newborns in my personal studio, it gives me the control over the environment. Occasionally I will shoot a newborn outside, but the weather has to be right because of their delicate nature. I have experimented over the years with several lighting setups and I find the soft, wrap-around look of my current lighting setup suits my style best. I use backdrops from Lemondrop Stop in almost every shoot. Blankets have always been a theme in my newborn work, and I’m always looking for new knits and textures.

What is the best way you’ve found to promote your business?
I live in a small community and as such, most of my business is developed through word of mouth. I maintain a blog, and a Facebook page related to my business, so on occasion people find me through there. Currently my choice in marketing has been to focus on producing elite caliber images and keeping client’s wants at the front of my mind. However I have begun to think about different avenues for promotion to set myself apart from the new crop of digital camera owners flooding the market.

What do you do to stand out from your local competition?
I have a great relationship with most of the other professional photographers in the area, so competition is not something that I spend a lot of time thinking about. I try to constantly improve my craft, and keep an eye out for upcoming trends that may filter into my medium. I feel like my distinct personal style has set me apart from the other photographers in the area, and is genuinely sought after.

How do you balance your business and family life?
As every working professional knows, time is the one resource we all share equally. I have the benefit of working from my home, and having my studio steps from my front door. This affords me the opportunity to be a full time caregiver as well as a full time working professional. My husband is very supportive and that also makes things manageable. Family is what led me to this, and family will always be the foremost part of my life. I love my babies, and ideally still want more.

What do you love most about being a photographer?
Wow, there are so many things. I love working with expectant mothers, especially first timer’s. It brings back memories of my time there, the fears, joys, anticipations. Babies will always be special to me, they change so quickly in those days, capturing those fleeting moments are heart warming. I have always had artistic aspirations, and for me being a photographer is so much more than just documenting. Behind the lens I am able to capture feelings, emotions and share those special moments with others.

Where do you see yourself in 5 years?
Well hopefully not five years older! 😉 but on a serious note, I would like to streamline my business even further. I recently focused on the places where I find the greatest motivation and joy, Babies, Bellies and Boudoir. I have some new styling in mind for the upcoming year with regards to newborn and infant shooting. I would like to put greater focus on becoming the preeminent Baby photographer in the north. In the near future I will look for some commercial opportunities in this area, and hopefully publish some editorial photos in the US.

If you could tell aspiring photographers one thing, what would it be?
I would tell them to be realistic about their motivations. There are far more efficient ways to make money, photography as a business grows from photography as a passion. When you put your heart and soul into the work you do, other things will fall into place. The landscape of our profession has changed dramatically in the past decade, professional grade equipment is now within easy reach of every consumer and hobbyist. I for one see this as a good thing, it diversifies the field and introduces new ideas. It can, and has diluted the commercial aspect, because there are so many new “professionals” emerging with limited experience, but eventually that will lead to a greater distinction between the quality level of the available photographers. There will always be clients out there for who price is the most important variable, however my business seeks out clients on the opposing spectrum, where a truly unique and professional image is tantamount.

blog_separator

About Alli:  I am a studio photographer in northeastern British Columbia, Canada specializing in maternity and newborn photography. I have 4 children of my own and try to balance my passion for photography and raising a family. I can’t think of any other job that would bring so much enjoyment and personal satisfaction. What could be better than snuggling a fresh little bundle of love while being able to express my creativeness at the same time?
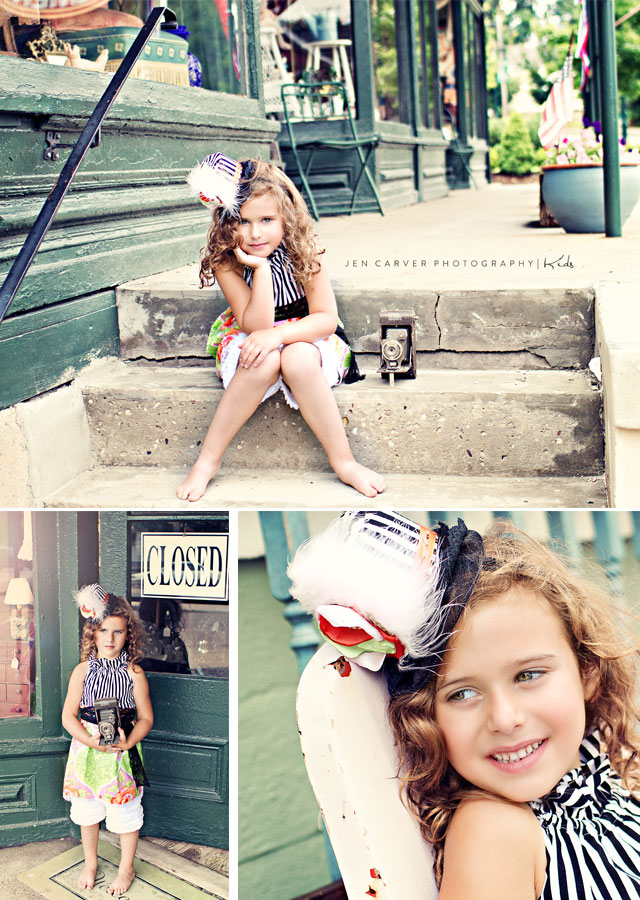
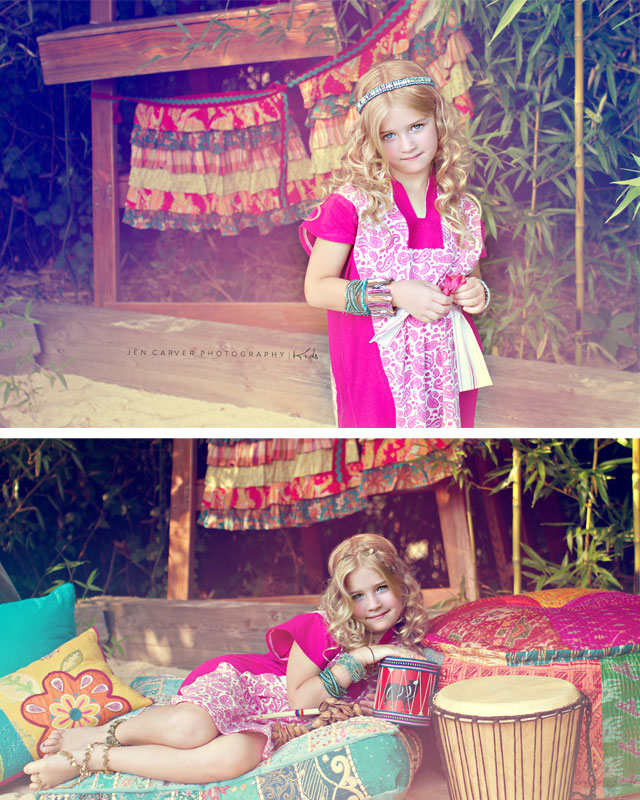
Visit Alli at her WEBSITE | BLOG | FACEBOOK PAGE


Tweet


5 Comments

Photographer Spotlight

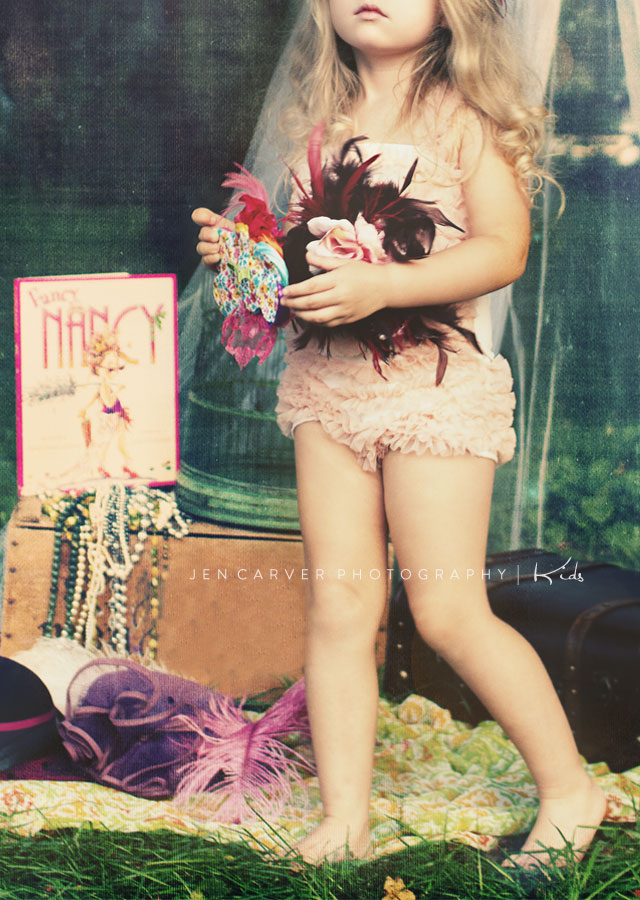
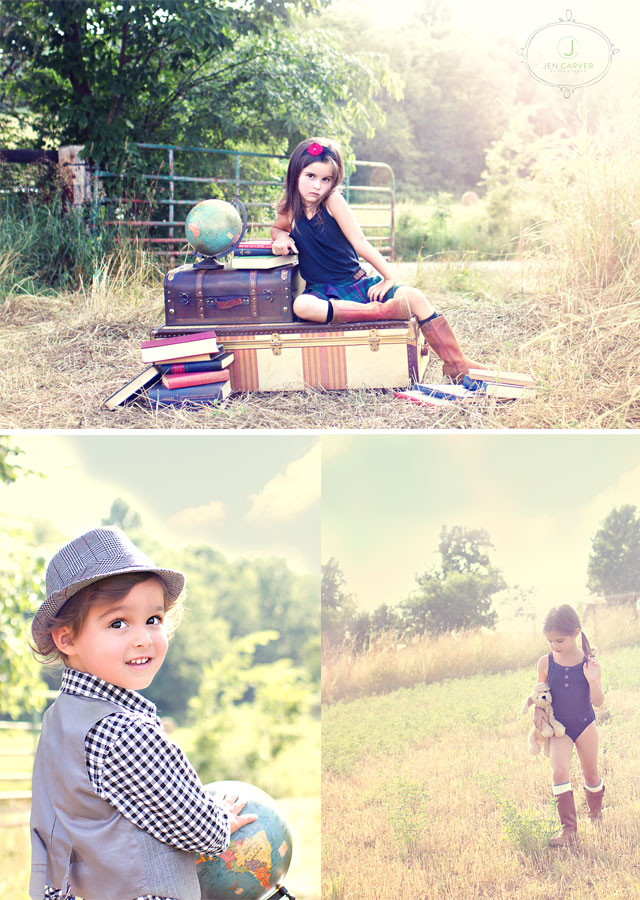
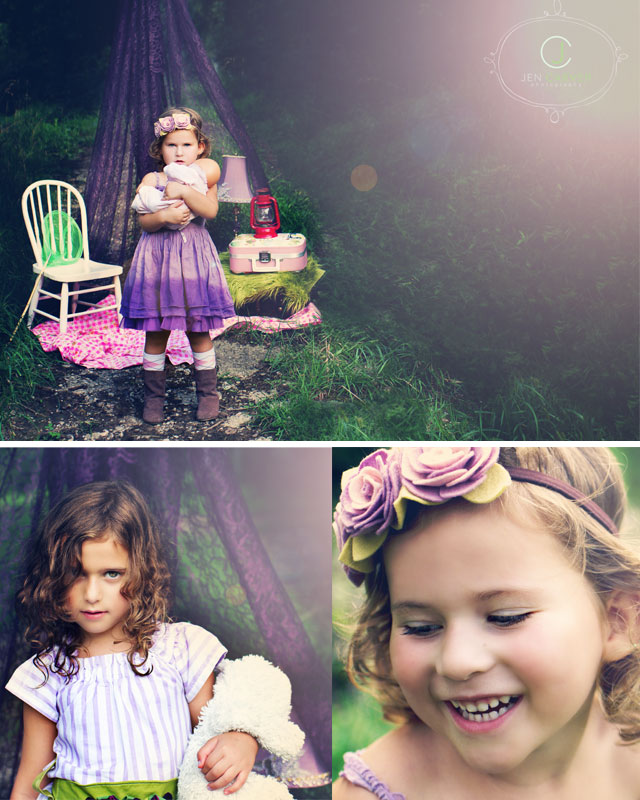
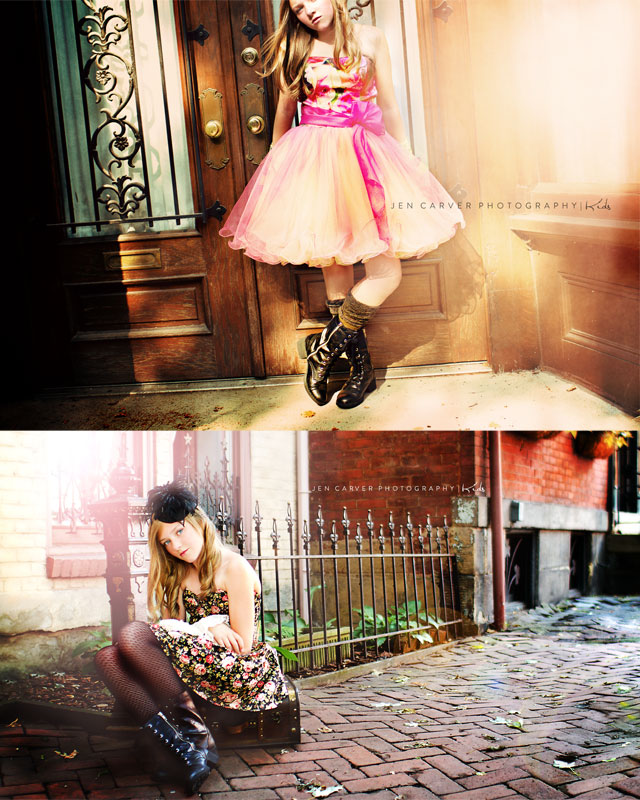
Photographer Spotlight: Jen Carver

We are so thrilled to welcome Jen Carver to Pretty today!   Her images are full of beautiful color and light.  Take a moment to learn more about Jen and visit her website Jen Carver Photography today!   Thank you so much Jen for taking the time to share your work with us!

Where did your inspiration for photography begin? 
I guess it started quite awhile ago.  Before I started my own photography business.  I was the Marketing Director for Nike, Lids and a Visual Director for Universal Studios…  I oversaw the creative for the overall brand and Marketing/Advertising Campaigns.  I was fortunate enough to work along side some incredible commercial photographers, producers, stylists and product designers.  Over the years, my interest in photography grew as I watched the camera capture story after story of collaborative ideas that our team put together.  BUT, the true catalyst that ignited my love for photography and inspires me everyday are my two little girls.

How would you describe your photography style?

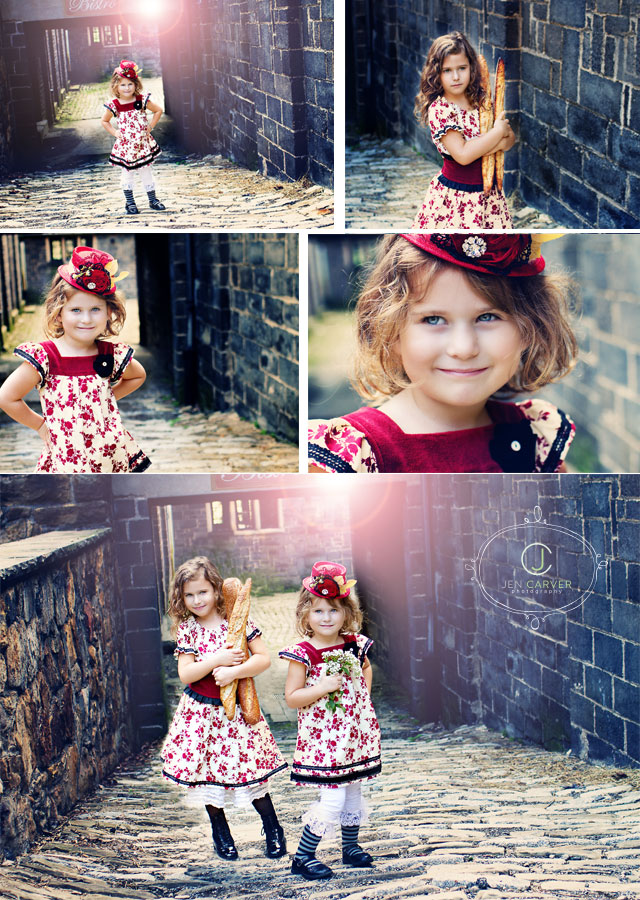
hmmm. that is a tough one!  My style is sometimes driven by my personal interests, there is no doubt I love vintage, shabby chic, boho and anything color!  I certainly would say my style is more “candid” than “posed” However, I approach each shoot very differently, similar to how I used to approach individual advertising campaigns prior to becoming a Professional Child Photographer.  So , it certainly depends on the child (or children), their style, personality, shoot location…a big part of how I process my images directly connects to the mood of the shoot and personality of the kids.  That is sometimes the most time consuming part as I dont want to miss interpret that connection, so the processing piece becomes a very important piece in conveying that story.  If i’m shooting for a designer the wardrobe certainly influences the models I choose and set ideas I put together so that it either connects to a particular silhouette or the overall brand.

All of your sessions are one of a kind.  How do you keep each session so unique?
The truth? …I get bored very easily, that is probably the biggest reason! LOL!  I like to keep things original and personal to the client.  After all, they are hiring a custom photographer so why wouldnt they get a custom session?!

Do you have any tips for photographers on finding the light when taking pictures?
Certainly scout locations and look at them at the time you will be shooting.  You can find beautiful light almost anywhere.  But you do have to do a little homework to find those sweet spots where the light can be just magical.  It is truly unlimited in terms of locations.

When looking through your sessions, each session tells a story.  How can photographers create a unique story through each session?
I guess this goes to back to my roots…I dont know any other way.  For me, that is my favorite  part.  I love being creative, the kids are able to play and get involved in the story, you get genuine raw emotions, and they have FUN in the process.   It doesnt have to always be elaborate, a subtle prop here and there can make all the difference in your images.  Pick a location that works with the child’s personality, then work with the parents on styling.  I truly believe this can make or break a shoot.  I personally make it a habit of always styling my clients.  I also use pinterest alot to create style boards for my clients so they know exactly what were doing, what they should bring and the overall feel of the shoot.  This can be such a great tool!

The lighting in your pictures are gorgeous! Any tips or tricks you would like to share about “finding the light”?
My advice would be…DONT BE AFRAID OF IT! Push yourself and you might be surprised!  I used to think  (and shoot) with the light always coming in from one side..but it wasnt until I started shooting into the light, in front of the light, behind the light, you name it , that I feel my work drastically jumped to another level.  Oh, and I always shoot late afternoon.

What camera do you shoot with?  What is your most used lens?
I shoot with the canon 7d and 5d mark11 and I cant say enough about the canon 35 1.4  – LOVE!

Do you use any actions when processing your photos?  If not, how do you process your images?
Florabella, her actions are fabulous.  I also love Jessica Drossin’s texture sets.  I do modify and combine to achieve the look I want.

What is the best way you’ve found to promote your business?
Facebook nationally and word of mouth locally.

If you could tell aspiring photographers one thing, what would it be?
If in your heart you love photography and want to be a professional photographer then BE ONE! The majority of us have not had “formal” training, what we do have is different  paths that have led us and inspired us to who and what we are today.  We are all here to help each other get to the next level.  Dont be afraid to ask for help or advice.  It may save you hours or months of work trying to figure it out yourself.  There are so many incredibly talented photographers out there to learn from, practice practice practice and  just go for it!  You have nothing to loose and everything to gain.

What do you love most about being a photographer?
It is such and incredible creative outlet for me.  However, what i love most is that this “service” that we provide touches peoples lives, moves them in such a way that you become a part of their lives forever, there is nothing more personal then when a parent allows you into their child’s world and when you are able to capture that, it is giving them a gift that is unmeasurable, what they may not realize…. is that is the gift that is unmeasurable to me!

Where do you see yourself in the next few years?
Hopefully more rested (haha!) I’m not sure honestly, I used to have a “plan” .. its better not to… I plan to do some group mentoring next year.  That will allow for me to teach others and allow more time for my family.  But, time will tell, I’m in a good place going in the right direction, I’m not in any hurry so I just want to enjoy the ride for now!
blog_separator

About Jen:  Jen Carver is known for her unique modern child portraits. Her approach to child portraiture has been published in one of the best selling children’s photography books, “Photographing Children by Ginny Felch” ( 2011).  Jen Carver is an award winning photographer that has been recognized for many of the unique images she has captured.  Jen Carver has done commercial work for several retail children’s lines and works with modeling agencies to provide marketing portfolios and comp cards for commercial use. Jen Carver is based in Pittsburgh, PA but travels throughout the country for Child photo sessions, commercial work and mentoring.

Visit Jen at her WEBSITE | BLOG| FACEBOOK PAGE

Tweet


5 Comments

Guest Contributor

Facebook Etiquette for Photographers

by Guest Contributor Elizabeth Halford

“Hi I’m Elizabeth! I want to use your hard earned fan-base to easily grown my own. Please ‘like me’ back!” If you’re a photographer, blogger or vendor for photographers, do you want people leaving advertisements like these on your Facebook page? Even worse, are you a photographer or vendor guilty of this rudeness? Stop! Think! And read the rest of this post.

Facebook was quickly picked up as a totally genius way to grow your business, reach out to your clients and build a fabulous fanbase. Once you have these fans, you can do a few things with them: you can build a community around yourself & your brand, you can gain bookings if you’re a photographer or if you’re a vendor, you can sell your products. If you follow the rules, you can also run fabulous competitions and get your name out there by giving what you’ve got. With all the rich diversity that Facebook offers folks like us, there is also a niche for giving tutorials and information to photographers about how to maximize these opportunities. Unfortunately, it seems that some people are learning to squat on others’ Facebook pages and utilize their hard-earned fan bases to advertise their own products and services. It often looks something like this:

I’ve noticed a large spike in these squatters recently and these are the trends that seem pretty consistent with them:

  • I have no clue who they are
  • They’ve never included themselves in conversations going on in my discussions tab or on my blog. I.e.: they’re not friends of Elizabeth Halford Photography & they don’t intend to be
  • They ask me to ‘like’ them
  • I never hear from them again
  • They have a very small number of ‘likes’
  • With the exception of a few vendors who should know better, they are almost exclusively amateur photographers just starting out

At the risk of looking like a total jerk, I have to say that I really don’t think these people know better. Some are vendors who want to tell my fans to come look at their sale (a surefire way to get banned from my page) but most are beginners who just want people to look at, and comment on, their work. In our hear of hearts, even the most advanced of us still just want to know that people like us, so how can I blame them? But there are rules to follow if you don’t want to look desperate and get your post removed.

{How not to do it}

Do not post a link to your page on someone’s wall without first emailing them and asking. Just because you can do it in 2 seconds flat doesn’t mean you should. Practice common courtesy.

Do not post your products or sales to someone’s page. Same rules as above.

Do not advertise your services on the page of a fellow local photographer. I can’t believe that I even have to say this, but it happens.

{How to do it}

Facebook now allows you to login and engage as your page. Which means that I can go to Pretty Presets and leave this much more appropriate message:

While logged-in as your page, you can comment on photos and statuses from other pages your page likes {you have to ‘like’ it while logged in as your page, not just ‘like’ it personally while logged in as your personal profile}. This is where you go to log in as your page:


If you’re posting for the first time on someone’s wall, leave a meaningful message, not just a “like me back” message. Tell them your favorite shot of theirs or how their work makes you feel. Don’t just try to sweep through and grab a few more likes. It looks slimy and cold and doesn’t do much for your relationship with that page in the future.

Another way you can be seen on someone’s wall is to include a mention in your own status. If you want to mention another photographer or vendor in your status, use the @ symbol before beginning to type their name and it will drop down for you to select like this:

The mention will appear on you wall and on theirs and is considered the safest way to pop up on someone else’s wall without looking cheap.

If you’re a vendor and you want to establish a relationship with a photographer you admire, do it the old fashioned way: offer them a complementary item. Ask only that, if they like it, they use it and send you a shot once you have. If you’re nice, that photographer will give you a shout-out on their page or blog for your kindness and you will gain far more likes than if you just squatted on their page.

{How I did it}

I have steadily gotten around 1,000 new fans per month for the last few months. I have never once posted my link on some stranger’s wall and asked for new fans. In addition to the points above, I have also:

  • Spent a lot of time writing guest posts like this one
  • Written tutorials on my own blog and posted them in forums, answered questions on Yahoo Questions, etc.
  • Gotten involved in communities like Rock the Shot. Posted my Facebook link in my post signature and gotten involved in threads where everyone is liking eachother’s pages.
  • Offered stuff for free. The information I post on my blog, many others charge for. I give something for free and, in return, I’ve gained a good, solid fanbase who I love and they love me back.
  • I give products away in giveaways from other photogs and vendors who have a good solid fanbase of their own.
  • Used the actions, presets and templates from fabulous vendors. Some vendors allow photogs to post B&A images directly to their page and some ask that you email them first. There are also Flickr groups from these vendors where users can post their B&As. This doesn’t directly lead to FB likes, but I often follow someone’s Flickr to their FB and ‘like’ them.

If you’re a photographer who has squatters posting inappropriately on your wall, don’t feel bad for removing those posts. You can even ban repeat offenders. The way I think about it is this: I charge for ad space on my blog. Why should ads on my Facebook wall be free?

Facebook is a very new establishment in our post modern social structure and these are things we have to discover and work out on our own to find out what’s rude and what isn’t. What works and what doesn’t. But no matter how you decide to move forward, always remember the golden rule and treat others as you would like to be treated.

So please for goodness sake after all this hard work…go like me on Facebook!

blog_separator

About the Author: Elizabeth Halford is a professional photographer and blogger. She gives real photography advice in real.plain.english. Visit her on Facebook and join a community of photographers just like you!


Tweet


40 Comments

Photographer Spotlight

Photographer Spotlight: April Renee Photography

We are excited to welcome April Renee to Blog today!  April takes stunning engagement and wedding photographs for her clients in Virginia.  She is especially talented at finding the right lighting, creating beautiful poses and discovering unique locations and props. Please take a moment to learn more about April Renee and visit her website April Renee Photography today!   Thank you so much April for taking the time to share your work with us!

When did you decide to be a photographer and how long have you been in business?

I decided to become a photographer after my daughter was born, 8 years ago.  At the time I had a point and shoot, a boppy pillow, blankets and sheets to use as the backdrop. I practiced on her and eventually got a job at “Picture People” as well. My love for photographer only grew stronger and stronger.

What inspires you most as a photographer?

My kids definitely inspire me as a photographer. I know it sounds cheesey but it’s true! I wish I could see things they way that they do. The way they get so excited when they see or learn something new.  It really is a beautiful thing!

How do you use light to your advantage?  Do you have a favorite time to have sessions?

I love shooting at least two hours before sunset. The light then is just gorgeous & everything is so warm, and golden.  There have been a few times where I’d have to shoot at any given time during the day (take weddings for example) so you just have to make it work & find the nearest shady spot with the sun poking through a tree or something (haha)! I always make it work though.

You’ve recently updated your website (love it!).  What made you decide to upgrade and would you do it again?

I’m actually in the process of updating it BIG!  I’m going with a Showit site this time! This will be my first time using after hearing so many great things, so I’m very excited about it! It’s all custom designed by me!  I’m still working on a few things with it but hope to have it launched soon!

What are some of your favorite props?

Great question!  I don’t really have a favorite prop, but they are fun to use when a client wants to.  I’ve used balloons, cute little signs the bride made, mustaches on a stick (for my weddings).

How do you come up with such unique poses?

When I am shooting, ideas just come to me. I hate doing the same thing over & over again especially because you see it everywhere.   I like to think of new ideas, and I get so excited when I do. I also like to look for inspiration in magazines as they help a lot!

You’ve recently started doing more family pictures.  What inspired you to branch out from the wedding and engagement photography?

Family portraits are fun, but I’m definitely invested more in engagements & weddings. I’m actually starting to learn to photograph newborns too.  I figured I’d branch out & try new things. And so far so good!  I mainly do family portraits for the clients I already have.  They get their engagement portraits taken, then I shoot their wedding and then they have a baby and want family pictures, so I can’t say no!  I love, love, love when my clients keep coming back to me. It makes me feel so special and so loved, and it makes me love what I do even more! It really does!

If you could encourage a new photographer in one area, what would it be?

My advice would be about weddings!  I’d tell them to 2nd shoot with a professional first and learn everything you can from them. Also, do as much researching as you can as you can learn a lot on your own. We all started somewhere and most photographers are self-taught (like me!). There’s a ton to learn and I’m still learning.

What is a good lesson you have learned this year in photography or in your business?

That’s a great question!  I’ve learned to think BIG and to dream BIG.  To not sell myself short and I’ve learned that I’m worth more than I give myself credit for. I’ve also learned that family is way more important than anything else in this world.  I’m learning is to turn my computer off when my husband and kids get home so I can spend more time with them!  I’m also learning to say “no” which is huge for me because I’m a people pleaser.

Where do you see yourself in 5 years?

In 5 years, I hope to be more successful, but also just to be enjoying life & loving life!  MAYBE do a workshop?  The thought has definitely crossed my mind a time or two.


Tweet


3 Comments

Business & Marketing Guest Contributor

Business Skills: “Promises”

by Guest Contributor Shannan Painter of Accounting for Photographers

I was less than a year into my accounting business when a client had me in tears.  I had promised to have a project done by a certain date when “something came up”. They were, justifiably, frustrated with me.  Often, we make promises to people, with great intentions of following through, only to have life interrupt. Disappointing people is not a great way to do business! Here are some simple ways you can keep your promises, keep your clients, AND establish a fantastic reputation:

Under-promise, Over-deliver!
When my husband and I got married, our wedding photographer said it would probably take 3 weeks to a month for him to edit and compile all our photos. As excited as I was to see the images, I was prepared to wait the time he estimated. When he posted them to Facebook only 10 days later, I was ecstatic! Now, imagine this scenario in reverse. What if he had promised me 10 days and it took a month before I got to see anything – very frustrating, right? Realize that your estimation has a significant effect on your client’s expectations.

Be realistic!
Staying up until 2am editing may seem like a good idea, but think it through! Plan your editing time so that it doesn’t occur at the end of a long day, when your kids are climbing on you, or when a deadline is looming. You won’t produce your best product when you are under stress. If 2 am is the only time you have, then stop committing to so much! Late-night editing sessions may work wonderfully for you, but know yourself. When will you get the best work done?

Allow for the unpredictable!
Understand that things come up over which you will have no control. Kids get sick, you get sick, funerals happen, cars break down, stock markets crash, natural disasters occur, and there is nothing we can do about it! Give yourself some extra time to allow for events you can’t plan.

When you mess up, admit it!
If something does come up that throws off your completion timeline, admit it, apologize and do your best to get it done as soon as possible. Remember, you can be discreet. Unless you are dealing with someone you know very well, you don’t need to disclose every detail. I once had someone doing work for me launch into a dramatic excuse of why the work wasn’t done because she and her husband had been fighting. Maintain your professionalism! I would use a phrase something like “I know I promised to have your sitting ready to proof by [this date]. Something personal has come up, and I apologize for the inconvenience. It will be my first priority. Thank you for your patience.”

I have a lot of experience dealing with this subject because I am a people-pleaser! One of the greatest challenges for me when I started my accounting business was learning how to be a business owner.  Even if you are an incredible photographer, remember that you have to learn to be a great businessperson too. Business skills may take some time to develop, but you can always learn from others.  Keep learning!

blog_separator

About the Author: I graduated Magna Cum Laude with an Accounting Degree from the University of Montana. Instead of pursuing a career in public accounting and being stuck behind a desk for 70 hours a week, I turned down jobs at big accounting firms to pursue a different love. I chose instead to work from home where I live with my husband, two boys and a puppy named Growler. I live a glamorous, exciting life working from my living room in my pajamas, cleaning crayon off the walls, driving kids to school, playing superheros and taking care of a little dog that likes to refinish furniture with his teeth. I get to work with fun, creative & artistic photographers and help them understand that numbers can be our friends!

Visit Shannan at her website Accounting for Photographers, and on her Facebook Page today!


Tweet


2 Comments

Photographer Spotlight

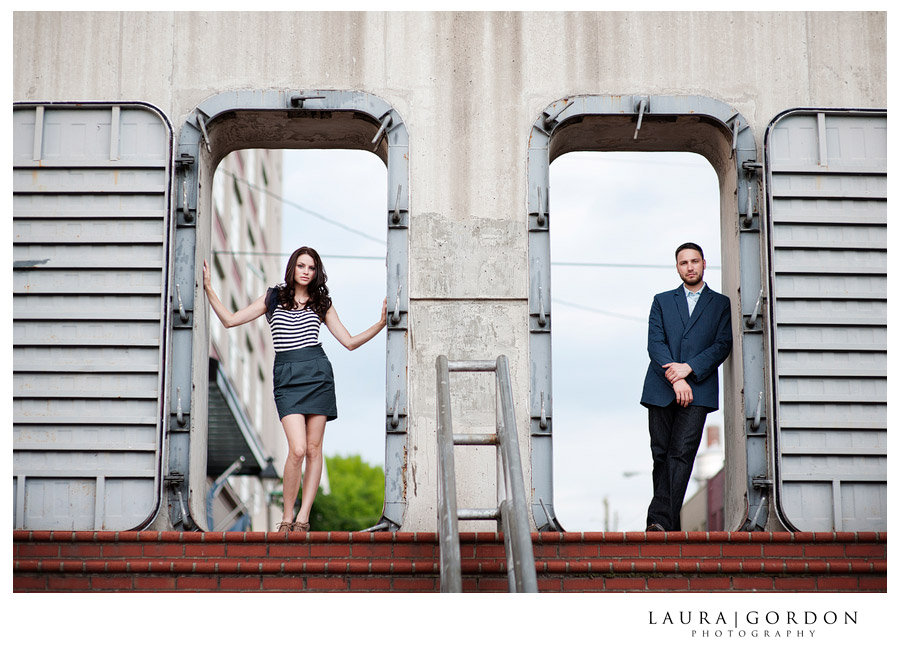
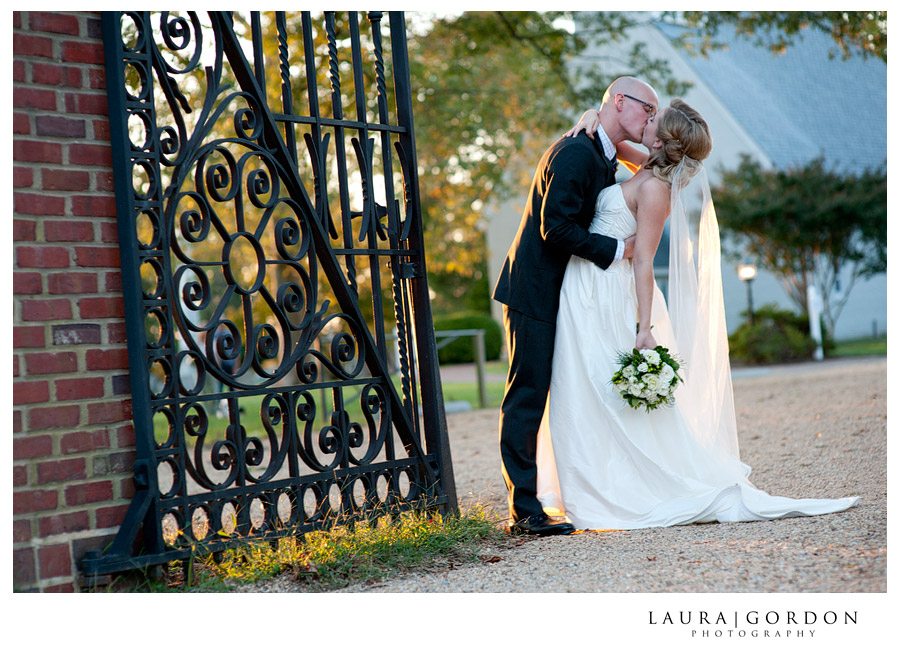
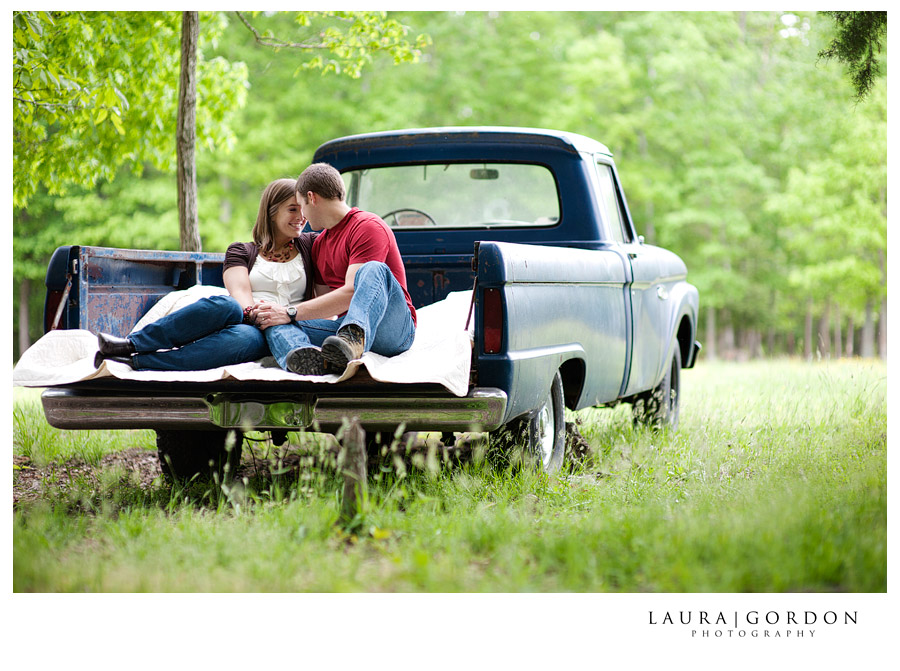
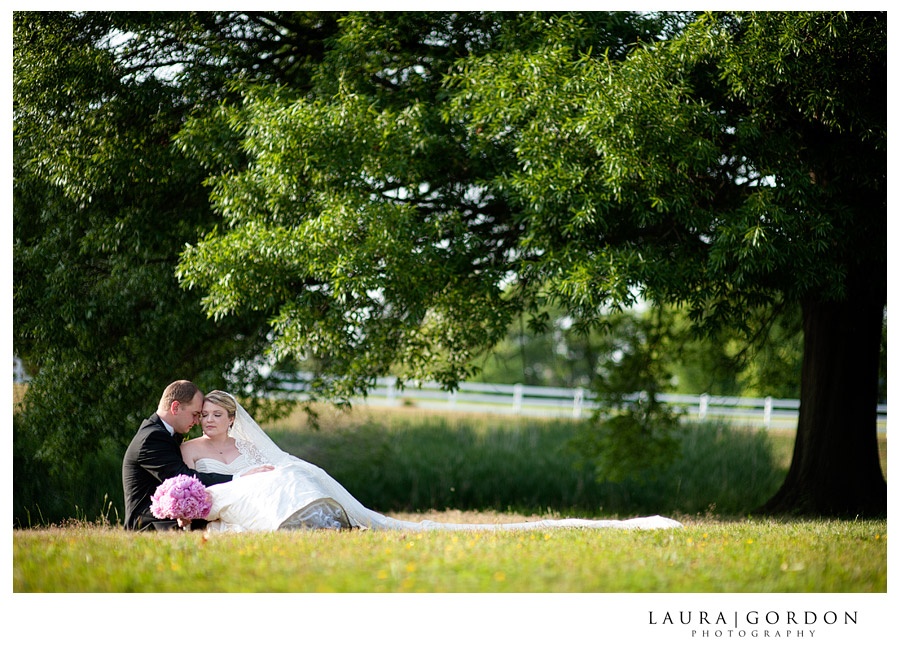
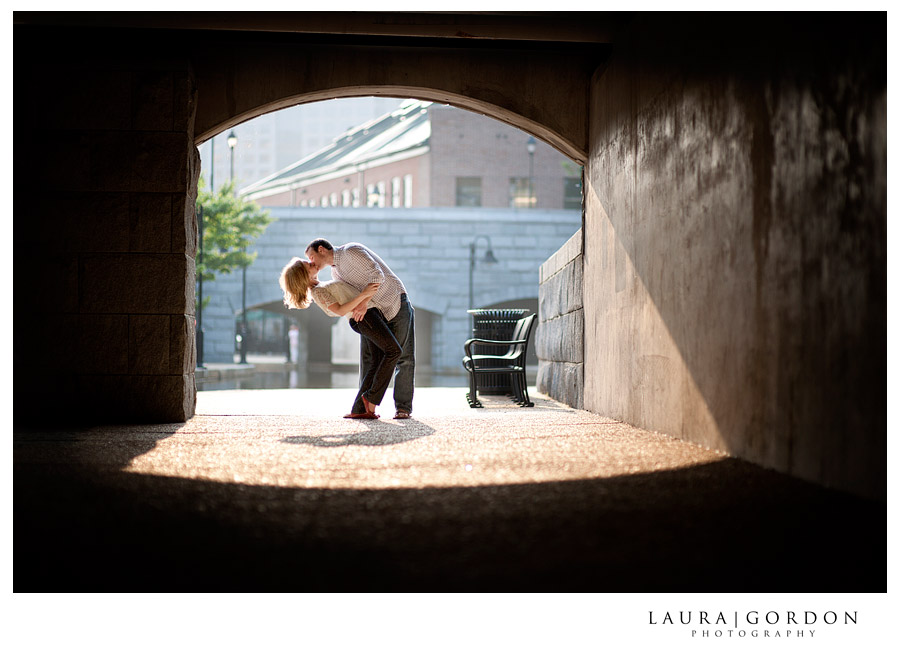
Photographer Spotlight: Laura Gordon Photography

How did you get started as a photographer?                                                                                                                                                                   

It’s actually a really long story but here is a quick overview. I worked in my dream job as an Interior Designer.  However, I never felt fulfilled and mostly felt like a furniture salesman.  I just didn’t have the opportunity to be creative. Not to mention that I was working crazy hours on top of it all! It was nothing like I had imaged and I felt lost and even sad.  It was disappointing as this is what I’d dreamed of doing most of my life. I took a break from it; to breathe and decide what route I was going to take, whether I should continue or move towards another career.

Fast forward to when my cousin needed pictures for her Christmas cards of her little boy. I had a “nice” camera and she thought it would be a good idea. Let me just say that I had no idea what I was doing. I had no knowledge of manual settings, no clue what aperture was, and no ideas what ISO or any of that meant. Well she posted the session to Facebook and to my surprise, calls and emails about pricing and session information started pouring in. It all started and it was as if God was leading me straight into a career as a photographer. It just seemed right and after 2 adventurous years in the business, here I am! It’s been quite a journey and I couldn’t feel more blessed or happy to be where I am and I’m excited to keep going!

What do you love most about your job?

There are so many things I love about being a photographer! Not only do I get to express myself and be creative but also, I get to fellowship with people. I love getting to know my clients! I love hearing their stories, I love seeing them laugh & smile and I love having the opportunity to share these special times with them. I feel totally blessed to be able to tell THEIR stories and document their lives! I am also VERY thankful to have so many people that have supported me through this journey! I am so grateful for each and every one of them!

What is your style? How did you find it?

Timeless, clean, elegant and fresh- I try to take the traditional and put a spin on it. It is hard finding your own unique style! And I’m definitely not going to pretend like it happens over night! I’m STILL working on it! I guess I’d say the images evolve into a style.  Style doesn’t just happen. However, over time you start to notice a cohesive look and will find your style.

How do you get creative in your sessions? Do you use props?

It can be really difficult, but in a good way. It’s always nice to have a challenge, right?! I love trying to find the light and challenge myself to come up with something new each time.

I don’t use too many props. Every now and then we’ll incorporate something but I make a point to let the client’s personalities shine. Whether it is a special location to them, a sentimental object or piece of clothing they want to include as long as it reflects them the session will always be unique.

Mostly I find inspiration and try to stay inspired. I get inspired by a lot of things- I have an entire Pinterest full of inspiration! (If you don’t have a Pinterest by now, you need to get one- I promise you will love it).


Your pictures are beautiful. Do you have any tips for new photographers when taking pictures or editing?

THANK YOU! I know everyone says it but it’s so true just practice, practice, practice! Learn to shoot manual and use the light to your advantage! I feel that the best time of day is when the sun is low in the sky so mornings and evenings are best so the subjects aren’t squinting and there aren’t harsh shadows.

As far as editing goes, don’t overdo it! You only want to enhance the photo and keep it simple and natural! If and when I use Photoshop actions, I’m sure to keep the opacity low so it doesn’t overpower the image.


What is in your camera bag today?

Nikon D700

Nikon D90

Nikon 70-200mm 2.8G VRII

Nikon 85mm 1.4D

Nikon 60mm 2.8G

Nikon 50mm 1.4G (favorite)

Nikon 35mm 1.4G

Nikon 24mm 1.4G

Nikon SB900

Nikon SB600

Pocket Wizards

 How do you get your clients to relax and look so natural?
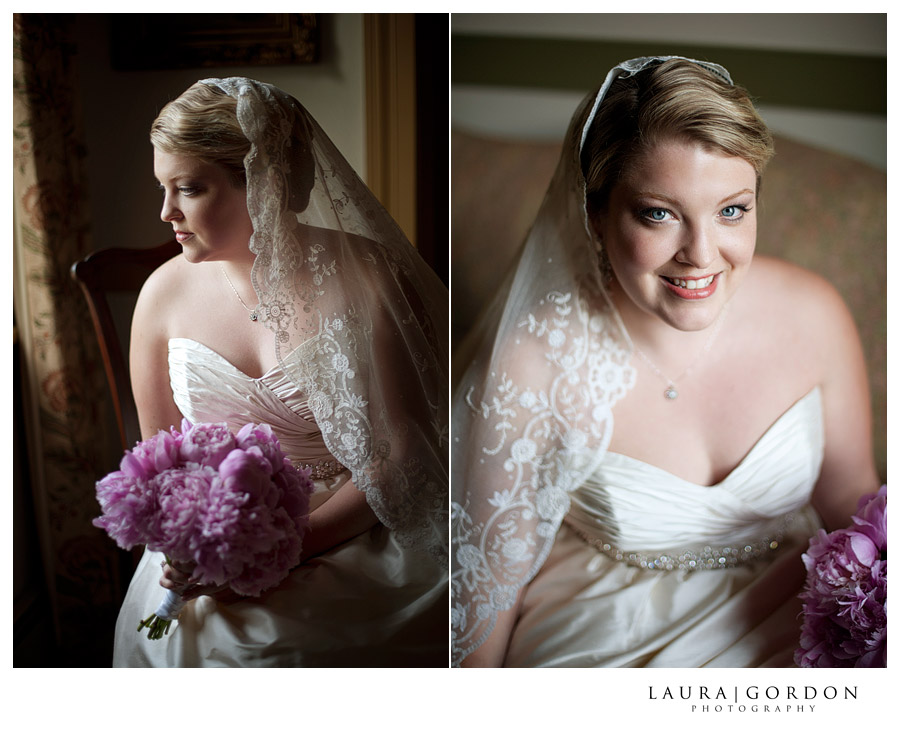
Connect with them, talk to them and make them feel confident! The more confident they feel, the more natural and genuine images they will get! I try to understand each and every clients personality, their passion and their relationship. It’s my job to capture who THEY are in the photos! I want when they look at the photos, for them to bring them back to a time that they cherish and hold on to with an unexplainable obsession. It’s those times that put a smile on my face and warmth in my soul when I am able to create that for them.

How important has pricing been? Do you have any tips on pricing for other photographers?

Pricing is hard! I swear I think it’s a science. I started out low and stayed low for a long time and that was a BIG MISTAKE. I was too scared to take the leap. And the day I finally decided to go for it and charge what I was worth- I started to get clients who hired me because they wanted ME, not because I was the cheapest. The price checkers aren’t going to stick with you, they aren’t hiring you for you, next year they are just going to find the cheapest photographer at that time and go with them.


Where would you like to be in your business in the next 5 years?

Oh goodness, 5 years?! Well, I know I still have A LOT to learn but I would like to help other photographers grow, maybe host a workshop and do some mentoring! And my ultimate goal would be to get featured in a top wedding magazine such as Martha Stewart Weddings or The Knot! I definitely want to have a real studio/office space and I want to keep shooting weddings!

What piece of advice would you offer new photographers who are just starting their businesses?

Don’t let mistakes get you down- let them teach you and learn from them. If I quit every time I messed up, I would have been gone a long time ago. Instead, learn from them and try to see how you could improve for next time and keep on going! I’m still learning and growing! I never want to stop.

blog_separator

About the Artist: My name is Laura, I’m 22 and I love photography! My favorite things to photograph are weddings. I love meeting new people and having the opportunity to share my creative passion with others. I was born and raised (and still live) in a rural town in Virginia. I am obsessed with animals. I have 5 dogs and 2 cats that I couldn’t live without! I am super close with my family and a child of God.
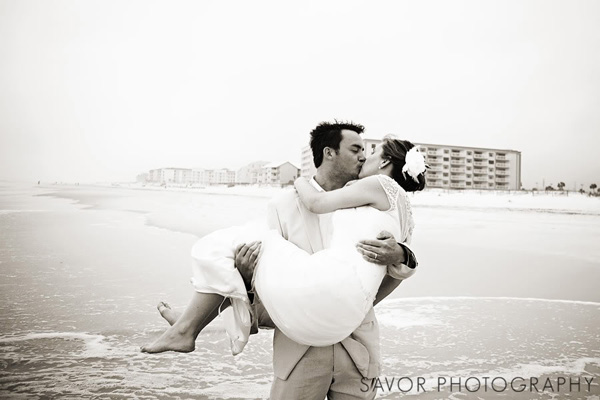
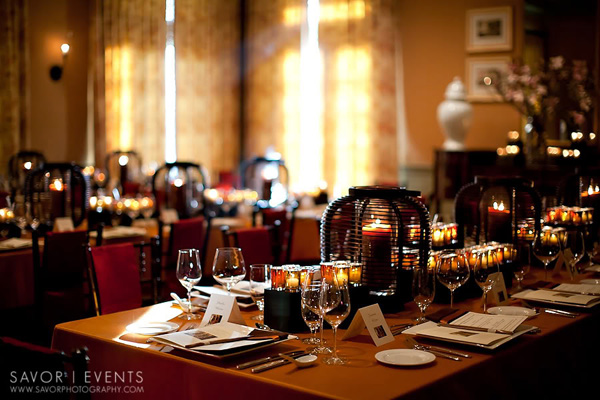
Tweet


10 Comments

Guest Contributor

Breaking Into the Wedding Photography Industry

 by Guest Contributor Rachel Durik

I started my business as a wedding photographer in North Carolina. My family had lived there for years and word quickly spread about what I was doing. Work practically fell in my lap. It came so easily that I thought rebuilding my business after moving to Florida wouldn’t be so hard.

Wow, was I wrong! It took nearly two years of pushing myself to finally make it to the point where I have (somewhat) regular work.  Along the way, I’ve learned some lessons about what you should (and shouldn’t) do to break into the wedding photography industry.

1. Advertise

I had read on several blogs about successful photographers who relied solely on word of mouth and never spent a penny on advertising.  Because of this, I thought that I would never need to advertise. The problem with this for me was that I didn’t have any local brides that could tell their friends. I needed to get some weddings first. Finally, I decided that I would need to invest some money in advertising. The first place I went was a very popular wedding website. It was expensive, didn’t generate many leads at all and the customer service was terrible. Next, I tried Facebook, which has been my most successful means of advertising.  Don’t be afraid to advertise to let people know you exist!


2. Work for Free (for the right people!)

I don’t suggest shooting any weddings for free. People who are willing to accept a free photographer probably won’t be referring clients to you and it won’t get you far. Instead, offer to do some complimentary work for local vendors. Early on, I was able to connect with a local event planning company that planned very high-end weddings. I photographed their designs at one event for free and with those images, I created a mini-album and some 5×7 cards with their name and logo featured.  When I delivered them, the owner was pleased, looked directly at me and told me what a smart move it was. Ever since, I’ve been working for this company and have been introduced to other very important people in the field as a result.


3. Get Experience

By all means, before you agree to shoot a wedding, be a second shooter for several weddings to gain experience. Contact other local photographers and see if you can build any relationships with them. If this doesn’t work, online forums sometimes will help you connect. Depending on how badly you want experience, you might even have to be willing to travel.  For example, a former workshop student of mine asked if she could second shoot with me at a wedding. She offered for free and is flying in from out of state. How could I possibly say no to that?


4. Be Yourself – Or don’t!

You want to be yourself when meeting with potential clients to make sure you’re a good fit. But my natural tendency is to be shy and introverted. When it comes to breaking into the business and signing clients, I often have to do what feel completely uncomfortable and unnatural for my personality– I have to put myself out there, get introductions, and be outgoing. It’s not easy for me, but I know that when I come home, I can return to my introverted self. A wedding photographer has to be a people person, so if that’s the job I want, that’s what I’ll be!

5. Don’t Give Up

It took me a whole year and a half of working day after day in Florida to book my first wedding. It might take time, but if you have determination, perseverance, and a willingness to work hard, you’ll meet your goals!

blog_separator

About the Author:  Rachel Durik is a photographer located in Southwest Florida. You can learn more by visiting her photography site, Savor Photography, Naples Wedding Photographer, the Savor Facebook page, or by attending her online Photoshop and Lightroom classes.


Tweet


3 Comments

Business & Marketing Guest Contributor Post-Processing

Get Your Photos Noticed [Part 2]: Adding the WOW Factor

by Guest Contributor Michelle Johnson from Love that Shot

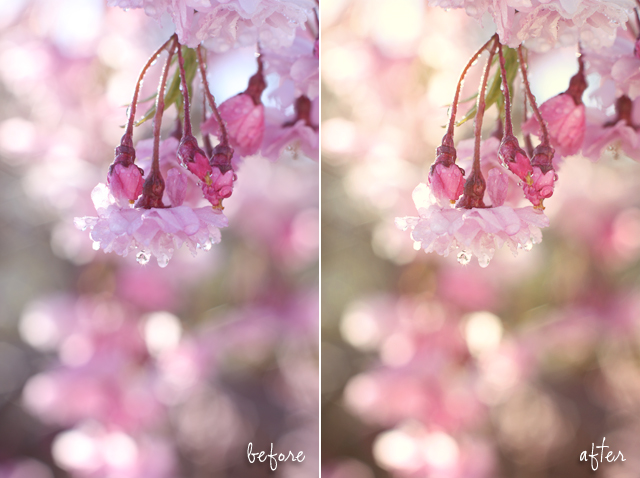
So now that you’ve learned some great compositional tips from Misti, let’s take the photos you love and add the “Wow!” factor! There are a few simple Photoshop techniques you can do to make your images really shine. They work on nearly every image, with a bit of tweaking here and there. Just experiment and see what you like best on your photo!

Let’s get started!

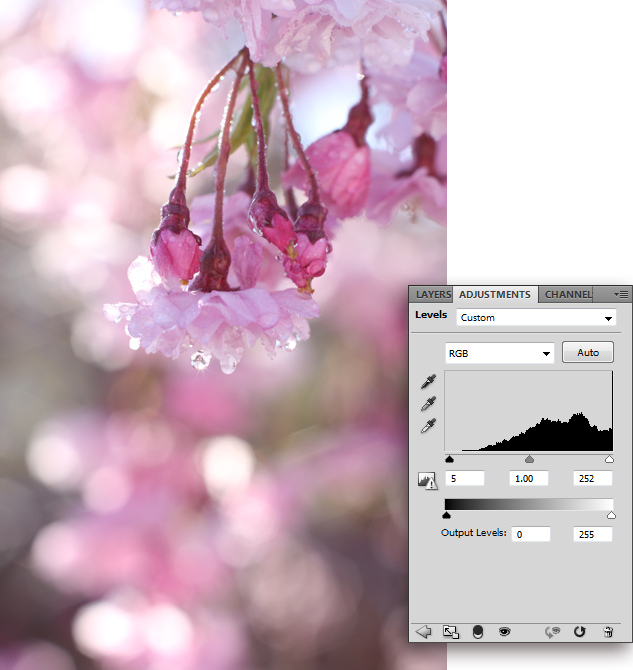
[1] The first thing I like to do to nearly all of my images is give them a boost using either the Levels adjustment or the Curves adjustment. Sometimes I use both!

Bring in the outside sliders just a bit. This will brighten the highlights and darken the blacks and shadows. Depending on the particular image you’re working with, you can bring the sliders in until they reach the beginning of the slopes of the “hill.”

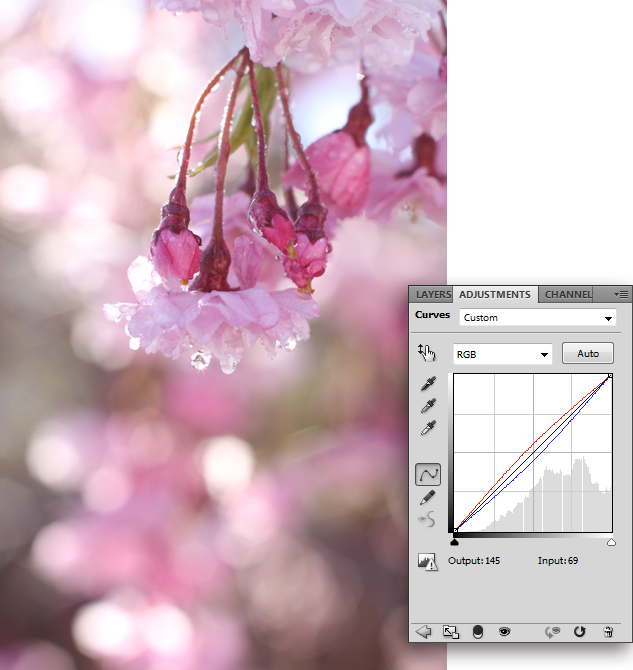
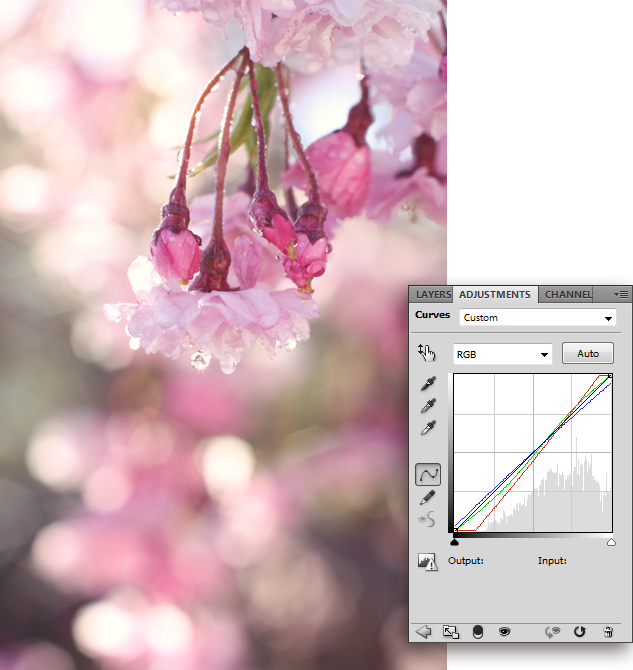
[2] If you find your image needs a little warming up, you can add a Curves adjustment layer. Click on the Red channel in the RGB drop-down menu and create a slight upward curve. Select the Blue channel and create a slight downward curve.

If you’d like to add a cooling effect instead of a warming effect, simply reverse the red and blue curves!

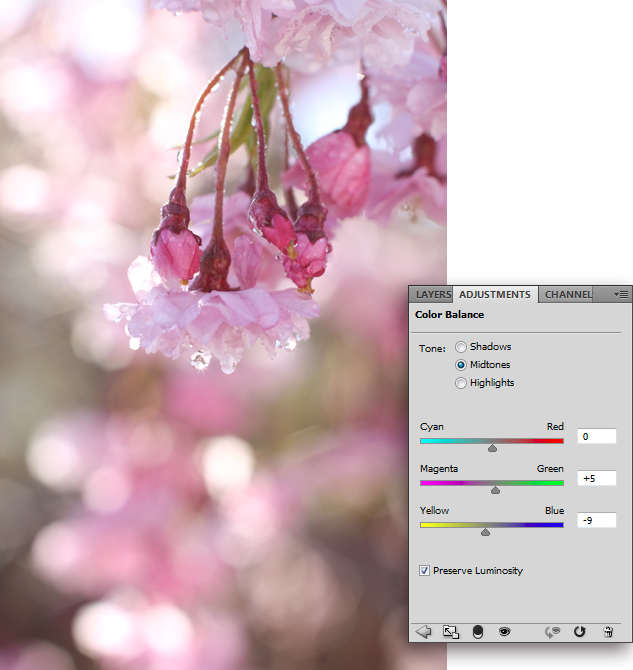
[3] Sometimes your photo might need a little color adjustment. Or it might not, but you can add a fun color effect here! In the Color Balance adjustment window, you can balance out different tones or adjust the sliders to where you have a neat color shift.

Here I added a sunshine glow by moving the bottom slider to the left towards Yellow. I moved the middle slider slightly towards Green. You can add a cool vintage tone by taking the top slider over to the right towards Red, the middle slider slightly towards Magenta, and the bottom to the left quite a bit towards Yellow.

[4] This next technique is one of my favorites…cross-process! You can go really subtle with this or pretty strong! For this image, I went subtle, creating a nice glow with blueish shadows. Create a Curves adjustment layer and go into each color channel in the RGB drop-down menu. Play around with the graph, creating different curves and lines.

Here I added a sharp S-curve to the Red channel and a slight S-curve to the Green channel. In the Blue channel, I grabbed the very outside corners and dragged the top one down and the bottom one up.

You can exaggerate these settings to get a more cross-processed look. And when you’re done with your adjustments, you can customize the effect further by adjusting the Opacity of the layer to fit your image perfectly!

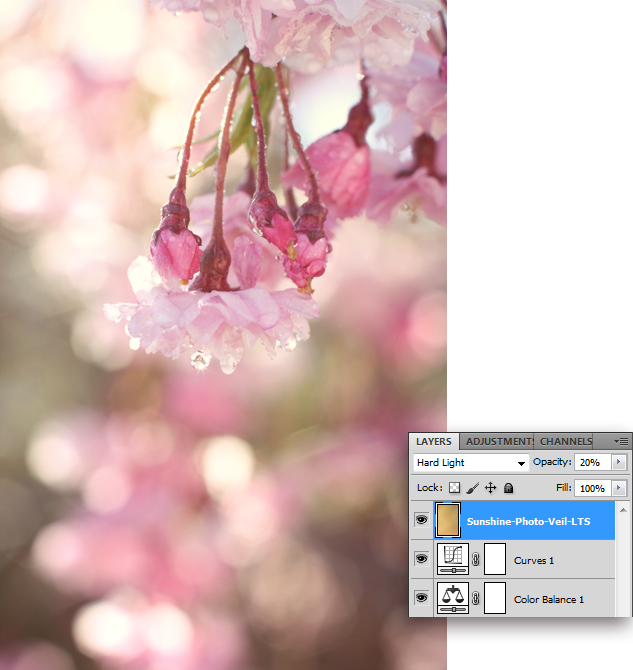
[5] I often like to throw on a Photo Veil or two at the end of my processing! They are so quick and easy to apply and they can transform an image drastically or subtly. Misti and I have included the Photo Veil I’m using in this demonstration as a free download for you so you can try them out! Just scroll down to the end of this article to download.

This Photo Veil is called “Sunshine” and I love to use it to add a sunshiny glow to my images! I set the blending mode to Hard Light and adjusted the Opacity down to 20%. You can also use the Overlay and Soft Light blending modes with the Photo Veils. Each of these three blending modes work really well with Photo Veils.

[6] The last thing I like to do when editing my images is sharpen them. There are many different ways you can do this and I’ll share one of my favorites.

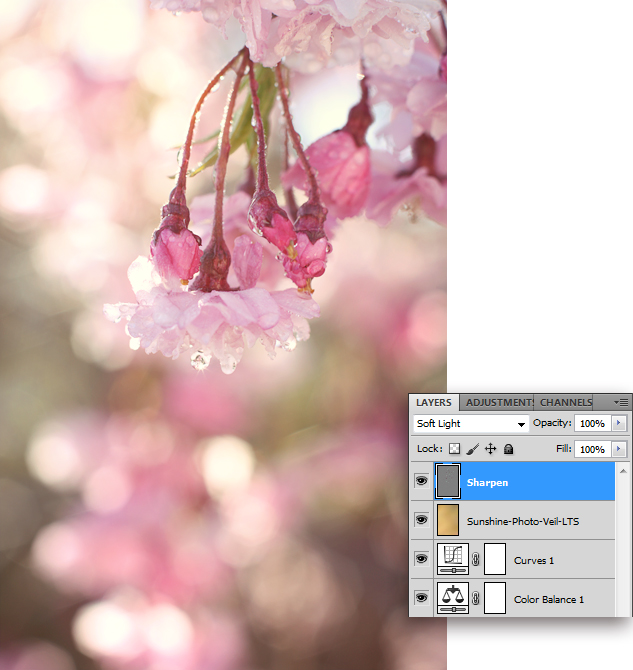
Create a duplicate layer of all the layers you have so far by pressing Control + Alt + Shift + E (Command + Option + Shift + E on a MAC). Go up to Filter in the top navigation menu and select Other > High Pass. Set the Radius to 5.5 pixels. You can go higher or lower depending on how much sharpening you want. I find that 5.5 is a good median setting that works on most of my photos.

Now set the blending mode to Soft Light and adjust the Opacity if you need to. You can also set the blending mode to Overlay if you want more sharpening.

And that’s it! Have fun adding the “Wow!” factor to your photos!

 Click here to download your FREE “Sunshine” Photo Veil!

blog_separator

About the Author: We are Misti and Michelle, sisters and co-founders of Love that Shot. Love that Shot is for the beginner and amateur photographer. We teach you how to use your camera, and edit your photos, so you can improve your photography skills. We’re your first stop along your path to professional photography, if that’s your goal, or we’ll help you make your hobby more enjoyable!
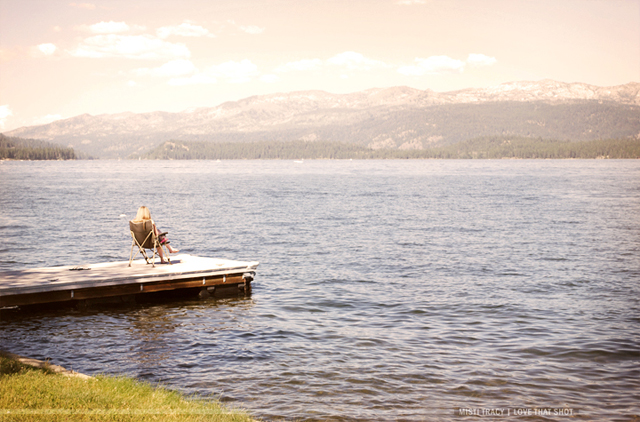
Find us here: Love that Shot | Blog | Facebook | Twitter

And… if you missed Part 1 of this article, you can find it here:  Get Your Photos Noticed [Part 1]:  10 Tips for Mastering Composition


Tweet


13 Comments

Guest Contributor

Get Your Photos Noticed [Part 1]: 10 Tips for Mastering Composition

by Guest Contributor Misti Tracy from Love That Shot

What makes a photo stand out from the crowd? Is it its unique use of color? Choice of subject matter? Or maybe its awesome post-processing? While it could be any number of these things, chances are, composition has a big part to play in it all. Often times, something as simple as how the photo is composed can make all the difference. Things like depth of field, contrast, negative space, and converging lines, when used to their fullest potential, can greatly increase your photo’s chance of getting noticed.

Here are ten of my favorite tips for mastering composition in your photographs:

[1] Keep the Horizon Line Straight

This might seem like a common sense, no brainer tip but you may be surprised at how many times it’s overlooked. Sometimes we’re so focused on getting that fabulous shot that we forget about the things in the background that could make or break that perfect shot. Pay close attention to the horizon line behind your subject…even if it’s only slightly visible through trees, houses, etc. Your camera may have a grid or guideline setting to make this easier.

[2] Maximize the Potential of Depth of Field

When shooting a photo, especially a portrait, it’s important to make sure the focus is always on your subject. One way to accomplish this is to eliminate any distracting background that could be competing for attention. Using a shallow depth of field will blur the background creating a beautiful bokeh texture, which will frame your subject nicely. Achieving shallow depth of field is easy, just open up your lens as wide as it will go! If you’re lucky enough to have a lens that will open up to the f1.4 range then you’ll have more than enough room to work with. For portraits, I would suggest starting at f2.8, then work from there as you become more comfortable.

Use this technique on your everyday photos as well and transform them from candid to captivating!

Using a kit lens with an aperture of only f5.6? Here’s a trick to maximizing depth of field…

[3] Step Away From the Background

Have your subject move several feet away from the background. This will create the illusion of a wider aperture by creating more space between the subject and background, allowing the available aperture to work its magic and blur what would have been in focus right along with the subject.

[4] Maximize the Potential of Negative Space

Building off of the gorgeous bokeh you’ve created using shallow depth of field in the tips above, try using negative space to direct the eye to the focal point. To do this, experiment with framing your subject to the left or right, rather than smack dab in the middle of your photo.

[5] Be Aware of the Background

This may go without saying, but always be aware of what’s going on in the background of your photo. Keep an eye out for anything that could be distracting. If something stands out as unsightly, change your view point, blur the background with depth of field, or have your subject move to a different area.

[6] Move Around

In addition to playing with the placement of your subject in the frame, experiment with different angles. Physically move around. Photograph from above, the side, or even below.

[7] Add Contrast

Use what is in the environment around your subject. Use differences in texture, color, and shapes to create contrast with your subject and the background.

[8] Fill Your Frame

Don’t be afraid to zoom in real close! Don’t have a zoom lens? Then take a step closer. Whether you’re shooting a landscape or a portrait, fill the frame!

[9] Converging Lines

One easy way to direct the eye to your subject or focal point is to look for lines that occur naturally in the scene. Take advantage of perspective lines in roadways, architecture, etc.

[10] Break the Rules!

Now that you’ve learned a few basic tricks, I’m going to totally blow your mind…forget everything! Okay, well not entirely everything. But I do want you to get out there and experiment because hey, rules are meant to be broken, right? The key to being creative and finding your own style is to learn the basics, and find ways to infuse your personality into them. So don’t be afraid to take risks and break the rules!

Keep an eye out for “Get Your Photos Noticed” [Part 2], where Michelle will share a few of her secrets to adding the “WOW!” factor! You’re not going to want to miss this one!

blog_separator

About the Author: We are Misti and Michelle, sisters and co-founders of Love that Shot. Love that Shot is for the beginner and amateur photographer. We teach you how to use your camera, and edit your photos, so you can improve your photography skills. We’re your first stop along your path to professional photography, if that’s your goal, or we’ll help you make your hobby more enjoyable!

Find us here: Love that Shot | Blog | Facebook | Twitter


Tweet


9 Comments

  • « Previous Page
  • 1
  • …
  • 25
  • 26
  • 27
  • 28
  • 29
  • 30
  • Next Page »

Popular Categories

You might also like

Love of Lifestyle Photography Workshop by Ashley Spaulding

Love of Lifestyle: The Fundamentals of Lifestyle Photography

The Lightroom Lab: An 8-Week Course to Mastering Lightroom

Pretty Forum for Photographers

Let Them Eat Cake—A Marie Antoinette Inspired Shoot

Tips to Keep Your Images Interesting in Limited Surroundings

Natural Light: The Art of Finding Magical Light

Copyright © 2025 · Divine theme by Restored 316

Copyright © 2025 · Divine Theme on Genesis Framework · WordPress · Log in

×
Never miss a thing!
Sign up for Pretty Forum Newsletters and get all the latest news on our upcoming:
  •  
    ​Workshops
  •  
    Celebrity Mentors
  •  
    Free Downloads 
  •  
    Photo Challenges
  •  
    Vendor Discounts
  •  
    and much more...